How to Deep Clean Hardwood Floors and Make Them Look Like New

How to Deep Clean Hardwood Floors

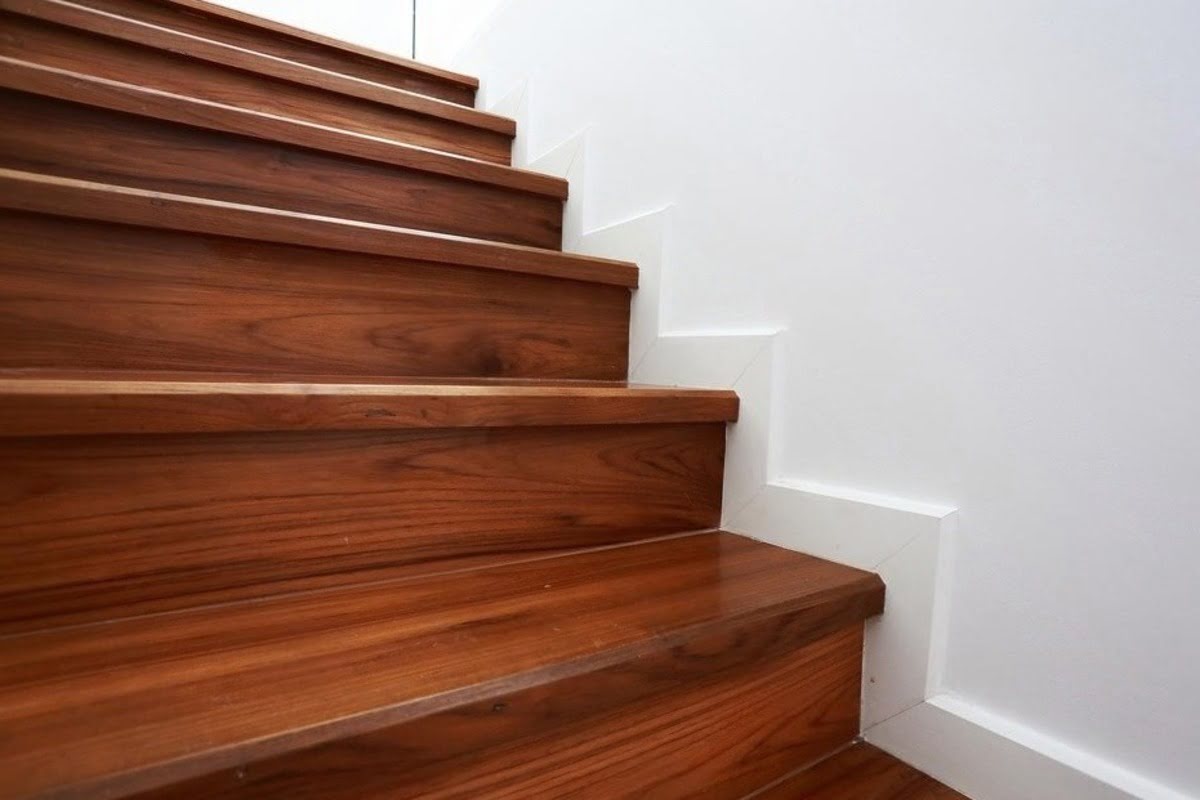
Hardwood floors are a timeless feature in any home, exuding warmth, elegance, and character. However, their natural beauty can diminish over time if not properly maintained. Accumulated dirt and grime can dull the finish, making your floors look worn and tired. That’s why it’s essential to understand how to deep clean hardwood floors the right way — not just for appearance, but to protect their longevity. In this guide, you’ll discover the best practices to restore the luster of your hardwood floors, maintain their beauty, and recognize when it’s time to seek professional help.

The Hidden Dirt That’s Dulling Your Wood’s Beauty

Even with regular sweeping and mopping, dust and debris can accumulate in the crevices of your hardwood floors. This hidden dirt not only affects the appearance but can also cause long-term damage if left unchecked. As dirt particles are abrasive, they can scratch the surface, leading to a dull and lifeless look. Identifying these hidden culprits is the first step towards maintaining the beauty of your floors.

To effectively address these issues, it’s essential to use the right cleaning tools and techniques. A microfiber mop or a vacuum cleaner with a hardwood floor attachment can help reach those tricky spots. Avoid traditional brooms, which can push dirt into the cracks rather than remove it. By regularly using these tools, you can ensure a cleaner surface, preserving the floor’s finish and preventing scratches.

Additionally, understanding the type of finish on your hardwood floors can guide you in choosing the appropriate cleaning products. Whether your floors are sealed with polyurethane, oil-based, or wax, using the wrong cleaners can lead to damage. Always opt for pH-neutral solutions specifically designed for wood surfaces to protect and enhance their natural beauty.

The Deep Clean Ritual: A Floor-Loving Routine

To truly revitalize your hardwood floors, a deep clean is necessary. This process goes beyond regular maintenance and tackles the ingrained dirt and grime that dulls your floor’s natural shine. Follow these steps to ensure a thorough and effective cleaning ritual.

  • Preparation: Start by removing furniture and rugs from the area. This will give you full access to the floor and prevent damage to your belongings. Sweep or vacuum the floor to remove loose dirt and debris.
  • Cleaning Solution: Choose a cleaning solution specifically designed for hardwood floors. Avoid using water alone, as excess moisture can damage the wood. Instead, opt for a pH-neutral cleaner that will effectively clean without causing harm.
  • Mop Carefully: Use a damp (not wet) mop to apply the cleaning solution. Ensure the mop is well wrung out to avoid water pooling on the floor. Work in small sections, following the grain of the wood to prevent streaking.

Remember to always test a small, inconspicuous area before applying any new cleaning solution to your entire floor.

hardwood floor polishing and refinishing

Little Fixes, Big Impact: Scratches, Dull Spots & More

Even with regular care, hardwood floors can develop small scratches and dull spots. These imperfections can detract from the overall appearance of your floors, but there are simple solutions to address them.

Scratches:

  • Minor Scratches: Use a color-matched wood marker or wax stick to fill in small scratches. These products can blend seamlessly with your floor’s finish, making scratches less noticeable.
  • Deeper Scratches: For more severe scratches, consider using a wood filler or putty. After applying, sand the area lightly and apply a matching finish to restore the wood’s appearance.

Dull Spots:

  • Buffing: Dull spots can often be revived with a simple buffing. Use a soft cloth or a buffing pad to gently rub the area in circular motions. This can restore shine without the need for harsh chemicals.
  • Polishing: For more widespread dullness, use a hardwood floor polish. Apply it evenly across the floor, following the manufacturer’s instructions, to bring back a uniform sheen.

Stains:

  • Spot Treatment: For localized stains, apply a small amount of the appropriate cleaning product directly to the spot. Gently rub with a cloth until the stain lifts.

How to Add That “Just Installed” Glow Again

Reviving the “just installed” glow of your hardwood floors involves a comprehensive approach that includes both cleaning and conditioning. Over time, the natural oils in the wood can dry out, leading to a lackluster appearance. Replenishing these oils is key to restoring the floor’s original shine and vibrancy.

One effective way to achieve this glow is by using a wood conditioner or a rejuvenation product specifically designed for hardwood floors. These products penetrate the wood, replenishing essential oils and enhancing the natural grain. Apply the conditioner with a microfiber pad, working in small sections to ensure even coverage.

After conditioning, a buffing process is essential. Using a buffing machine or a soft cloth, polish the floor to a high shine. This step not only amplifies the glow but also smooths out any uneven areas, giving your floors a fresh, new look. Incorporating these steps into your maintenance routine will keep your floors looking impeccable for years to come.

Maintaining That Wow Factor: Weekly Habits

Consistent care is crucial to maintaining the stunning appeal of your hardwood floors. By establishing a few simple habits, you can prevent wear and tear, keeping your floors in top condition. Implementing these weekly practices will ensure that your floors remain a focal point of your home’s decor.

  • Regular Dusting: Use a microfiber mop or cloth to dust your floors at least once a week. This practice prevents the buildup of dirt and debris, which can scratch and dull the surface over time.
  • Quick Spill Response: Address spills immediately to prevent staining or water damage. Use a damp cloth to clean up the spill, then dry the area thoroughly.
  • Rug Placement: Place rugs in high-traffic areas to protect your floors from excessive wear. Ensure that the rugs have non-slip backings to prevent accidents and are regularly cleaned to avoid dirt transfer.
  • Furniture Pads: Attach felt pads to the bottom of furniture legs to prevent scratches when moving items. Regularly check these pads for wear and replace them as needed.
  • Seasonal Adjustments: Use a humidifier during dry seasons to maintain optimal moisture levels in the air, preventing your wood from drying out and cracking.

How to Clean Old Hardwood Floors

When to Call a Professional for Deep Cleaning

While regular maintenance is essential, there are times when professional intervention may be necessary to restore your hardwood floors to their full glory. Recognizing these situations can save you time and effort in the long run.

  • Severe Scratches and Damage: If your floors have extensive scratches, gouges, or other damage, a professional can assess the situation and recommend the best course of action, such as sanding and refinishing.
  • Stubborn Stains: For stains that refuse to budge, professionals have access to specialized products and techniques that can effectively remove even the most persistent marks.
  • Refinishing Needs: Over time, the finish on your floors may wear down, requiring a complete refinishing. This process involves sanding down the surface and applying a new finish to restore the floor’s original look.

Calling a professional ensures that your floors receive the care they need and helps maintain their value and appearance.

Summary

In conclusion, maintaining the beauty of your hardwood floors requires regular care and attention. However, there may come a time when cleaning and minor repairs are no longer sufficient. If your floors are severely damaged, warped, or have lost their structural integrity, it might be time to consider refinishing or replacing them. Refinishing is a cost-effective way to breathe new life into worn floors, while replacement might be necessary for floors that are beyond repair. Consult with a professional to evaluate the condition of your floors and determine the best option for your home.

When Is It Time To Refinish Wood Stairs?

How to Refinish Wood Stairs

Wood stairs are a timeless and elegant feature in many homes, adding warmth and character to your living space. However, like any other part of your home, they require maintenance to keep them looking their best. Over time, wood stairs can begin to show signs of wear and tear, which might lead you to wonder when it’s time to refinish them. Refinishing wood stairs can restore their original beauty and extend their life, but knowing when and how to undertake this task is crucial.

Signs That Indicate It’s Time to Refinish Wood Stairs

Recognizing the signs of wear and tear on your wood stairs is the first step in determining whether it’s time for refinishing. One of the most obvious indicators is visible surface damage. This includes scratches, dents, and deep scuffs that penetrate the finish, exposing the wood underneath. Such damage not only affects the stairs’ appearance but can also lead to more serious structural issues if left unaddressed.

Another sign to look out for is discoloration or fading. Over time, sunlight and heavy foot traffic can cause the finish on your wood stairs to fade, leading to an uneven appearance. If you notice that the stairs have lost their luster and appear dull, it might be time to consider refinishing. Additionally, if the stairs feel rough or splintery to the touch, this indicates that the protective finish has worn off, leaving the wood vulnerable to moisture and further damage.

Finally, creaking or loose boards can also be a sign that your wood stairs need attention. While these issues might not directly relate to the finish, they often accompany a worn-down surface. Addressing these underlying problems during the refinishing process can ensure the longevity and safety of your stairs.

Steps on How to Refinish Wood Stairs

Refinishing wood stairs can be a rewarding DIY project if approached with care and patience. The first step in the process is to prepare the area. This involves removing any carpets or runners, cleaning the stairs thoroughly, and ensuring that the workspace is well-ventilated. It’s crucial to cover nearby furniture and flooring to protect them from dust and potential spills.

Once your workspace is prepared, the next step is sanding. Sanding removes the old finish and smooths out any imperfections on the wood surface. You should start with a coarse grit sandpaper to remove the bulk of the finish, then progress to finer grits for a smooth finish. Be sure to sand evenly and follow the grain of the wood to avoid scratches. After sanding, thoroughly vacuum and wipe down the stairs to remove all dust particles.

The final step in refinishing is applying the new finish. This could be stain or paint, depending on your preference. When applying stain, use a brush or cloth to apply a thin, even coat, allowing it to penetrate the wood before wiping off the excess. For paint, use a primer first before applying the paint in smooth, even strokes. Allow each coat to dry completely before applying the next. Finish with a clear polyurethane sealant to protect the wood and enhance durability.

Tools and Materials Needed for Refinishing

Embarking on a refinishing project requires the right tools and materials to ensure a smooth and successful process. Here’s a list of essentials you’ll need:

  • Safety Gear: Dust mask, safety goggles, and gloves to protect yourself from dust and fumes.
  • Sanding Equipment: An electric sander for large surfaces and sanding blocks for edges and corners, along with various grits of sandpaper.
  • Cleaning Supplies: Vacuum, tack cloths, and wood cleaner to remove dust and prepare the surface.
  • Finishing Products: Stain or paint of your choice, brushes or applicators, and a polyurethane sealant for protection.
  • Miscellaneous: Painter’s tape to protect adjacent areas, drop cloths to cover nearby surfaces, and a putty knife for removing old finish or applying wood filler.

Having these tools and materials on hand will streamline your refinishing project, allowing you to focus on achieving a professional-looking result.

Sandless Refinishing

The Refinishing Process Explained

The refinishing process can be broken down into several key stages, each crucial for achieving the desired outcome. First is preparation, where you clear the work area and ensure that the stairs are clean and free from debris. Proper preparation sets the foundation for the entire project, helping to prevent mistakes and ensuring a smooth application of the finish.

Next comes the sanding stage. Begin with a coarse grit sandpaper to strip away the old finish and any rough spots on the wood. As you progress to finer grits, the surface should become smooth and even, ready to accept the new finish. Remember to sand in the direction of the wood grain to avoid unsightly scratches and to vacuum thoroughly between sanding stages to keep the surface clean.

Finally, it’s time to apply the finish. Whether you choose stain or paint, apply in thin, even layers, allowing each coat to dry thoroughly before moving to the next. A clear sealant is the final touch, providing a protective layer that enhances both the appearance and durability of the wood. With careful application, your refinished stairs will look revitalized and ready to withstand the test of time.

DIY vs. Professional Refinishing: Pros and Cons

Deciding between DIY and professional refinishing can be challenging, as both options have their advantages and drawbacks. Understanding these can help you make an informed decision based on your needs and capabilities.

Category DIY Refinishing Professional Refinishing
Pros – Cost-effective: You save on labor costs – Expertise: Pros deliver high-quality finishes
– Personal satisfaction from doing it yourself – Efficient: Faster and more streamlined process
– Full control over materials and techniques – Guaranteed quality: Often comes with warranties
Cons – Time-consuming: Requires effort and patience – Higher cost due to labor and professional skill
– Skill-dependent: Hard to get pro results without experience – Less control over methods and materials
– Mistakes can lead to extra costs or need for pro help

Ultimately, the decision between DIY and professional refinishing depends on your budget, time availability, and confidence in your woodworking skills.

Cost Considerations for Refinishing Wood Stairs

Understanding the costs associated with refinishing wood stairs can help you budget appropriately for your project. Several factors influence the total cost, including the size of the staircase, the condition of the wood, and the materials chosen for refinishing.

Breakdown of Costs:

  • Materials: This includes sandpaper, stains or paints, sealants, and any additional tools required. Quality materials can range from $50 to $200, depending on the brand and type.
  • Labor: If hiring a professional, labor costs can vary widely based on location and the complexity of the project. Expect to pay anywhere from $500 to $2,000 or more.
  • Additional Repairs: If your stairs require structural repairs, such as fixing loose boards or replacing damaged treads, these costs can add to the total expense.

It’s important to weigh these costs against the potential increase in home value and aesthetic appeal that refinished stairs can provide.

Mistakes to Avoid When Refinishing Wood Stairs

Common Mistakes to Avoid When Refinishing Wood Stairs

Refinishing wood stairs is a complex task that requires careful attention to detail. Avoiding common mistakes can save time and ensure a successful outcome.

  • Inadequate Preparation: Skipping thorough cleaning or failing to remove all dust can lead to a poor finish. Always prepare the surface meticulously.
  • Improper Sanding: Using the wrong grit sandpaper or neglecting to sand evenly can result in scratches or an uneven surface. Follow a systematic approach when sanding.
  • Rushing the Process: Allow adequate drying time between coats of stain or paint. Rushing can lead to smudges or uneven application.

Summary

Refinishing wood stairs offers numerous benefits, from enhancing the appearance of your home to increasing its value. A well-executed refinishing project can rejuvenate tired, worn stairs, restoring their original beauty and charm. Furthermore, refinishing provides a protective layer that guards against future damage and extends the life of the wood. If you’re considering refinishing your wood stairs, take the time to plan carefully, gather the necessary tools, and approach the task with patience and attention to detail. Your efforts will result in a stunning transformation that you can enjoy for years to come.

How to Repair Rotted Wood Caused by Moisture in Hardwood Floors

How to Repair Rotted Wood

When moisture seeps into hardwood floors, it can lead to rotting, a problem that compromises both the integrity and appearance of your flooring. Understanding how to repair rotted wood caused by moisture in hardwood floors is essential for preventing serious structural damage and costly repairs. Early recognition of rot and prompt action are key to maintaining the longevity of your hardwood flooring.

Signs of Moisture Damage in Hardwood

Identifying signs of moisture damage in your hardwood floors early can prevent extensive damage. Look for discoloration, which often appears as dark or grayish patches on the wood surface. This discoloration indicates that moisture has penetrated the finish and is starting to affect the wood underneath. Another sign is warping or cupping of the floorboards, where edges rise higher than the center, creating an uneven surface.

Soft spots in the flooring are another telltale sign. When you walk across your floors, pay attention to any areas that feel spongy or give way under pressure. This could indicate that the wood beneath the surface is beginning to rot. Additionally, a musty odor can be a significant indicator of moisture damage. This smell usually accompanies mold and mildew growth, which can be harmful to your health.

Lastly, if you notice gaps or separation between floorboards, it may be a result of moisture causing the wood to expand and contract. This type of damage can lead to further vulnerability to water intrusion. Regularly inspecting your floors for these signs can help you address issues before they worsen and help you understand how to repair rotted wood caused by moisture in hardwood floors effectively.

Tools and Materials You’ll Need

Repairing rotted wood in hardwood floors requires specific tools and materials to ensure a successful outcome. Having the right equipment at your disposal makes the process more efficient and effective.

Essential Tools:

  • Hammer and Pry Bar: For removing nails and lifting floorboards.
  • Circular Saw or Jigsaw: To cut away damaged sections of wood.
  • Chisel and Mallet: Useful for precise removal of smaller rotted areas.
  • Moisture Meter: To gauge the moisture content in the wood and subfloor.
  • Safety Gear: Including gloves, goggles, and a dust mask to protect against debris and mold spores.

Necessary Materials:

  • Replacement Floorboards: Match the type and finish of your existing flooring.
  • Wood Filler or Epoxy: For repairing small areas of rot.
  • Wood Sealant: To protect the repaired areas from future moisture.
  • Plastic Sheeting and Tape: To contain the work area and prevent dust spread.

With these tools and materials, you’ll be well-equipped to address rotted wood issues in your hardwood floors. Proper preparation ensures that the repair process is both safe and effective.

How to Remove Rotted Floorboards Safely

Removing rotted floorboards is a delicate task that requires precision and care to avoid further damage to surrounding areas. First, gather the necessary tools: a pry bar, a hammer, a saw, and protective gear such as gloves and safety goggles. These tools will help you carefully extract the damaged sections without harming the rest of your floor.

Begin by assessing the extent of the rot. Mark the affected areas with chalk or tape to ensure you only remove what is necessary. Use the pry bar and hammer to gently lift the rotted boards. If the wood is deeply embedded, you may need to saw along the edges for a cleaner removal. Always work slowly and methodically to prevent splintering or breaking adjacent planks.

Once the damaged boards are removed, inspect the surrounding area for any hidden damage that might not have been visible initially. This ensures that all compromised material is addressed, which is a key step in how to repair rotted wood caused by moisture in hardwood floors successfully.

Removing rotted floorboards

Inspecting the Subfloor for Hidden Rot

After removing the rotted floorboards, it’s crucial to examine the subfloor for any signs of hidden rot. The subfloor provides the foundational support for your hardwood, and any damage here can compromise the stability of your entire floor. Look for discoloration, mold, or a musty odor, which are telltale signs of moisture infiltration.

To inspect the subfloor, you may need to lift additional boards or access the area through a basement or crawlspace if available. This thorough examination will reveal the full scope of the rot and help you determine if the subfloor requires repair or replacement.

If you find damage, you’ll need to remove the affected sections of the subfloor. Take care to avoid damaging the joists or other structural elements. Proper inspection and repair of the subfloor are essential steps in ensuring the longevity and safety of your hardwood flooring.

Drying and Treating the Affected Area

Before proceeding with repairs, it’s vital to dry and treat the affected area to prevent future rot. Use dehumidifiers, fans, or heaters to remove any remaining moisture from the floor and subfloor. This step is critical because even a small amount of residual moisture can lead to further decay.

Once dry, treat the area with a wood preservative or fungicide. This will kill any remaining fungi and protect the wood from future infestations. Ensure the product you choose is suitable for indoor use and follow the manufacturer’s instructions for application.

For added protection, consider applying a moisture barrier to the subfloor. This extra layer will help prevent future moisture penetration, safeguarding your floors from potential damage.

Replacing or Repairing the Rotted Wood

With the area dry and treated, you can now focus on replacing or repairing the rotted wood. If the damage is extensive, replacing the entire section of flooring may be necessary. Choose boards that match the existing wood in terms of species, color, and grain to maintain a uniform appearance.

For smaller areas, repairs may involve cutting and fitting new pieces of wood into the existing floor. Ensure that the new wood is the same thickness as the rest of the floor to avoid uneven surfaces. Use wood glue and nails to secure the new pieces in place, taking care to align them with the surrounding boards.

Once the new wood is installed, sand the area to create a smooth transition between old and new. This step is essential in the visual restoration aspect of how to repair rotted wood caused by moisture in hardwood floors, leaving the surface even and seamless.

Sealing and Protecting Your Hardwood Floor

After repairs, sealing your hardwood floor is crucial to protect it from future moisture damage. A high-quality sealant acts as a barrier, preventing water from penetrating the wood. Choose a sealant that complements the finish of your floor for a cohesive look.

Apply the sealant evenly across the entire floor, not just the repaired areas. This comprehensive approach ensures that all parts of your floor are equally protected. Allow the sealant to dry completely before walking on the surface or replacing furniture.

In addition to sealing, consider using area rugs or mats in high-traffic areas or spots prone to moisture, such as near sinks or entrances. This added layer of protection helps mitigate the risk of future damage, prolonging the life of your hardwood floors.

How to Repair Rotted Wood Caused by Moisture

Preventing Future Moisture Damage

Prevention is key to avoiding future moisture damage and maintaining the beauty of your hardwood floors. Implementing a few simple strategies can significantly reduce the risk of rot. Regularly check for leaks in plumbing or roofing and address them promptly.

Maintaining proper indoor humidity levels is also essential. Use humidifiers or dehumidifiers to keep humidity between 30% and 50%, which is ideal for hardwood flooring. This balance prevents excessive moisture from accumulating in the wood.

Finally, establish a routine cleaning and maintenance schedule. Regularly sweep and mop your floors with products designed for hardwood to maintain their finish and prevent water from seeping into the wood. These preventative measures ensure your floors remain in excellent condition for years to come.

Summary

Keeping your hardwood floors healthy requires a combination of vigilant maintenance, timely repairs, and preventative measures. By understanding the causes of rot and recognizing the early signs of moisture damage, you can act swiftly to protect your investment. With the right tools and techniques, repairing rotted wood can be a manageable task that restores the beauty and function of your floors. Remember, prevention is the best protection against future damage. Regular cleaning, sealing, and humidity control are crucial steps in maintaining your floors after learning how to repair rotted wood caused by moisture in hardwood floors.