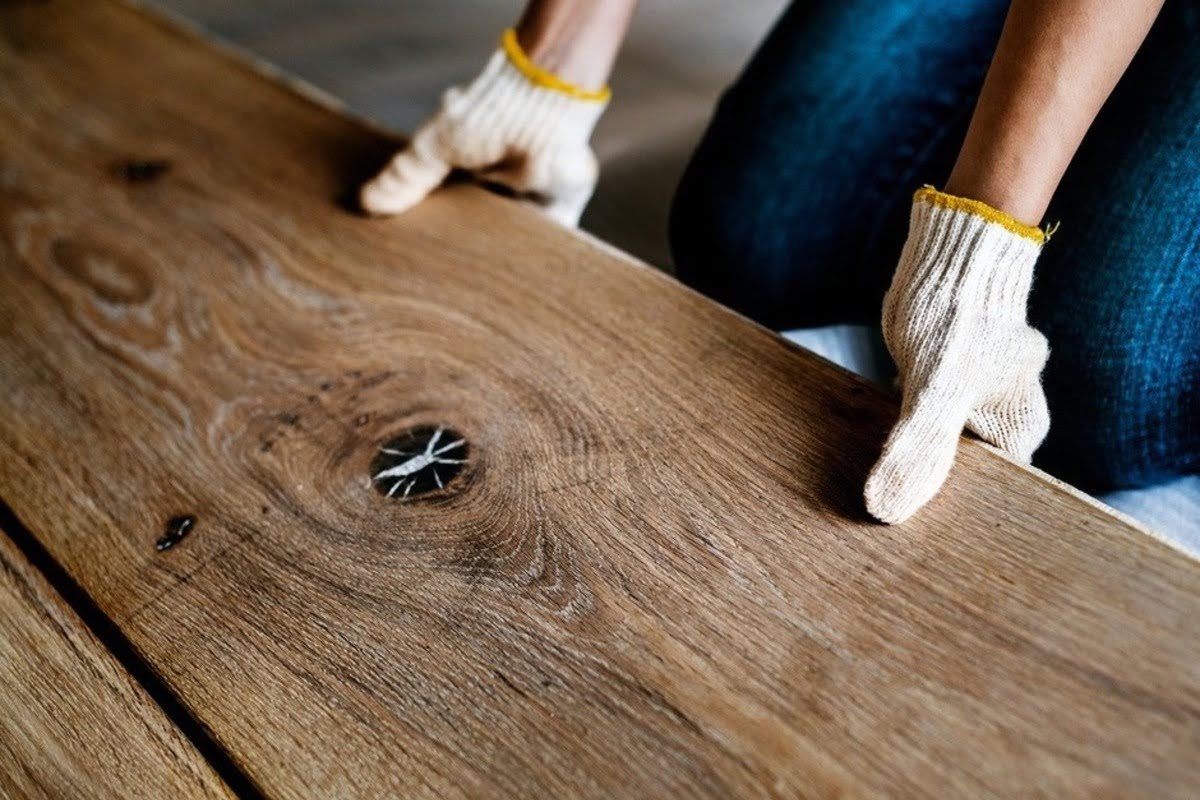
Hardwood floors are supposed to feel solid. Quiet. The kind of floor you don’t think about when you walk across it. Then one day you hear it. That little squeak. Or worse, the one that follows you from the hallway into the bedroom every night.
From what we see in real homes at 1 DAY® Refinishing, squeaks rarely come from one big failure. They come from small movements adding up – a board shifts, a fastener flexes, the subfloor lifts just enough to make noise. You don’t see it, but you hear it. Especially when the house cools down at night.
Here’s the short answer. Many hardwood floor squeaks can be prevented if you catch them early. When noise is light, seasonal, or limited to a few spots, prevention usually means stopping movement – tightening the right fasteners, stabilizing the subfloor, or controlling indoor humidity. But when squeaks keep coming back or the floor feels bouncy, the noise is often a warning sign. This guide explains both – how to prevent squeaks before they get worse, and how to tell when the floor needs more than a temporary fix.
Quick Answer: How to Stop Hardwood Floor Squeaks
So… let’s get straight to it.
If the squeak is new, isolated, and light, you usually have options. If it’s loud, widespread, or keeps coming back, you’re probably looking at something structural.
When Squeaks Are Easy to Prevent
Squeaks tend to be manageable when they show up like this:
One spot that talks back when you step on it
Noise that comes and goes with the seasons
A floor that feels solid, even if it sounds annoying
This is the window where prevention actually works. Tightening the right fastener, stabilizing a small gap, or getting humidity under control can stop things from snowballing. On our repair projects, this is where we see the cleanest, longest-lasting results.
When Noise Signals a Bigger Problem
Now here’s the tricky part – people assume a squeak is just “old house noise.”
It’s not always.
When squeaks spread across rooms, come with bounce, or return right after you fix them, that’s usually a sign the movement is deeper. Subfloor attachment. Joist flex. Missed fasteners from the original installation. At that point, prevention alone won’t cut it.
Why Hardwood Floors Squeak in the First Place
Every squeak has the same root cause. Movement plus friction. That’s it.
Wood Movement, Friction, and Fasteners
Wood expands and contracts as moisture changes – and if you want a deeper breakdown of how moisture actually behaves inside wood, this
guide on how to draw moisture out of wood floors
explains it clearly. It’s normal. What’s not normal is when that movement has room to make noise.
A nail loosens just a hair. A staple flexes. The board lifts, then drops when weight hits it. That rubbing creates the squeak. You’d think tightening the fastener solves it every time. Sometimes it does. Sometimes it just shifts the noise a foot to the left.
Subfloor Gaps and Joist Movement
This is where things get louder.
If there’s space between the hardwood and the subfloor – or between the subfloor and the joists – you get vertical movement. You step, the floor dips, then snaps back. That snap is what you hear.
On real jobs, we see this a lot in older homes. Fasteners that barely caught the joist. Subfloor panels that weren’t glued. Everything looks fine until the house settles and starts talking back.
Seasonal Humidity Changes
Quiet all summer. Noisy all winter. That’s not random.
This is the same mechanism we see when floors weren’t given proper time to adjust early on – our article on hardwood floor acclimation goes deeper into how skipping that step creates long-term movement and noise. The U.S. Environmental Protection Agency recommends keeping
indoor humidity in the 30%–50% range
to reduce moisture-related material movement inside homes, which directly affects how wood floors expand, contract, and make noise.
That sharp squeak you only hear at night when the house cools down? Pretty classic humidity-driven movement.
How to Prevent Hardwood Floors from Squeaking
Preventing squeaks long-term means stopping movement, not just quieting sound.
Stabilizing the Subfloor and Fasteners
This is the heavy lifter. If you can eliminate vertical movement, you eliminate most squeaks.
A lot of this work happens from below. Reinforcing the subfloor to the joists with screws, adding construction adhesive where needed, shimming small gaps – none of it is glamorous, but it works.
Here’s how we usually break it down:
Cause of Squeak
Preventive Fix
Loose fasteners
Reinforce with screws
Subfloor gaps
Shims or adhesive
Joist flex
Blocking or reinforcement
Missed joists
Correct fastener placement
Honestly, most squeak prevention lives in this table.
Reducing Friction Between Boards
Not every squeak comes from below. Sometimes boards rub against each other. Tight installs. Limited expansion space. Seasonal movement.
Reducing friction can mean targeted fastening or, in limited cases, dry lubricants. And yes, they can help – temporarily. If movement continues underneath, the sound usually finds a new way out.
Controlling Indoor Humidity
This part surprises homeowners every single time.
You can quiet a floor just by stabilizing humidity. Whole-home humidifiers, dehumidifiers, better HVAC balance – we’ve seen floors settle down without touching a single fastener.
Is it exciting? No. Is it effective? Very.
Preventive Fixes That Work Without Removing the Floor
Most people don’t want their floors ripped out, and that’s fair. The good news is, prevention rarely requires removal.
Effective options include:
Working from below whenever possible
Reinforcing only problem zones
Using screws instead of nails
Fixing the environment before chasing mechanical fixes
The goal isn’t silence today. It’s stability over time.
Preventive Fixes That Don’t Work (and Often Make It Worse)
Now, let’s talk about what usually backfires.
Temporary Lubricants and DIY Myths
Powders. Sprays. Internet hacks. They might quiet a squeak for a bit. They don’t stop movement.
Worse, they can contaminate joints or finishes, which makes real repairs harder later. We’ve walked into plenty of homes where the floor smells like graphite and still squeaks.
Over-Tightening Screws or Nails
Everyone thinks one screw will fix it.
Sometimes it does. Sometimes it wakes the whole floor up.
Over-tightening can split wood, strip joists, or force boards against uneven surfaces. Then you’re chasing new squeaks instead of solving the original one.
How to Prevent Squeaking During Refinishing or Repairs
Refinishing is actually one of the best times to deal with squeaks – if you do it right.
What Proper Refinishing Does (and Doesn’t) Fix
Refinishing is surface work. Sanding and finishing won’t fix structural movement by themselves. But the prep phase is where squeak prevention should happen.
On our hardwood floor refinishing projects, our crews always check for movement before sanding. Once the finish goes down, fixing squeaks gets riskier.
Prep Mistakes That Lead to Noise Later
Skipping subfloor checks. Ignoring small movement. Rushing the job.
Those shortcuts lock problems in place. This matters even more with engineered hardwood flooring, where aggressive fastening can damage the wear layer. Prevention during prep is cheaper, cleaner, and safer.
When Squeaking Can’t Be Prevented Without Professional Help
Some floors just need more than a DIY fix. Knowing when to stop matters.
Signs of Structural or Subfloor Issues
You’re likely past prevention if you notice:
Bounce underfoot
Noise across multiple rooms
Growing gaps
Squeaks that return quickly
That usually means joists, subfloor attachment, or installation issues.
When a Long-Term Fix Requires a Pro
Here’s how we explain it to homeowners:
DIY Prevention
Professional Repair
Localized squeaks
Structural movement
Minor fastener issues
Subfloor or joist problems
Stable floors
Floors with bounce
Short-term improvement
Long-term resolution
This same decision shows up when homeowners weigh polishing, recoating, or full refinishing – and honestly, the wrong call can lock in movement issues. If you’re on that fence, should you choose
DIY or professional wood floor polishing
lays out the tradeoffs clearly.
Keeping Hardwood Floors Quiet for the Long Term
Anyway, let’s bring this back to your floors.
Squeaks don’t automatically mean failure. They mean movement. The sooner you deal with that movement, the easier it is to keep things from getting worse.
From what we see on real jobs at 1 DAY® Refinishing, the quietest floors come from solid structure, controlled humidity, and smart prevention. Temporary fixes buy time. Stability solves the problem.
If you’re not sure what kind of noise you’re dealing with, or whether prevention is still on the table, that’s okay. Sometimes it’s a small adjustment. Sometimes it’s a bigger fix. Either way, understanding what’s happening under your feet is the first step toward a floor that stays solid – and quiet – for the long haul.
Right… let’s start from the spot where most homeowners get stuck.
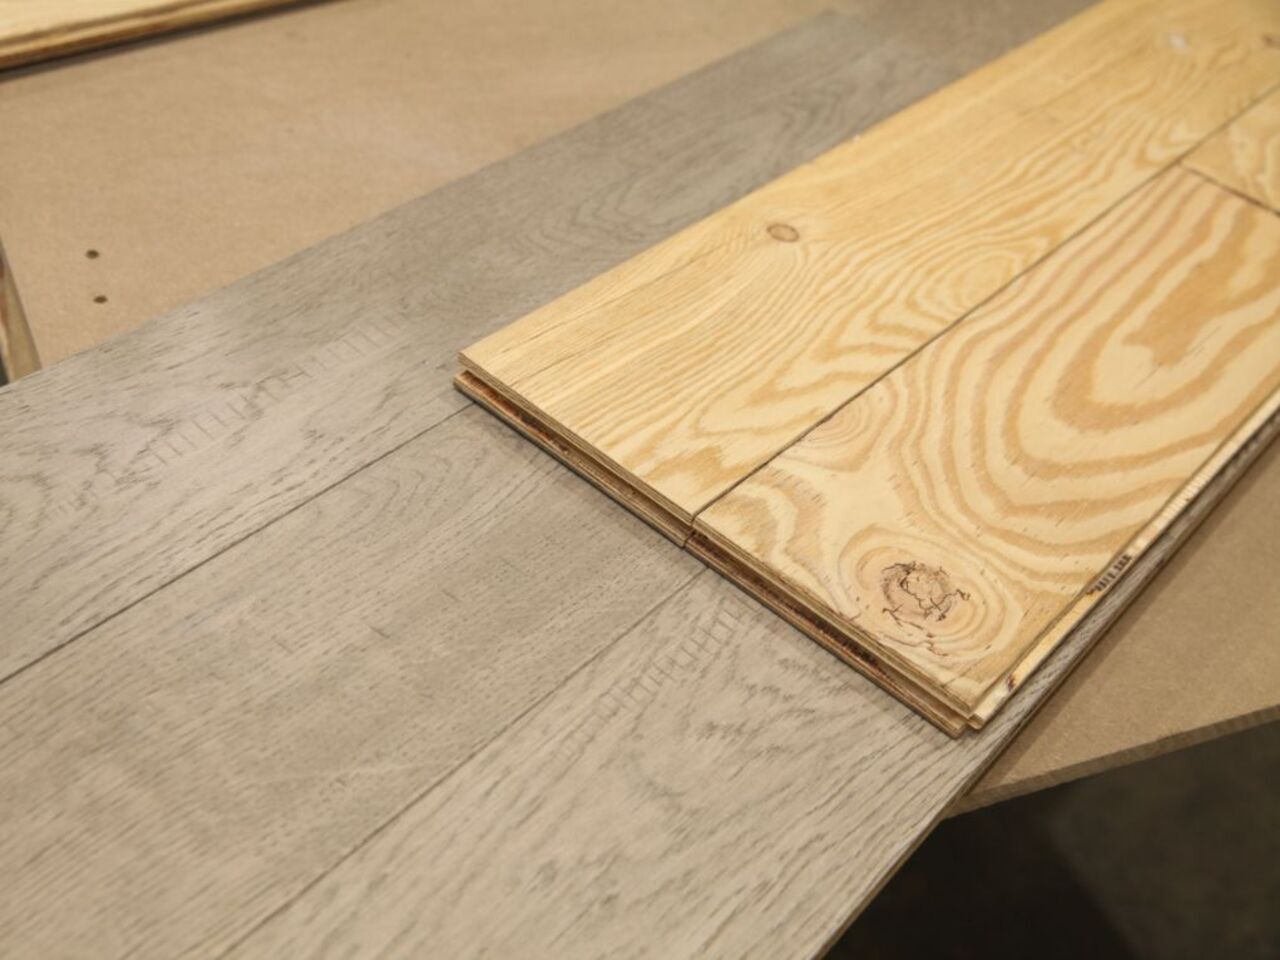
Width. Not species, not stain, not finish. Width.
You’d think it’s the easier part – “wider feels modern,” “narrow feels classic,” that sort of quick Pinterest logic – but in real houses it never works that clean.
Wide plank means anything 5 inches and up, sometimes 7, 9, even 12.
Narrow strip usually sits in the 1.5 to 3.25 inch range.
On paper that gap sounds tiny. In a room? That little number decides the entire rhythm of the space.
On our projects at 1 DAY® Refinishing, this comes up constantly.
Someone calls us thinking they want the widest boards the mill makes… then remembers they’ve got a hallway the size of a canoe.
Or someone wants the old 2.25-inch red oak look… then walks into their open concept and realizes it feels too choppy.
So… here’s what we’ve learned over the years – real homes pick their own plank width.
Not trends. Not catalogs. And definitely not the glossy showroom floor that’s perfectly flat with the humidity locked at 42% by a hidden HVAC.
Anyway, let’s get into it.
Wide Plank Hardwood Flooring
Visual Impact & Aesthetic Appeal
Wide planks hit you right away. They have this calm, open look – fewer seams, fewer interruptions, longer grain lines.
Your eye kind of glides across the room instead of bouncing around on every joint.
And if we’re talking species like white oak or walnut, wide boards let those grain patterns breathe.
You see the sweep of a cathedral grain instead of half of it chopped into three narrow strips.
The flooring feels intentional – modern homes, rustic cabins, clean Scandinavian spaces, they all love wide boards for that reason.
You know… sometimes I bring a sample inside and even before I lay it down, homeowners go “Oh wow, that’s the one.”
It’s that sort of impact.
Pros of Wide Plank Floors
From our experience:
Wide planks open big rooms up – the whole space feels more expensive, even if it isn’t.
They give you strong grain visibility – especially with rift & quartered cuts.
Fewer seams = cleaner lines and a calmer vibe.
They pair nicely with longer board lengths, which makes everything look balanced.
Rustic, modern, or minimalist interiors all seem to adopt wide planks naturally.
There’s also a feeling underfoot. Hard to explain if you haven’t installed them, but wide planks have this quiet, low “thud”
when you walk across. The mass dampens sound in a good way.
Challenges & Moisture Considerations
Now here’s the catch – and this part surprises homeowners every single time – wide boards move more.
It’s not a defect, it’s just how wood behaves when moisture changes.
According to
NWFA’s 2023 guidance
in Hardwood Floors Magazine, wood flooring will expand and contract with changes in relative humidity,
and the amount of that movement increases as the board width increases.
In the winter you might see faint gaps or shadows along seams. In the summer, maybe a touch of cupping if humidity climbs fast.
Nothing dangerous – just wood reacting to the house.
So, wide planks really depend on:
consistent HVAC
controlled humidity
a dry subfloor
careful acclimation
sometimes choosing engineered instead of solid
I’ve had homeowners swear they want 10-inch boards… until we pull out the moisture meter and the crawlspace reads like a Florida swamp.
Wide boards don’t like bad subfloors. They don’t like dips. They don’t like humps. They will show every flaw the house ever had.
APA standards ask for tighter flatness tolerances on wider boards, and yeah – they mean it.
On our projects, we tell clients straight up:
expect more subfloor prep
expect a mix of adhesive + mechanical fastening
expect careful layout planning at transitions
expect longer acclimation times
The finished result is worth it, but wide planks aren’t “drop and go.” They need babysitting.
Narrow Strip Hardwood Flooring
Classic Look & Where Narrow Planks Excel
Narrow strips… well, they’re the classic.
If you grew up in any home built from the 60s to the early 2000s, you stepped on 2.25-inch red oak strips almost daily.
They’re simple, rhythmic, and they give rooms this subtle movement your eyes follow.
In tight rooms – hallways, smaller bedrooms, old cape-style homes – narrow strips are perfect.
They elongate space. They feel familiar.
Pros of Narrow Strip Floors
This is where narrow strips still shine today:
More stable seasonally – less width = less movement.
Hide subfloor issues better than wide boards ever could.
Fit traditional and transitional decor naturally.
Cost tends to be friendlier in many species.
Gapping is less noticeable in dry seasons.
And there’s this tiny crisp sound when narrow strips lock tight as they settle.
Not loud. Just a soft “tick” as everything finds its place. Wide boards rarely do that.
Drawbacks & Design Limitations
But yeah, they have limits.
In big rooms, narrow strips can look too busy.
More seams = more visual interruption.
Modern or minimalist interiors sometimes feel mismatched with narrow width.
Grain clarity drops – you’re seeing slices of grain instead of the full story.
It’s not a bad thing. Just depends on the room’s vibe.
Installation Notes & Structural Stability
Narrow strips are forgiving. That’s why so many older homes still rely on them.
Subfloor imperfections get hidden by the small width.
They nail down easily.
Acclimation tends to be quicker.
Seasonal movement is muted.
On our projects, if the floor structure is old or slightly uneven, narrow strips can save thousands in prep work alone.
Room Size, Style, and Design Considerations
How Room Dimensions Influence Plank Width Choice
Seems obvious, right? Bigger room = bigger plank. But it’s not always that linear.
Still, here’s the general pattern we see:
Small rooms – narrow strips stretch the space visually.
Large rooms – wide planks keep everything calm instead of jittery.
Hallways – narrow strips guide the eye forward; wide boards can feel… well, oversized.
Open concepts – wide boards carry the whole space like one continuous canvas.
It’s surprisingly easy to overwhelm a small guest room with big boards, and just as easy to make a big living space feel choppy with narrow ones.
Matching Width to Architectural Style (Modern, Rustic, Traditional)
Design plays a big role too.
Modern spaces love wide planks – clean lines, less fuss.
Rustic spaces love wide boards with knots and character.
Traditional rooms naturally lean narrow – especially red oak or maple strips.
Farmhouse style? Usually wide planks with matte finishes.
Minimalist interiors look best with wide, select-grade boards.
We sometimes point clients to engineered hardwood flooring if they want modern-but-stable 8–10 inch boards.
Mixed-Width Designs & When They Work Best
Mixed-width floors… they’re kind of the wildcard.
They look amazing in:
cabins
big family rooms
certain rustic or vintage designs
It adds warmth without chaos. Not many people know it’s an option until we show them a sample and they go,
“Why didn’t anyone tell me this sooner?”
I’ll say it again because it matters – wood moves.
According to NWFA guidelines, moisture swings hit wide planks harder.
More face width means more seasonal expansion and contraction.
You might see:
little gaps in winter
slight cupping in humid summers
shadow lines when the house dries fast
crowning if moisture comes from below
Narrow strips hide movement better. Wide boards turn movement into a feature you’ll actually notice.
Engineered vs. Solid Options in Wide & Narrow Formats
Engineered really shines in wider formats. Its multi-layer build helps control movement.
So if someone wants 9–12 inch boards, our pros usually say something like:
“Well… engineered might save you headaches later.”
Not because solid is bad – solid is great – but engineered handles humidity swings better.
Especially if you have radiant heating or live somewhere where summers feel like a sauna.
When clients ask us “What width should I choose?”, we look at:
room sizes
ceiling height
lighting (natural and artificial)
subfloor condition
species availability
budget
climate
pets and kids
style goals
Sometimes the whole house can use one width.
Other times, the hallway demands something different from the living room.
No shame in mixing smart.
Interior Style & Current Flooring Trends
Trends come and go, but wide planks are having a long moment right now.
They feel calm and clean. But narrow strips aren’t outdated – they just belong to certain styles.
If homeowners are refinishing instead of replacing, we often point them toward
hardwood floor refinishing.
Width stays the same, but look and feel can shift drastically with stain and finish changes.
When to Consult a Flooring Specialist
Talking with someone who’s installed thousands of square feet of both widths helps.
Our refinishers can walk into a room and tell you instantly whether wide boards will breathe or feel cramped.
We check:
moisture levels
subfloor flatness
HVAC stability
engineered vs solid options
species that suit your climate
what the house wants instead of what the showroom suggests
Sometimes a 5-minute visit saves months of second-guessing.
Finding the Best Fit for Your Space
Anyway… choosing between wide and narrow plank hardwood flooring isn’t about right or wrong.
It’s about how you live, what your rooms demand, and what story your home is already telling.
Some spaces come alive with broad, calming boards. Others feel right only when that tight strip pattern carries your eye across the floor.
And if you ever want a second set of eyes, our crews at 1 DAY® Refinishing can swing by,
take moisture readings, check the subfloor, and help you picture how each width will actually feel once it settles under your feet.
Hardwood is personal – and width might be the most personal choice of all.
If you’re on the fence, you can always
grab a free quote from us –
no pressure, just straight answers on what’ll work best in your home.
Right… so let’s start with something simple that somehow confuses almost everyone:
buff and coat isn’t sanding, and sanding and refinishing sure isn’t buff and coat.
Sounds obvious, but trust me, I’ve walked into plenty of homes where folks were told, “Yeah, we’ll just buff it,” when the floor had bare wood staring right back at us.
Anyway… these are the two main ways people restore hardwood, and they each have their place.
A buff and coat is like giving the floor a new topcoat – a fresh shield – without grinding off the old finish.
Sanding and refinishing is the full reset. We go down to raw wood, fix damage, change color if you want, and rebuild the finish system.
From our experience at 1 DAY® Refinishing, choosing between the two usually comes down to three things:
what the floor looks like up close (not from across the room)
what’s hiding on the finish (wax, polish, oil soaps, those “restore” products)
whether you want a different color or just want the floor to look alive again
Floors don’t lie. They’ll show you exactly what they need once the light hits at the right angle.
And once you learn to “read” them – those dull lanes, shiny patches, deep scratches – the right method becomes pretty clear.
Let’s dig into buff and coat first, because that’s the one most homeowners cross their fingers for.
Buff and Coat: What & Why
Why a Buff and Coat Is a Good Option
Well… most folks want a buff and coat because it’s fast, clean, and doesn’t turn their home into a sanding zone.
You keep your color, you keep your floor intact, and you get rid of that dull, tired look that starts creeping into high-traffic spots.
On our projects, buff and coat is the go-to when a floor looks worn out but is still structurally fine.
Light scratches, scuffs, and that cloudy vibe in walkways – the buffer takes care of that.
To be honest, it’s surprising how much a floor wakes up once we abrade the top layer and lay down fresh water-based poly.
There’s this clean, crisp smell when the finish hits the air – it always tells me the coat is leveling right.
When a Buff and Coat Should Be Done
Ideally, a buff and coat is done every 3–5 years. Think of it like a tune-up – you’re reinforcing the topcoat before it wears too thin.
Once the finish erodes down to bare wood, buffing won’t bring it back.
We tell homeowners: the moment you see dullness, don’t wait.
That greyish “flat lane” look? That’s the floor whispering for help.
Are All Floors Good Candidates for a Buff and Coat?
Short answer – no. And this is where people get frustrated, because they’re hoping for the quick fix.
A floor is a good candidate when:
the existing finish is intact
there’s no bare wood
there’s no wax or polish contamination
scratches are surface-level
you’re okay keeping the same color
the finish still has adhesion integrity
Engineered floors actually love buff and coats. Even the ones with thin veneer that we can’t sand safely — buff and coat keeps them going for years.
But the deal-breaker? Contamination. Wax or polish hides in the pores of the finish.
You might not smell it or see it, but the buffer feels it – the floor drags a little differently.
And that’s when we know it’s game over for a buff and coat.
When Floor Products or Conditions Make Buff and Coat Impossible
Here’s the catch – and yeah, this surprises people every single week.
If the floor has:
wax contamination
acrylic polish buildup (“restore” products)
oil soap residue
silicone
mop-and-shine layers
…a buff and coat simply won’t bond. You can screen it, vacuum it, pray over it – won’t matter. The finish will peel.
And it usually peels right where you walk the most, so it’s impossible to ignore.
We run adhesion tests before every buff and coat. If the tape test fails, that’s it. Straight to sanding.
You know… wax is sneaky. Looks clean. Smells clean. But the moment the buffer hits it, you feel the slip.
Our pros can tell instantly.
Signs You Need a Buff and Coat
Light Wear, Dullness, and Minor Scratches
So… you walk into your living room one morning, and the floor just looks tired. Not ruined – just dull.
That’s usually the first sign.
Those cloudy footpaths, the tiny scratches from kids or a dog running around, the finish that no longer reflects light evenly – that’s exactly what buff and coat is designed to fix.
The buffer makes this soft hum as it cuts through the old finish, and the floor feels almost powdery right after screening.
Once the new coat hits, it smooths right back out.
Floors That Haven’t Been Contaminated by Wax or Polish
This is huge. If the floor cleans evenly, dries evenly, and doesn’t show streaky patches, you’re probably safe.
Wax contamination often shows up as slippery patches or dull smears that don’t buff out. Polish contamination looks plastic-y or too shiny in weird spots.
Oil soap residue sits deeper; you feel it more than you see it – like the buffer suddenly skates.
Anyway, if none of that is happening, there’s a good chance a buff and coat will work beautifully.
When a Buff and Coat Is Possible vs. When It Isn’t
Here’s a quick snapshot – something we show clients all the time:
Is Your Floor a Candidate?
Floor Condition
Recommended Method
Light surface wear
Buff & Coat
Dull finish, minor scratches
Buff & Coat
Contamination from wax/polish
Sand & Refinish
Deep gouges, pet stains, color damage
Sand & Refinish
UV fading
Sand & Refinish
Bare wood showing
Sand & Refinish
You want a different color
Sand & Refinish
Floor cupping/crowning
Sand & Refinish
If you’re seeing bare wood or heavy staining, buff and coat is like putting fresh paint over a crack – looks good for a minute, then falls apart.
Buff and Coat Process Explained
Step-by-Step: How We Buff and Coat Hardwood Floors
Right… so let me walk you through how we actually do this on real job sites. Nothing fancy – just the honest workflow our refinishers follow.
1. Deep clean and residue removal
We start with a proper clean. Not the “mop and hope” approach – I mean neutral cleaners that don’t leave anything behind.
If the floor feels slick or strange under the mop, we run an adhesion test right there. If it fails… well, that tells us everything we need to know.
2. Screening (abrasion)
This is where the buffer comes in. You’ll hear a soft, even hum when it’s grabbing the finish properly.
If you’ve ever run your hand across the floor right after screening, it feels slightly gritty – almost like a matte texture.
3. Vacuum and tack
HEPA vacuums get the fine stuff, and then we run microfiber tacks until the cloth comes off clean.
Dust is the enemy of a smooth coat.
4. Apply new finish
Most homeowners choose water-based polyurethane now. Honestly, I don’t blame them – low odor, dries fast, looks clean.
When we open the jug, there’s this faint, crisp smell. Not strong, just enough to know it’s fresh.
5. Dry and cure
Floors are usually walkable in a few hours. Full cure takes longer – sometimes a week – but day-to-day living can resume pretty quickly.
On a good buff and coat day, the change feels instant. Floors look brighter, smoother, more alive.
Our past clients always say the same thing: “I didn’t realize it looked that bad before.”
Limitations: What Buff and Coat Can’t Fix
Here’s the honest bit – buff and coat has limits. And folks sometimes expect miracles from it.
It won’t fix:
deep scratches you can catch with a nail
pet stains that have soaked in
water stains
UV fading
bare wood
color inconsistency
cupping or crowning
heavy traffic grooves
If you try to buff and coat over bare wood, the finish just sinks in weird and looks patchy.
And UV fading? Screening won’t even touch it.
To be honest, buff and coat shines when you use it before things get bad.
Once you’re past a certain point, sanding is the only clean fix.
Expected Durability and How Long It Lasts
A good maintenance coat lasts around 3–5 years.
Homes with big dogs, busy families, or shoes-on habits… maybe lean closer to the 2–3 year side.
Based on what we see every week, a strong topcoat keeps the wood protected for much longer.
But the moment the finish wears through, the floor starts aging quick – kind of like metal rusting once the paint’s gone.
Anyway, the rule of thumb is simple: if the finish still reflects light evenly, you’re in the “saveable” zone.
Once it goes dull and grey, act sooner rather than later.
Sand and Refinish: The Basics
Now… sanding. The big one. Nobody wakes up excited to hear their floors need a full sand and refinish, but sometimes it’s the right call – the only call, actually.
A full refinish takes everything down to bare wood. That’s where we
fix deep scratches,
pet stains,
discoloration, uneven sheen, UV issues – the whole deal.
Think of it like peeling an orange: you remove the outer layer and get to the fresh part underneath.
Why Not Just Buff and Coat Instead?
You’d be shocked how many people try to talk themselves into a buff and coat.
I get it – it’s cheaper, cleaner, faster. But wax, polish, silicone, oil soap… these things kill adhesion faster than anything.
We’ve had floors that looked perfect from afar, but the moment our refinishers ran the buffer across, it slid like it was on ice.
That’s wax hiding under the surface. Acrylic polishes do the opposite – they’re sticky and soft. When you screen them, they gum up and smear.
And those deep scratches? The ones you feel with your fingernail? Buffing won’t touch them.
Light abrasion doesn’t remove depth; it just flattens sheen.
Why You Should Choose Sanding and Refinishing
You go with sanding when:
the finish has failed
the floor has bare wood showing
you want to change the color
the surface looks uneven
there are pet stains or water spots
UV fading has turned areas dull or orange
polishing products have built up
Sanding is the great equalizer. Once we hit raw wood, we get a blank canvas.
You can go natural, choose a new stain, go darker, or brighten everything up.
When Your Floors Need a Full Sand and Finish
If you’re seeing deep gouges – the kind where dirt packs in – sanding’s the only fix.
Same with pet stains. If the stain is dark, it’s penetrated the fibers. Buffing won’t even touch that.
Other sanding triggers:
cupping or crowning
boards that feel uneven
finish peeling or flaking
serious color damage
large patches of bare wood
Engineered floors can sometimes take a refinish too, as long as the veneer is thick enough.
We always measure first.
Deep Damage, Color Change, and Full Restoration Needs
Here’s the part where people sometimes feel torn – the floor “looks okay” until you get close.
But the moment sunlight comes in sideways, all the scratches, grooves, and color issues show up.
Buff and coat makes floors look better. Sanding makes floors look new. That’s the real difference.
And color change? Buffing can’t do anything there.
Sanding lets you go from red oak that looks dated to a modern grey, neutral brown, or natural tone.
That’s why people choose it.
Full Sand and Refinish Process
Step-by-Step: How Sanding and Refinishing Works
If you want the full deep-dive, we’ve laid out the entire process in
our complete sanding and refinishing guide
– but here’s the quick walk-through the way our crews usually handle it.
Prep and dust containment: Plastic sheeting up. HVAC vents covered. We set airflow so dust moves outward or downward. Dustless sanding systems take care of most airborne dust. Not all, but almost all.
Rough sanding (36–60 grit): This is where you hear that deep, controlled rumble. The sander pulls forward, then glides back. We remove old finish and level problem areas. Freshly sanded wood feels warm and a little soft – almost velvety.
Medium sanding (80 grit): This removes the scratch marks from the rough pass.
Fine sanding (100–120 grit): Now the surface looks uniform. Under bright light, you don’t see swirl marks anymore.
Edging and corners: The edger has a higher-pitched whine. Corners need hand-scraping – slow but necessary.
Vacuum and tack: Multiple rounds. Fine dust hides everywhere.
Stain application (optional): If you’re going for a color change, this is where the magic happens. Oil-based stains deepen the grain – you can literally watch the wood darken as it absorbs.
Finish application: Most homeowners choose water-based polyurethane. It smells clean and mild, and it dries quick. Oil-based poly has that warm amber glow – beautiful but slower.
Benefits of a Full Refinish
A complete sand lets us fix just about everything:
deep scratches
pet stains
discoloration
uneven sheen
UV fading
cupping (mild cases)
worn finish
You walk back into the room afterwards and it feels like a new space.
We see it all the time – people run their hand over the floor like they’re touching it for the first time.
A good sand and refinish typically lasts 7–10 years depending on traffic and finish type.
Dust, Noise, Timeline, and Other Considerations
Dustless sanding helps a ton, but sanding is still a louder, more involved job.
The drum sander hums low. The edger bites a bit. None of it is unbearable, but it’s noticeable.
Alright… here’s where homeowners usually pause and say, “Okay, just tell me which one I need.”
And honestly, after seeing thousands of floors, the answer is pretty predictable once you know what you’re looking at.
When Buff and Coat Is the Right Choice
Buff and coat is the right move when things are still “fixable” at the surface level.
If your floor is basically saying, “Hey, I’m tired, but I’m not falling apart,” this is the sweet spot.
Choose buff and coat when:
the finish is dull but not broken
scratches are shallow
color is fine
you want low dust and quick turnaround
the floor passes an adhesion test
there’s no wax, polish, or oil soap hiding on the surface
you want to maintain longevity without a full overhaul
It’s pretty much the easiest way to keep wood floors looking good without going into renovation mode.
Our refinishers see a ton of homes where the only mistake was waiting too long. Catch it early, and buff and coat is a simple win.
When Sanding and Refinishing Is Required
Now… sanding is the “big fix.” If the floor is past a certain point, no matter how much you wish buff and coat could work, it just won’t.
Choose sanding and refinishing when:
you can see bare wood
scratches catch your fingernail
there are pet stains
boards are faded from sun
finish is peeling or flaking
the floor has contamination
you want a different stain color
the surface has uneven texture
We’ve had jobs where a homeowner swore it was just dullness… then the buffer hit the floor and slid like it was on waxed marble.
That’s when you know sanding is the only reasonable path.
Cost, Durability, Appearance, and Lifespan Comparison
Right… here’s the part everyone screenshotted the moment we typed it the first time.
This table keeps things simple.
Buff & Coat vs Sand & Refinish — Practical Comparison
Category
Buff & Coat
Sand & Refinish
Typical Cost
Lower
Higher
Dust
Very low
Moderate (dustless minimizes)
Noise
Minimal
Noticeable
Timeline
1 day
2–4 days
Color Change
No
Yes
Repairs Deep Damage
No
Yes
Removes Stains
No
Yes
Lifespan
3–5 years
7–10 years
Best For
Light wear
Full restoration needs
Let me add a small side note here: the “Best For” row is the one that saves people headaches.
Buff and coat is maintenance. Sanding is restoration. Once you understand that, the choice gets a lot clearer.
Preparing Your Home for Either Process
We try to keep prep simple because, let’s be honest, nobody loves moving furniture.
For buff and coat:
move furniture out of the room (or we help, depending on the job)
Some homeowners choose to be out of the home for part of the sanding stage.
Others stay in the unaffected rooms. Either works – we just help coordinate a schedule that makes sense.
Discuss Your Options with a Flooring Expert
So… here’s the real talk. Every floor tells a story. Some are just lightly worn and begging for a maintenance coat.
Others are, well, too far gone and need the full sand and refinish treatment.
Neither option is “bad” – they’re just different tools for different situations.
A buff and coat is like giving your floor a new jacket. A sand and refinish is rebuilding the whole thing from scratch.
And once you know which one fits your floors, the rest becomes a pretty straightforward plan.
If you’re on the fence – or just not sure what’s on the floor and whether there’s wax or polish hiding under the surface –
reach out to us at 1 DAY® Refinishing.
We’re doing buff & coats and full sand & refinish projects every week.
Our pros can stop by, take a look, and talk you through what actually makes sense for your home, not just what sounds good on paper.
Sometimes a quick refresh is all you need. Sometimes the floor needs a reset.
Either way, you’ll get honest guidance, real options, and a clear path forward.
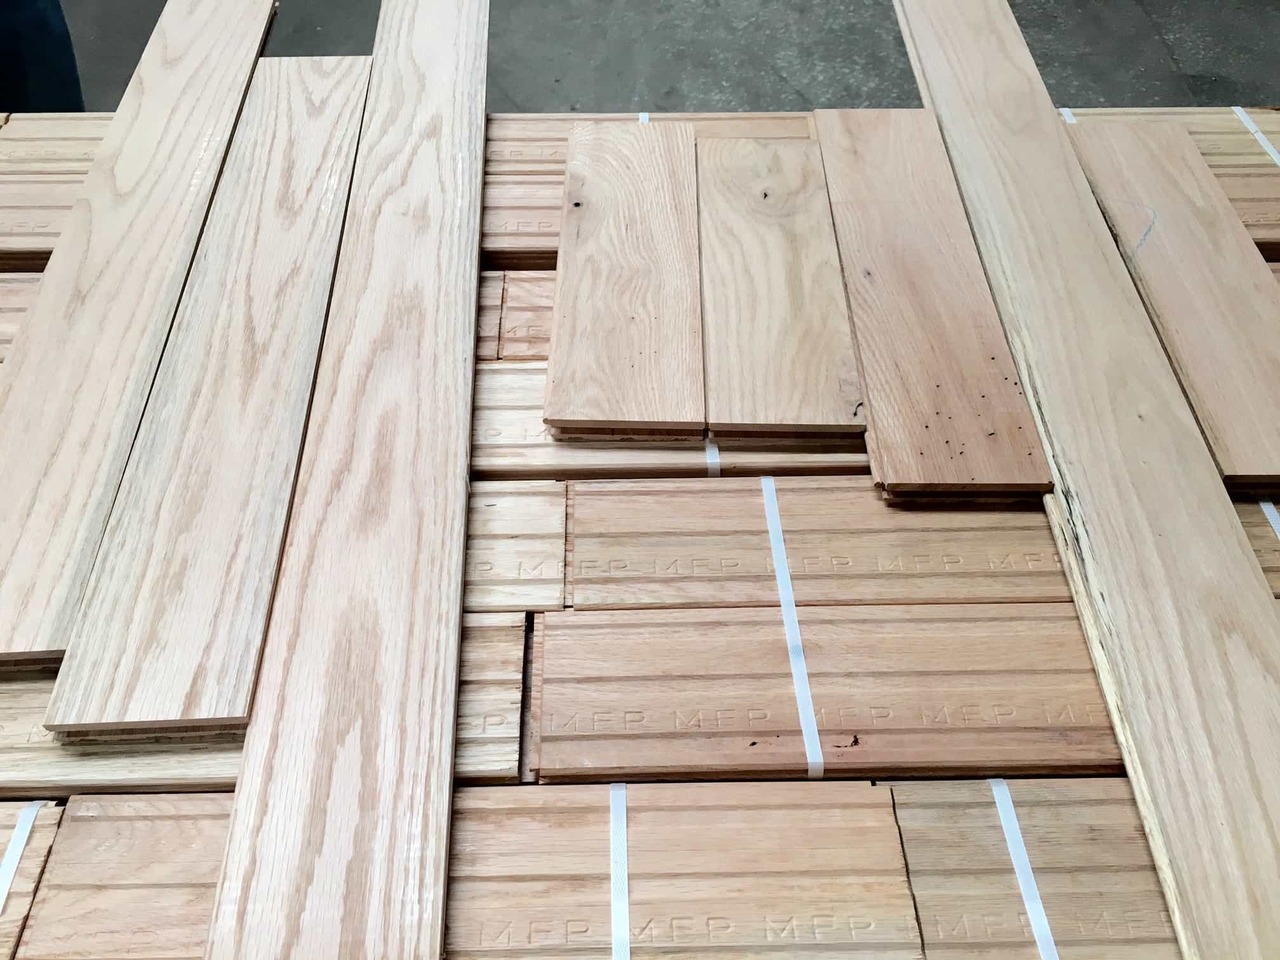
Hardwood installation isn’t just dropping boards on the floor and hoping they behave. It’s prep work first – subfloor checks, leveling, moisture testing, acclimating the planks – and then choosing the right installation method: nail-down, glue-down, or a floating click-lock system. Each one has its own rhythm and cost range. Nail-down feels the most traditional, glue-down gives a quieter and firmer step, and floating installs are the most DIY-friendly. Most homeowners end up somewhere between $7–$12 per sq ft installed, depending on method and materials, but the real difference comes from the prep. That’s what decides whether your floor feels tight underfoot or starts clicking and shifting a month later.
Anyway… most folks want to know if this is something they can handle themselves. If you’re decent with a saw, patient enough to follow layout lines, and not afraid of kneeling for a few hours, DIY can work – especially with floating floors. Nail-down and glue-down? Those take a steadier hand and better tools, and that’s usually where our installers get called in. On our projects at 1 DAY® Refinishing, we follow the same flow every time: prep the subfloor, plan the layout, leave proper expansion gaps, and lock in rows clean and straight. It isn’t complicated, it’s just… precise.
So, here’s the full walk-through – the same process we use on real jobs, start to finish.
Tools and Materials Needed
Essential Tools
Here’s what our crews bring to almost every hardwood install:
Flooring nailer or stapler (for nail-down installs)
Finish nailer (for first/last rows and trim)
Miter saw, jigsaw, and oscillating multi-tool
Tapping block and pull bar
Chalk line, spacers, and measuring tape
Level or straightedge
Moisture meter for wood and subfloor checks
75–100 lb floor roller (for glue-down installs)
Shop vacuum
You’ll hear all of this long before you see it - that sharp whine of a saw, the solid thunk from a flooring nailer when it’s seated right. A lot of DIY kits skip the pull bar or a proper tapping block - don’t do that to yourself. Folks end up hammering on the boards, blowing out tongues, and then the planks never lock cleanly again.
Materials & Underlayment
Depending on your installation method, you’ll need:
Solid hardwood planks or engineered hardwood flooring
Underlayment: foam/cork for floating, felt/rosin paper for nail-down
Vapor retarder sheet (over plywood or concrete, where required)
Wood flooring adhesive (for glue-down installs)
Adhesive trowel (correct notch size for that adhesive)
Transition strips (reducers, T-molds, stair nose)
Baseboards, shoe moulding, or quarter-round
Underlayment looks thin and unimpressive, but you feel it right away under bare feet. Foam and cork give a softer, slightly cushioned step; felt feels firmer and a bit “quieter.” When you kneel on it, that soft crunch under your knees tells you it’s there doing its job.
Safety Gear
Not glamorous gear, but you really do need:
Knee pads
Work gloves
Eye and ear protection
Dust mask or respirator
Fresh-cut oak has this sharp, almost sweet smell when the saw warms up, and the dust hangs in the air if you’re not pulling it out with a vac. You don’t want that in your lungs all day. Our pros throw on respirators as a habit at this point - you forget they’re there after a few minutes.
Preparation & Planning
Remove Existing Flooring & Baseboards
Start by pulling up whatever’s there: carpet, vinyl, laminate, old hardwood. Scrape off adhesives, pop out tack strips, nails, and staples. Take off baseboards or quarter-round so you can reinstall them cleanly once the new floor is down. On our projects, our refinishers vacuum the subfloor at least twice; you’d be surprised how one leftover staple or a clump of adhesive can turn into a little bump you feel every time you walk across it.
Inspect and Prepare the Subfloor
Check for:
Flatness within 3/16" over 10 ft (per NWFA guidelines)
Loose OSB or plywood panels (screw them down)
Squeaks (tighten with flooring screws into joists)
High spots (grind or sand them down)
Low spots (patch or level them out)
Seems simple? Well… not exactly. This is where installs are made or broken. If the subfloor flexes when you walk or waves like a slow roll, the hardwood will follow that shape. You can feel that tiny bounce under your feet when something isn’t tight - and once the boards are down, fixing it is a lot harder.
Moisture Testing & Humidity Requirements
Hardwood likes steady conditions. Rooms should stay within a stable 30–50% relative humidity, and the flooring’s moisture content should be close to the subfloor before installation. Keeping both within the same range helps prevent cupping, gaps, and seasonal movement.
Use a moisture meter on:
The subfloor (plywood, OSB, or concrete)
Several boards pulled randomly from your flooring boxes
If you’re installing over concrete, you’re not just checking the top - you’re checking how much moisture is moving through the slab. If readings are high, you need a proper vapor retarder or a glue-down system that’s rated for that situation. Skipping this step is how you get cupping, hollow spots, and those “mystery” issues a few months later.
Acclimate Your Hardwood Flooring
Most solid hardwood needs 3–5 days to acclimate; some engineered products need less, but you still shouldn’t rush it. Open the boxes, cross-stack the planks, and let them breathe in the actual room. You want the boards and subfloor to “meet in the middle” moisture-wise. If the wood goes in way too dry, it may suck up humidity and swell. Too wet, and it shrinks later and leaves gaps. You won’t see it on day one, but you’ll notice once seasons change.
Plan Your Layout & Expansion Gaps
Choose your starting wall - usually the longest and straightest side of the room that your eye hits first. Snap a chalk line so you don’t have to trust the drywall. Think through:
Expansion gaps all the way around the perimeter and at fixed objects
Staggered end joints (no obvious stair-step pattern)
Board direction (typically perpendicular to floor joists)
Doorway transitions and where flooring changes type or height
Last-row width (you don’t want to end up ripping a row down to pencil width)
When our installers “rack out” boards - laying them loosely first - we’re not just playing with puzzle pieces. You’re checking color mix, lengths, and making sure you don’t get all your short boards in one corner. It also helps you spot tricky cuts ahead of time.
Choose Your Installation Method
– Nail-Down Hardwood Installation
Best for ¾" solid hardwood over plywood or OSB. You get that firm, classic feel with very little movement underfoot. You’ll hear a clean, solid tap when it’s done right - no hollow echo.
– Glue-Down Hardwood Installation
We use glue-down:
Over concrete
With many types of engineered planks
When someone wants less floor deflection and a quieter sound
Glue-down installs feel a bit slower. The adhesive is tacky and deliberate - you don’t rush it. It has an open time, and once it skins over, it doesn’t really want to bond. That’s when you get those hollow spots we all hate hearing.
– Floating / Click-Lock Installation
Floating click-lock systems are where a lot of DIY folks feel comfortable. Boards lock to each other, not the subfloor. Great choice for basements and certain remodels, as long as the product is rated for those conditions and your subfloor is flat.
Vacuum the subfloor so you’re not trapping debris. Lay felt or rosin paper as a slip sheet. Snap your starting line. Set spacers at the walls and around posts so your expansion gap stays consistent. You’ll hear that underlayment crunch a little under your knees as you move along the first row.
Step 2 – Install the First Row
Face-nail the first row through the top near the wall (those nails will hide behind trim later). Take your time here - the first row has to be dead straight. Every row after this wants to follow it. If the first row drifts, you’ll fight that curve all the way across the room.
Step 3 – Use a Flooring Nailer
Once you’re on row two or three, switch to blind nailing through the tongue with a flooring nailer or stapler. Seat the tool firmly - you want a clean, strong hit without crushing the tongue. Aim too high and you split wood; too low and the fastener shows.
Step 4 – Stagger & Lock Boards
Mix board lengths as you go. Stagger end joints by 6–8" so you don’t get weak spots or repetitive patterns. Tap boards together with a tapping block, not directly with a hammer. A pull bar helps pull that last inch tight near the wall. When everything lines up and those seams disappear, it’s weirdly satisfying.
Step 5 – Install Final Rows
For the last couple of rows, the flooring nailer usually won’t fit, so you go back to a finish nailer and hand nailing through the tongue or face if needed. Tight areas around vents and corners are where most DIYers slow down. Fresh-cut pieces may feel slightly warm off the saw, and you’re shaving millimeters to get a snug fit without forcing anything.
Step 6 – Add Transition Pieces
Attach reducers, T-molds, or stair nosing at doorways and where hardwood meets tile, vinyl, or carpet. These must be anchored well and sit level with both surfaces. If they’re even a little proud or loose, you’ll feel it every time you step over them.
2. Glue-Down Installation
Step 1 – Prepare Subfloor & Spread Adhesive
For glue-down, the subfloor has to be flat, clean, and dry. No dust piles, no old glue ridges. Spread adhesive with the manufacturer-approved trowel notch. Only spread as much as you can cover in maybe 20–30 minutes - you’ll feel it getting tackier as time passes, and that’s your cue to move.
Step 2 – Lay and Lock Boards
Press each board firmly into the adhesive bed. You should feel a little resistance as it settles. Keep your chalk line visible and don’t bury it too early. Wipe up glue squeeze-out immediately - once it cures on the surface, removal gets annoying fast.
Step 3 – Roll the Floor for Bonding
Use a 75–100 lb roller to go over the floor, section by section. This pushes boards into the adhesive ridges and squeezes out voids. Roll it again after a bit if the instructions recommend it. When you tap the floor and it sounds dense and solid instead of hollow, you know it bonded well.
Step 4 – Install Final Rows & Transitions
Final rows in glue-down installs work a lot like nail-down, just without the fasteners. A pull bar is your best friend here. Once the boards have set enough that they don’t slide under your feet, install T-molds and reducers to lock the edges and transition to other floors.
3. Floating / Click-Lock Installation
Step 1 – Install Underlayment
Roll out foam or cork underlayment over the subfloor. Butt the seams together - don’t overlap them - and tape joints if the manufacturer calls for it. As you crawl, you’ll notice that little cushion under your knees, which is one perk of floating systems.
Step 2 – Fit and Click Planks Together
Angle the tongue into the groove, lift slightly, then drop and click. When it’s right, you get that tight, crisp “click” sound and the seam disappears. If you’re fighting it, something’s out of alignment. Don’t force it - back up, check for debris, try again.
Step 3 – Cut Boards Around Obstacles
Use a jigsaw or oscillating tool around door jambs, vents, and odd angles. Undercut door frames so the planks slide underneath instead of stopping short with a little notch. Doorways are where most folks mutter a few words they probably shouldn’t - it’s normal.
Step 4 – Finish Final Rows & Transitions
Tap the last rows together with a pull bar. Keep your expansion gap. Install transitions and check seams with your hand - you’re feeling for any proud edges or lippage before you call it done.
Working Around Obstacles
Doorways and Trim
Doorways are one of the trickiest spots on any install. Undercutting jambs lets the boards slide under and look like they’ve always been there. For metal frames or awkward thresholds, take careful measurements and sneak up on the cut instead of trying to nail it in one pass.
Vents, Angles & Irregular Spaces
When angles feel confusing, grab a scrap piece or cardboard and make a template. It saves good boards from “almost right” cuts. Around vents, cut clean rectangles and, if you like, swap in flush-mount vent covers so the whole area looks seamless.
Tight Areas and Last Rows
The last row is where patience really shows. Measure both ends of the board because walls are almost never perfectly straight. Rip your boards slowly and support them well at the saw so they don’t splinter. When that last piece slides in snug with a tiny gap for expansion, it feels like closing the lid on the job.
Finishing Touches
Install Baseboards and Shoe Moulding
Reinstall your trim to cover the expansion gap all the way around the room. If the wall bows a little, shoe moulding hides those tiny sins. Our crews use a finish nailer and then run a small bead of caulk along the top edge where trim meets wall for a clean line.
Fill Nail Holes & Touch-Ups
Touch up face nails on the first and last rows. Use wood filler that’s close to your floor color and wipe it gently with a damp cloth so it blends instead of sitting as a hard dot on the surface. If you see any scuffs from tools, now’s the moment to touch them up.
Final Cleanup
Vacuum the floor, including along edges and vents. Wipe down planks with a slightly damp microfiber or manufacturer-recommended cleaner. Don’t wet-mop yet - give everything time to settle, especially if there’s fresh adhesive curing underneath.
After Installation: Care & First 72 Hours
What to Avoid Immediately After Installation
For the first day or two:
No heavy furniture dragging
No rolling loads (office chairs, dollies)
No wet mopping
Avoid covering floors completely with plastic
The boards and any adhesive still need time to settle and get comfortable. Blocking airflow or loading the surface too early can cause issues you won’t see right away.
Initial Cleaning & Protection
Start with a dry microfiber sweep to grab the fine dust from cutting. Put felt pads under chair and table legs before they move back in. If you’re adding area rugs, wait a couple of days so finishes and adhesives can stabilize. Think “gentle use” instead of “move-in day chaos” for the first 72 hours.
Early Maintenance Recommendations
Keep humidity steady. According to the
EPA’s indoor air quality guidance,
hardwood performs best when your home stays within a stable seasonal humidity range instead of swinging wildly up and down. Use your HVAC system the way you normally would – don’t shut it off for long stretches, and try to keep the environment consistent day to day.
For long-term care tips,
see our hardwood floor maintenance guide. It covers the cleaning products, habits, and little things that help floors still look good ten years out.
Troubleshooting Common Hardwood Installation Problems
Gaps Between Boards
Gaps usually come from:
Poor acclimation
Subfloor dips
Seasonal humidity swings
Tiny hairline gaps can close when humidity goes up. Wider ones often stay and may call for board replacement or targeted repairs. When we see this on service calls, we usually trace it back to moisture or prep, not the boards themselves.
Squeaking Floors
Squeaks can come from loose subfloor panels, missing or undersized fasteners, or joist movement under the whole assembly. Sometimes it’s simply boards rubbing because the expansion gap was too tight around walls or posts. If you hear that sharp little squeal every step, something’s moving that shouldn’t.
Uneven Boards or Lippage
This shows up when:
The subfloor wasn’t flat
Tongues or grooves were damaged
Adhesive was too thick, too thin, or inconsistent
Minor lippage might be addressed later
during hardwood floor refinishing,
depending on the product and thickness. More severe cases often need specific boards pulled and replaced.
Adhesive Issues (Glue-Down Installs)
If you hear hollow spots when you tap the floor:
The adhesive may have skinned over before boards went down
There may not have been enough adhesive ridges under that area
The floor might not have been rolled properly
Spot repairs are sometimes possible with syringes or injection glues, but not every hollow spot can be fixed invisibly. That’s why our installers are picky about coverage and rolling from the start.
Conclusion
Hardwood installation isn’t rocket science, but it is real, hands-and-knees work. When prep is solid - flat subfloor, clean layout lines, boards acclimated right - the floor almost “wants” to go together. I’ve watched homeowners knock out a room over a weekend, nervous cutting that first board, then grinning every time they walk across the new floor.
If you’d rather skip the learning curve, the dust in your hair, and the stress of getting it wrong, calling a pro is usually the calmer route. Our crews at 1 DAY® Refinishing do this every week, and we treat each home like it’s our own. If you’re not sure where to start, we can swing by, look at the space, and give you
a free on-site quote. No pressure – just honest feedback about what the job really needs.
Most folks think hardwood is just hardwood – but it isn’t.
We’ve worked with both for years, and trust me –
solid hardwood and engineered hardwood might start from the same log, but they live totally different lives.
One’s a single piece of lumber that swells and shrinks with every season; the other’s a layered plank built to resist those changes.
Solid hardwood is cut straight from oak, maple, or hickory – thick, sturdy, and ready to be sanded five or six times over its lifetime.
Engineered hardwood has a real-wood veneer on top of plywood layers that keep it flat and calm when humidity rises.
So while solid hardwood gives you decades of refinishing potential and that deep, solid-oak thud underfoot,
engineered hardwood delivers better dimensional stability, moisture control, and easier installation.
In simple terms: solid wood is about longevity and character; engineered wood is about practicality and performance.
The choice usually comes down to where it’s going – dry spaces versus basements, radiant-heat systems versus old-school subfloors,
budget versus refinishing freedom.
At 1 DAY® Refinishing, our crews deal with both every week.
We’ve restored century-old oak that still shines after seven sandings and laid engineered planks that laugh off damp slabs.
If you’re trying to figure out which one fits your home best, let’s break it down the same way we do on site:
structure, stability, lifespan, and how each really behaves once it’s under your feet.
Solid Hardwood Flooring – Traditional Strength, Timeless Feel
Structure and Composition
Solid hardwood is pure wood – one solid piece, milled from top to bottom.
No fancy cores, no glue layers.
That’s why it gives that deep thud when you walk barefoot across oak or maple.
It’s usually around three-quarters of an inch thick, and you can feel the weight of it.
Because it’s one solid mass, it expands and contracts with the seasons.
That’s normal – wood breathes, same as us.
We always let it sit on-site for a few days before nailing it down so it can adjust to the room’s air.
Keep the temperature and humidity steady, and you’ll avoid most of the gaps or cupping that show up later.
Simple, but worth repeating.
Lifespan and Refinishing Potential
Here’s where solid wood really earns respect.
The wear layer is the whole board, so you can sand and refinish it several times before running out of material.
Industry experts from Hardwood Floors Magazine – the
official publication of the National Wood Flooring Association
– note that most solid hardwood floors can be sanded and refinished five to seven times over their lifespan,
depending on thickness and condition.
I’ve personally restored oak floors installed nearly a century ago – the kind still found in older homes with thick quarter-sawn boards.
Each sanding only removes about a thirty-second of an inch – just enough to expose fresh grain and color.
Treat it right – sweep the grit, keep humidity stable, and recoat every few years – and you’re looking at 75 to 100 years of service.
Floors like that outlive furniture, paint, and sometimes the house itself.
Ideal Room Placements and Humidity Limits
Solid wood likes comfort zones – living rooms, bedrooms, upstairs halls.
It doesn’t get along with basements or damp kitchens.
Too much moisture and it swells; too dry and it cracks.
Think of it like an old friend who hates sudden weather changes.
Engineered Hardwood Flooring – Modern Stability and Flexibility
Layered Construction and Materials
Engineered hardwood was built to calm wood’s wild side.
It’s a sandwich – a real hardwood wear layer on top, a cross-laminated plywood or HDF core below,
and sometimes a balancing layer underneath.
Those alternating grains keep it steady when humidity swings.
That top veneer might be red oak with warm honey tones, hickory with rustic streaks, walnut for deep chocolate browns,
or maple if you like a clean, light look.
The core’s often birch or poplar bonded with low-VOC adhesives – glues designed to release fewer volatile organic compounds into the air.
According to the EPA,
VOCs are gases
that can come from certain building materials and finishes, so using low-VOC options keeps indoor air cleaner and safer
once the floors are installed. Still wood – just smarter wood.
Advantages in Moisture-Prone Environments
Because the layers pull against each other, engineered flooring doesn’t cup or warp like solid.
That’s why we use it in basements, kitchens, or over radiant heat.
When we install on concrete, we always lay a vapor barrier – the NWFA recommends moisture differences under 4 percent between slab and plank.
And installation? Plenty of options.
Some planks click together and float; others get glued or stapled.
We choose by room conditions, not marketing claims.
Veneer Thickness and Refinishing Limits
Here’s the catch – veneer thickness decides how many lives that floor has:
0.6 mm = a quick buff and coat only
2 mm = one full sanding
4–6 mm = two to three refinishes – almost like solid performance
I always tell clients: pay a little more for thicker veneer.
You’ll thank yourself twenty years from now when a light sanding brings it right back.
Comparing Solid vs Engineered Hardwood
Durability and Dimensional Stability
Durability isn’t just a number – though for reference, hickory hits about 1,820 lbf and red oak roughly 1,290 lbf on the Janka hardness scale.
Those numbers come from testing by the
U.S. Forest Products Laboratory
,
a federal research center that studies how different woods respond to force, wear, and long-term use.
The Janka test they publish measures the pressure needed to press a small steel ball halfway into a wood sample –
basically a scientific way to show how tough each species really is.
That data gives refinishers and installers a solid benchmark when judging how a floor will handle dents, furniture legs, and years of traffic.
Still, numbers only tell part of the story.
What matters is how the floor behaves day to day.
Solid oak takes heavier dents and keeps that old-school density underfoot, while engineered stays flatter through winter and summer.
When the air swings from dry to damp, engineered just rides it out with less movement and fewer gaps.
If you’re comparing species, our piece on the
hardwood hardness scale
shows what those numbers actually feel like once the floors are under your feet.
Cost, Installation, and Long-Term Maintenance
Cost changes more with method than material.
Nail-down solid needs a wood subfloor and extra labor; click-lock engineered goes down fast.
On average, solid runs $10–$15 per square foot installed, while engineered averages $8–$13.
Maintenance is about the same – vacuum regularly, control humidity, and skip the wet mops.
Refinishing is where solid still wins: it just has more wood to work with.
Feature
Solid Hardwood
Engineered Hardwood
Core Structure
Single solid wood
Multi-layer plywood / HDF core
Refinishing Potential
5–7 times
1–3 times (depends on wear layer)
Moisture Resistance
Low – needs stable humidity
High – cross-laminated core resists cupping
Installation Options
Nail / Staple only
Nail / Glue / Float
Average Cost (Installed)
$10–$15 / ft²
$8–$13 / ft²
Ideal Rooms
Living areas, bedrooms
Basements, kitchens, condos
Comfort, Sound, and Thermal Performance
Solid floors feel heavier – that deep, confident knock when your heel hits oak.
Engineered can sound a little hollow if it’s floating, though a good cork or foam underlayment helps soften the echo.
Over radiant heat, engineered spreads warmth evenly; solid sometimes dries out along the seams if humidity isn’t kept steady.
Environmental and Resale Considerations
Engineered flooring uses less hardwood per square foot, which helps conserve lumber.
Many quality lines carry FSC or CARB 2 certifications for sustainable sourcing and low emissions.
For resale value, both make a strong impression – most buyers just want “real wood,” and both qualify.
If you’re planning a remodel for long-term value, check out our guide on
how hardwood floors increase home value
to see how homeowners typically gain after installation or refinishing.
Choosing the Right Type for Each Room
Every room has its own personality – some humid, some quiet, some full of traffic.
Here’s how we usually guide homeowners:
Room
Recommended Type
Notes from the Field (Wood Species & Tone)
Living Room / Dining Area
Solid or Engineered
Red oak or hickory – warm mid-tones, both perform well; engineered handles radiant heat better
Bedrooms
Solid Hardwood
Maple or walnut – smooth grain, cozy palette, low moisture risk
Kitchens
Engineered
White oak or birch – neutral hues, handles spills and humidity swings better
Basements / Lower Levels
Engineered only
Ash or hickory – tough grain, glued or floated over slab with vapor barrier
Hallways / Entryways
Solid or Thick Engineered
Hickory or cherry – hard surface, darker tones hide wear
Living Room / Dining Areas
These rooms stay steady through the seasons, so either flooring works.
Solid oak brings that deep, classic feel, while engineered fits perfectly over radiant-heat systems
and handles temperature shifts with less fuss.
Bedrooms
Quiet, dry, and comfortable – solid wood feels right at home here.
It softens sound and can be refinished decades later without losing character.
Keep the air balanced, and it’ll look just as good after twenty years of footsteps.
Kitchens and Bathrooms
Moisture’s the wild card.
Engineered flooring performs better in kitchens when glued tight and seams are sealed with
a durable high-traffic hardwood floor finish
.
Bathrooms are trickier – a small powder room might handle engineered if ventilation is solid,
but full baths with daily moisture aren’t worth the risk.
Basements and Lower Levels
That one’s easy – engineered only.
Solid wood doesn’t play well with concrete or humidity swings.
A floating engineered setup lets the slab breathe and keeps the surface flat season after season.
Maintenance, Refinishing, and Longevity
Keeping hardwood floors looking their best is about timing, care, and knowing the limits of each type.
How Refinishing Cycles Differ
Solid floors can usually take a deep sanding every 15–20 years – plenty of time between makeovers.
Engineered floors depend on the veneer thickness: some can handle one full sanding,
others maybe two or three before the top layer runs thin.
Before any hardwood floor refinishing job, we always check the wear layer first to see what’s safe to sand.
Thin veneers – anything under 2 mm – get a light screen and recoat rather than a full cut.
That quick touch-up adds another five to seven years of life without risk.
And
keeping dust from sanding hardwood floors under control
is part of the craft – proper vacuum systems and sealed containment keep the air clear
and prevent the fine haze most folks still expect from old-school sanding.
Cleaning, Humidity Control, and Finish Upkeep
Clean: Use a microfiber mop or soft-brush vacuum.
Skip: Steam mops or soaking wet cloths, which damage the finish.
Humidity: Keep levels around 35–55%. Use a humidifier in winter and a dehumidifier in summer if needed.
Recoat: Apply every 3–5 years with waterborne polyurethane for optimal longevity.
Factory aluminum-oxide finishes last longest but are tougher to sand later.
Waterborne finishes dry faster and have lower odor.
Choose the finish based on what matters most to you – long-lasting durability or easy maintenance.
Professional Refinishing Advice from 1 DAY® Refinishing
Our pros use dust-contained sanding with HEPA vacs – no fog of sawdust over your couch,
no haze drifting through the hallway.
You can breathe easy while we work – that’s what true HEPA filtration is built for.
According to the EPA, certified
HEPA filters capture 99.97 percent of airborne particles
as small as 0.3 microns, keeping fine wood dust out of the air and off your furniture.
It’s the same standard used in hospitals and labs, which makes a big difference when we’re sanding inside someone’s home.
For solid floors, we start coarse – 36-grit – then move through 60, 80, and 100 before buffing and coating.
Each pass levels the surface while the HEPA vac stays locked on, pulling away every bit of fine dust.
Engineered floors? We baby them – usually a 120-grit screen only – because once you cut through that veneer, it’s game over.
And don’t wait until boards turn gray or black.
Once stains dive deep, sanding might not save them.
Catch wear early – a light recoat’s way cheaper than a rescue job.
If you’re unsure which type you have,
contact 1 DAY® Refinishing
.
We’ll check veneer thickness and tell you straight – refinish, recoat, or replace.
Our crews handle all of it with clean air and clean results from start to finish.
Finding What Fits Your Home’s Rhythm
So … which one’s better? Honestly, it depends on your house – and you.
Want that heritage feel and the freedom to refinish again and again?
Solid’s your pick.
Need stability through every humidity swing or radiant-heat setup?
Engineered’s got your back.
Both can look incredible. Both last decades if you treat them right.
The real trick is matching the floor’s personality to your home’s rhythm.
At 1 DAY® Refinishing, we’ve helped homeowners make that call for years –
sometimes bringing century-old oak back to life through
careful hardwood floor refinishing
,
sometimes giving new engineered floors a tone and finish that fit the space just right.
A lot of folks think refinishing’s just sanding and coating, but we like to say,
“It’s more like giving the wood a reset – letting it breathe again.”
Whether it’s a solid oak revival or an engineered refresh, we’ll help your floors look and feel right for the life you live.
Hardwood floors carry their stories in every step – the creaks, the dull patches, that one board that catches the light differently than the rest.
Over the years, life leaves its mark, and sanding is how we start rewriting those stories.
At 1 DAY® Refinishing, our crews know that hum of a drum sander when it’s tuned just right – that low, steady buzz that tells you the grit’s biting clean.
It’s not about fancy tools; it’s about rhythm, patience, and the kind of skill that only comes from doing this work day after day.
Before any machine starts, we inspect and prep. Furniture moves out, vents get sealed, airflow’s balanced, and lights drop low so every scratch shows before the first pass.
Using drum, edge, and orbital sanders with HEPA vacuums, our crews move through a four-stage grit sequence, blending edges and corners until the floor feels seamless.
A full sanding cycle takes about a day per room – maybe two if the boards are uneven – and we clean between every pass to keep the air clear and the wood breathing right.
This quick overview is just the start. What follows is the full walk-through – the process we’ve refined over years, the one that turns long workdays into floors that look new again by the time morning light hits them.
Inspecting the Floor
Before any machine rolls in, we spend time reading the floor. Every board has history.
First thing – we check the wear layer. Older hardwoods can be paper-thin, and one heavy pass can take them out for good.
We set every nail head down flush; one proud nail can tear a sanding belt in seconds.
Different woods, different behavior. Maple’s tough and slow, oak’s smooth, and pine... well, pine dents if you breathe wrong.
If we see cupping or uneven spots, that usually points to moisture or movement underneath. Happens a lot after wet seasons.
We’ve got a full piece on
how to draw moisture out of wood floors
if you want to see how we deal with that.
We run a hand across the grain – feeling for wax, ripples, or grit. A quick water drop tells the rest: if it beads, there’s old finish to remove.
If it soaks in, that surface is ready. That tiny check saves hours later.
Clearing & Protecting the Space
Prep’s the unsung hero. Miss one vent or skip a doorway and, trust me, dust will find its way into every corner of the house.
At 1 DAY® Refinishing, we strip the room to its bones — furniture, curtains, vents, all of it.
The space has to feel bare before the machines start humming.
Then we seal everything tight with plastic and tape so the rest of the house stays clean and the client doesn’t spend a week chasing dust.
Lighting’s another little secret. We drop lights low to the floor; raking light tells the truth about every ridge or mark that overhead lighting hides.
Airflow’s its own balancing act — one cracked window, one fan drawing outward, never a crosswind.
Keeps the air breathable but calm. It’s routine now, but still satisfying when a client says, “Can’t believe how clean you left it.”
We hear that one a lot — and we like hearing it.
Tools & Gear – What We Bring to the Job
Each floor gets the same lineup of machines and safety gear. Nothing fancy – just reliable equipment we maintain ourselves.
Equipment
Purpose
Typical Usage Time
Drum Sander
Main machine for open floor sections
≈ 70 %
Edge Sander
Works along walls and tight corners
≈ 20 %
Orbital / Buffer
Final blending and screening
≈ 10 %
Shop Vacuum
Collects dust between passes
All stages
Extension Cords
Keeps power safe and steady
Setup
Respirator Mask
Filters fine wood dust
Always
Hearing Protection
90–100 dB equipment
Always
Knee Pads / Gloves
Comfort and grip
As needed
We always test every sander on scrap before starting. A misaligned drum leaves chatter marks that no finish can hide. That kind of detail – we never skip it.
Choosing the Right Sandpaper Grits
Getting the grit sequence right is where experience really shows. We pick it based on the floor’s age, coating, and hardness.
Stage
Grit Range
Purpose
First Cut
36–40
Removes finish, flattens boards
Second Cut
50–60
Smooths first-pass marks
Third Cut
80
Refines texture for sealing
Final Screen
100–120
Evens tone before coating
For dense species like maple, we’ll slot an extra grit step in. Softer woods skip one.
When belts heat up and the air smells faintly like resin – that’s dull paper. We swap it right away.
Burning wood wastes time and ruins edges. Our refinishers change paper fast, sand slow – that’s the formula.
Keeping Dust Under Control
Wood dust doesn’t ask for permission – it travels. So before we start, our crew locks down the space tight.
According to a 2017 study published by PMC (PubMed Central),
sanding creates fine dust that can stay in the air for hours – which is why every sander we run connects to a HEPA vacuum rated for 99% filtration.
The dust bags get emptied midway through each pass. You can hear when they fill – airflow shifts and the tone goes flat. We catch that before it happens.
A small fan exhausts the air outside. That steady outward pull keeps the workspace clean and keeps clients’ homes from filling with dust.
The First Pass – Heavy Sanding and Leveling
This first cut sets the tone. The drum lowers while we walk forward – never while standing still.
You can feel it the instant the grit starts biting: a firm pull, a low growl, that faint smell of stripped finish.
We go with the grain, overlapping by a third. Uneven floors get a diagonal first pass to level them out, then a straight one to clean the pattern.
The goal here isn’t speed – it’s consistency. The surface should feel even, not polished.
Push too hard or stay too long in one spot, and you’ll end up with
over sanded wood
– thin spots that no finish can hide. That’s how you know you’ve taken off the right amount. The rest is finesse.
Edging and Corners – The Finishing Reach
Edging’s the part where patience wins. We start with the same grit we used on the field: 36, 60, then 80.
The edge sander stays flat and steady – one tilt, and you’ll leave a ring that flashes under finish.
Our crew at 1 DAY® Refinishing works clockwise, blending those perimeter zones into the main field with a random orbital sander.
That subtle transition – called feathering – makes the difference between a floor that looks “done” and one that looks perfect.
Clients don’t always see the work that goes into it, but they notice the result when the morning light hits every board just right.
Intermediate Sanding – Refining the Surface
Now the floor’s clear wood, ready for finesse. Between every grit, we vacuum – no exceptions. Even one stray grain from 40 grit can carve a swirl through 80.
You can hear when the paper dulls – the hum softens, and the dust gets heavier. That’s our cue to change.
Under raking light, we check every pass. You learn to trust both your ears and your eyes.
Each grit makes the floor smoother, but the goal stays the same – level, clean, no cross-scratches. Every pass builds toward that glass-smooth feel.
Final Sanding & Screening
This last step is where the floor turns silky. We run a 100–120 grit screen on an orbital or buffer, letting its weight glide.
No pressure – just patience. You hear a faint hiss when it’s right, like soft sand under your boots.
We move in wide overlaps to blend every section. Then we vacuum, wipe down with a tack cloth, and inspect under low light.
At that moment, the surface feels cool and smooth to the touch – ready for finishing.
That’s usually our pause point – a short break before moving into hardwood floor refinishing. Coffee tastes better when the boards look this clean.
Safety, Comfort & Air Quality
We work clean and safe, every time. Dust might look harmless, but it isn’t.
Every crew member wears a respirator with a real filter, plus goggles and ear protection.
According to the
NWFA Sand & Finish Guidelines,
the ideal range for sanding and finishing stability sits around 35–55 % RH and 18–24 °C, and that’s exactly where we keep our rooms for smooth, consistent results.
Knee pads, gloves, hydration – all part of the day. After years of doing this, we’ve learned comfort is safety.
No shortcuts, no skipped gear – that’s how we keep crews healthy and jobs consistent.
Cleanup & Final Prep
Once sanding’s done, we treat cleanup as part of the craft. Every wall, vent, and corner gets vacuumed twice.
Then we go over the floor with tack cloths to pull the last trace of dust.
We patch nail holes or cracks using color-matched filler, hand-sand the spots flat, and do one last inspection under angled light.
No swirl marks, no chatter – only smooth grain. When everything passes, we prep for finishing. That’s the moment clients start smiling – they can already see the transformation.
And if a homeowner ever started a job and called us halfway through, we finish it without judgment. Happens more often than you’d think.
Wrapping It Up the Right Way
Sanding floors isn’t glamorous, but it’s honest work. You hear the machines hum, smell the wood dust, see the grain return – that’s the reward.
Every time we finish a job, there’s that second when sunlight hits the floor and it looks alive again.
Smooth, clean, quiet underfoot. That’s when we know it’s right.
So yeah – good floors aren’t rushed, they’re revealed.
And if you’d rather skip the noise and the learning curve, that’s fine. Our pros at 1 DAY® Refinishing handle the full process start to finish – dust-free, clean, and steady.
Hardwood floors are a cherished feature in many homes, offering a timeless elegance and warmth that enhances any space. However, over time, these floors can become worn and scratched, prompting homeowners to consider refinishing as a viable option. Understanding the costs associated with hardwood floor refinishing in Calgary is essential for making informed decisions. This article delves into the various factors that influence the cost of refinishing hardwood floors, providing a comprehensive guide for homeowners.
Hardwood Floor Refinishing Explained
Hardwood floor refinishing is the process of restoring your wood floors to their original beauty. This involves sanding down the top layer of the wood to remove scratches, dents, and the old finish. After sanding, a new stain or sealant is applied to protect the wood and enhance its appearance.
Benefits of Refinishing:
Cost-Effective: Refinishing is generally more affordable than replacing hardwood floors entirely.
Aesthetic Improvement: It revitalizes the look of your floors, making them appear new again.
Increased Home Value: Well-maintained hardwood floors can significantly boost your property’s market value.
The refinishing process typically involves several steps. First, the floors are cleaned thoroughly to remove any dirt and debris. Next, a sanding machine is used to strip away the old finish. This step is crucial for smoothing out any imperfections and preparing the wood surface for a new coat. Finally, a sealant or stain is applied to protect the wood and give it a fresh look.
While refinishing can breathe new life into your floors, it’s important to understand that not all hardwood floors can be refinished. Some may be too thin or damaged to withstand the sanding process. Therefore, it’s vital to assess the condition of your floors before deciding to refinish them.
Factors Influencing Refinishing Costs
Several elements contribute to the overall cost of refinishing hardwood floors in Calgary. Understanding these factors can help homeowners budget effectively and avoid unexpected expenses.
1. Square Footage
The size of the area to be refinished is one of the most typically cost determinants. Larger spaces will naturally incur higher costs due to the increased labour and materials required.
Area Size
Estimated Cost Range
100 sq ft
$300 – $800
400 sq ft
$1,200 – $3,200
1,000 sq ft
$3,000 – $8,000
2. Type of Wood
Different wood species have varying hardness levels and require different refinishing techniques. Common woods like oak and cherry are generally less expensive to refinish compared to denser varieties like maple or mahogany.
Softwoods (e.g., Pine): $4 – $7 per sq ft
Hardwoods (e.g., Oak, Cherry): $3 – $5 per sq ft
Dense Hardwoods (e.g., Maple, Mahogany): $6 – $8 per sq ft
3. Condition of the Floors
The existing condition of the hardwood floors plays a crucial role in determining the cost. Floors with deep scratches, stains, or damage will require more extensive preparation and repairs, which can increase the overall expense.
Minor Repairs: $6 – $12 per sq ft
Subfloor Repairs: $3 – $10 per sq ft
The Refinishing Process
Understanding the refinishing process can help homeowners appreciate the costs involved. The process typically includes several key steps, each contributing to the final price.
1. Assessment
Before any work begins, a thorough assessment of the floors is necessary. This evaluation helps determine the extent of damage and the type of refinishing required.
2. Sanding
Sanding is a critical step in the refinishing process, as it removes the old finish and prepares the wood for staining. The cost of sanding can vary based on the depth required and the equipment used.
Basic Sanding: $0.50 – $3 per sq ft
Dustless Sanding: $5 – $8 per sq ft
3. Staining and Finishing
After sanding, homeowners can choose to stain the wood to achieve a desired colour. The type of finish applied also affects the cost.
Staining: $1 – $3 per sq ft
Oil-based Polyurethane: $20 – $50 per gallon
Water-based Polyurethane: $30 – $55 per gallon
Labour Costs
Labor costs are a significant component of the Calgary hardwood floor refinishing cost, often accounting for up to 80% of the total expense. The hourly rates for flooring professionals can vary widely based on experience and location.
Hourly Rates: $60 – $160 per hour
Geographic Variations Labour costs can differ based on the region within Calgary. Urban areas may have higher rates compared to suburban locations.
Complexity of the Job
Jobs that involve intricate designs, tight corners, or multiple rooms may require more time and expertise, leading to increased labour costs.
Additional Services and Considerations
When budgeting for hardwood floor refinishing, homeowners should also consider potential additional services that may be required.
Furniture Moving
Some contractors include furniture moving in their service, while others may charge an additional fee ranging from $20 to $50 per room.
Cleanup Services
Post-job cleanup is another factor to consider. Some companies include this in their pricing, while others may charge an hourly rate for cleanup services.
Average Costs in Calgary
Understanding the average costs associated with hardwood floor refinishing in Calgary is essential for budgeting and planning your project effectively. Here, we provide a detailed overview of typical prices to help guide your expectations.
Cost Breakdown
Service
Average Cost (per sq. ft.)
Sanding
$1.50 – $3.00
Staining
$1.00 – $2.00
Finishing
$0.50 – $1.50
Total (Basic Refinishing)
$3.00 – $6.50
Additional Services (Repairs, Custom Staining)
Varies based on complexity
Influences on Average Costs:
Location: Prices can vary based on the specific area within Calgary, influenced by local market conditions and contractor availability.
Material Costs: Fluctuations in material costs, such as the price of stains and finishes, can impact the overall cost of refinishing.
Contractor Rates: Rates charged by different contractors can vary, so obtaining multiple quotes is advisable to ensure competitive pricing.
Considering these average costs and influencing factors will help you develop a realistic budget for your refinishing project, ensuring you are well-prepared for any financial commitments.
Choosing the Right Contractor
Selecting a reputable contractor is crucial for ensuring a successful refinishing project. Homeowners should consider the following when choosing a flooring professional:
Experience and Expertise
Look for contractors with a proven track record in hardwood floor refinishing. Experienced professionals are more likely to deliver high-quality results.
Customer Reviews
Reading customer reviews and testimonials can provide insight into a contractor’s reliability and quality of work.
Detailed Estimates
Request detailed estimates from multiple contractors to compare pricing and services offered. This will help you make an informed decision.
Maintenance Tips for Hardwood Floors
Once your hardwood floors have been refinished, proper maintenance is essential to prolong their lifespan and maintain their beauty.
Regular Cleaning
Regularly sweep or vacuum your hardwood floors to remove dirt and debris. Use a damp mop with a suitable hardwood floor cleaner to maintain shine.
Humidity Control
Maintaining proper humidity levels in your home can prevent cracks and gaps in hardwood floors. Consider using a humidifier during dry months.
Protecting from Scratches
Place felt pads under furniture legs and avoid wearing shoes with hard soles on hardwood floors to minimize scratches.
Summary
Refinishing hardwood floors in Calgary is a worthwhile investment that can enhance the beauty and value of your home. By understanding the various factors that influence the cost, homeowners can make informed decisions and choose the right professionals for the job. With proper maintenance, refinished hardwood floors can provide lasting beauty and functionality for years to come. For those considering refinishing their hardwood floors, it’s advisable to start with a thorough assessment and gather quotes from multiple contractors to ensure the best possible outcome.
Did you know that hardwood flooring refinishing cost typically ranges from $3 to $8 per square foot in Canada, potentially adding up to thousands for an average home? Many homeowners face sticker shock when they receive quotes for restoring their tired floors to their former glory. Hardwood floor refinishing in Canada varies significantly based on your location, with urban centres like Toronto and Vancouver commanding premium rates compared to smaller communities. However, understanding what drives these costs presents numerous opportunities to save money without sacrificing quality. From timing your project strategically to knowing which tasks you can handle yourself, the right approach can potentially reduce your overall expenses by 20-30%.
What Drives Refinishing Costs
The complexity of hardwood floor refinishing costs stems from several interrelated factors that affect your final invoice. Looking beyond the basic price range, let’s examine the core elements that determine what you’ll pay.
Square footage and layout complexity
Square footage forms the foundation of refinishing cost calculations. Smaller projects (under 100 sq ft) typically cost between $260-$800, while medium-sized areas (400 sq ft) range from $1,200-$3,200. For larger homes requiring 1,000+ sq ft of refinishing, expect to budget $3,000-$8,000.
Nevertheless, the total area tells only part of the story. Layout complexity substantially impacts your final bill. Projects involving numerous small rooms with closets require more detailed work than open-concept spaces. Consequently, expect to pay a premium for intricate layouts with:
Multiple doorways and transitions
Staircases (averaging $50-$100 per stair tread)
Tight corners requiring special equipment
Separate areas needing individual treatment
Many contractors establish minimum project fees—often around $2,000 —regardless of size, making small single-room projects relatively expensive per square foot. Conversely, larger projects over 3,000 sq ft might qualify for modest bulk discounts.
Labour rates across Canadian provinces
Labour constitutes approximately 80% of your refinishing costs, making geographic location a major price determinant. Urban centres generally command higher rates due to increased demand and higher cost of living.
Professional floor refinishers typically charge between $2.50-$11.15 per square foot for labour alone (most often $2.50-$7 in smaller communities), or $40-$225 hourly, depending on your location. This substantial variance explains why identical projects might cost significantly different amounts in various provinces.
For instance, metropolitan areas like Toronto or Vancouver typically command premium rates compared to smaller communities. Furthermore, regional economic differences create notable pricing variations even between neighbouring provinces.
Material types and finish options
Your flooring material significantly influences refinishing costs. Standard woods like oak and cherry typically cost $3.00-$6.00 per square foot to refinish, while denser specialty woods demand higher prices:
Wood Type
Refinishing Cost (per sq ft)
Bamboo
$2.00-$6.00
Oak/Cherry
$3.00-$6.00
Pine
$4.00-$7.00
Mahogany
$6.00-$9.00
Maple
$6.00-$9.00
Additionally, the refinishing process involves several components, each adding to the total cost:
Basic sanding: $0.50-$3.00 per square foot
Staining (optional): $1.00-$3.00 per square foot
Finish application: $1.00-$2.50 per square foot
Your choice of finish notably affects both price and performance. Water-based polyurethanes (like Bona Traffic HD at approximately $150 per gallon) offer faster drying times but generally cost more initially. Oil-based finishes may be less expensive upfront but require longer drying periods, potentially balancing out the cost advantage.
Special finishes such as acid-cured finishes or penetrating oils introduce additional complexity and typically command premium pricing due to their specialized application requirements and higher material costs.
Beyond these core factors, several other elements can influence your refinishing budget, including subfloor condition, repair needs, and specific design requirements—all considerations we’ll explore in subsequent sections.
Hidden Costs That Catch Homeowners Off Guard
Beyond the base refinishing price, many Canadian homeowners encounter unexpected expenses that can quickly inflate their hardwood flooring refinishing cost. Being aware of these hidden charges beforehand helps you prepare a more realistic budget.
Furniture moving and storage fees
Most refinishing quotes don’t automatically include furniture relocation services. If you opt for professional help, expect to pay between $20-$50 per room for furniture moving. For homes with multiple rooms needing refinishing, these costs accumulate rapidly.
Storage solutions present another expense worth considering:
Temporary in-home storage: Using spare rooms works for smaller projects but requires careful planning to avoid blocking floor access
Garage storage: More economical but lacks temperature control that sensitive or antique furniture might require
Storage units: Offers climate-controlled options but necessitates truck rental and additional labour
Portable storage containers: Delivered directly to your home, eliminating the need to transport furniture to off-site locations
For larger homes, furniture relocation and storage can add $100-$300 per room to your total project cost. Naturally, moving furniture yourself saves money, albeit at the expense of convenience and potential injury risk.
Subfloor repairs and prep work
Once your existing flooring is stripped back, underlying issues often become apparent. Subfloor repairs typically cost between $3-$10 per square foot, depending on damage severity.
Common subfloor issues requiring immediate attention include:
Water damage requiring moisture testing ($75-$200) before repairs can begin
Warped or sinking areas indicating structural problems
Loose floorboards needing repair ($6-$10 per square foot)
Old carpet removal represents another potential charge, costing approximately $1.50-$4.00 per square foot if your floors have been previously carpeted. Meanwhile, permit fees for structural modifications might range from $50-$500 depending on your municipality.
Post-project cleanup services
Floor refinishing creates substantial dust despite contractors’ best efforts to contain it. Many homeowners underestimate cleanup costs because quotes often include only minimal post-project cleaning.
Professional post-project cleanup typically costs $50-$150 per hour. Some contractors include basic cleaning between sanding and finishing but charge extra for comprehensive cleaning afterward.
Rather than assuming cleanup is included, review your contract carefully. The estimate should clearly specify whether:
Dust containment systems are used during the project
Basic or thorough cleanup is included
Additional cleaning services are available at extra cost
You’re responsible for final cleanup
Failing to clarify these details beforehand often results in unexpected charges or the need to hire separate cleaning services after project completion.
Understanding these hidden costs helps prevent budget surprises. Instead of focusing solely on the per-square-foot price when comparing quotes, ask detailed questions about what’s included and what costs extra. This approach ensures your hardwood floor refinishing in Canada stays within your planned budget while delivering the beautiful results you expect.
How to Build a Smart Refinishing Budget
Creating a realistic budget for your hardwood floor refinishing project requires methodical planning and awareness of all potential expenses. Since sticker shock is common with these projects, a systematic approach will help you maintain financial control throughout the process.
Creating a detailed cost worksheet
Building a comprehensive cost worksheet begins with understanding typical pricing structures. Firstly, calculate your base refinishing costs by multiplying your square footage by the expected per-square-foot rate (typically between $3 and $8). For instance:
Small room (100 sq ft): $300-$800
Medium room (400 sq ft): $1,200-$3,200
Large open area (1,000 sq ft): $3,000-$8,000
Subsequently, factor in your specific floor type and desired finish. Standard woods like oak typically cost $3-$5 per square foot to refinish, whereas specialty woods like maple or mahogany range from $6-$8.
Indeed, your worksheet should separately itemize core services (sanding, staining, finishing) and potential additional charges. Standard quotes typically cover basic sanding ($1.00-$3.00/sq ft), optional staining ($1.50-$3.50/sq ft), and finish application ($1.00-$2.50/sq ft).
Setting aside a contingency fund
Unexpected expenses can add approximately 20% to your final bill, making a contingency fund essential. Experts recommend setting aside 10-15% of your total project cost for unforeseen issues.
This reserve particularly helps cover hidden problems like damaged floorboards ($6-$10/sq ft) or subfloor issues ($3-$8/sq ft) that often emerge once work begins. Accordingly, for a $3,000 refinishing project, a prudent contingency fund would range from $300-$600.
What to ask in contractor quotes
Obtaining detailed quotes from multiple contractors allows for meaningful comparisons. Although prices vary, ensure each estimate clearly specifies:
Inclusions and exclusions: Does the quote include furniture moving ($20-$50/room), carpet removal ($1.50-$4.00/sq ft), and post-project cleanup ($60-$120/hour)?
Preparation and repair costs: How will repairs be handled and billed? Are subfloor assessments included?
Process details: How many sanding passes will be performed? What type of finish will be used? What is the project timeline?
Additional savings opportunities: Ask about potential package deals for multiple rooms or off-season discounts that could reduce your overall hardwood flooring refinishing cost.
Ultimately, reliable hardwood floor refinishing in Canada depends on thorough preparation and clear communication with contractors. Through careful budgeting and informed questions, you’ll avoid financial surprises while ensuring your project delivers the beautiful results you desire.
Financing and Long-Term Value Considerations
Viewing your hardwood floor renovation as an investment opportunity reveals compelling financial benefits beyond the initial expense. For homeowners concerned about managing hardwood flooring refinishing cost, various payment options exist alongside impressive long-term returns.
Financing options available in Canada
Several payment solutions help make floor refinishing more accessible:
Buy now, pay later programs allow you to break down large purchases into manageable installments.
Flexible financing plans spread costs over time while freeing up your budget for other needs.
Deferred interest options offering 12-18 month promotional periods with no interest if paid within the term.
Equal monthly payment plans extending up to 36 months for larger projects.
These financing arrangements typically require credit approval, hence checking with local flooring companies about their specific offerings proves beneficial. Many Canadian contractors partner with financial institutions to provide these services directly.
ROI from refinishing vs replacing
Looking at return on investment, hardwood floor refinishing stands out as exceptionally cost-effective. The 2022 Remodeling Impact Report from NAR and NARI found refinishing hardwood floors recovered 147% of project costs at resale, whereas installing new wood flooring recovered 118%.
This substantial difference makes refinishing particularly attractive from an investment perspective. The initial outlay for refinishing ($3.50-$8.00 per square foot) often yields returns exceeding the original investment upon resale.
How refinishing affects home resale value
The impact of refinished hardwood floors on property values is striking. Studies by the National Wood Flooring Association consistently show refinished hardwood floors can increase a home’s value by 5-10%.
More specifically, homes with refinished hardwood floors tend to:
Sell faster than comparable properties with worn flooring
Command a premium price, sometimes 10% higher than similar homes without wood floors
Attract a wider pool of potential buyers
Make stronger first impressions during showings
In practical terms, if a home valued at $200,000 invested $10,500–$16,000 in hardwood flooring refinishing, it could potentially sell for $223,500–$232,000—yielding a strong return on investment. Likewise, research from the Real Estate Staging Association indicates homes with refinished hardwood floors often sell for at least 2.5% above initial market value.
Effectively, this translates to an additional $2,500–$3,000 for every $100,000 of home value. Such impressive figures explain why many real estate professionals consider hardwood floor refinishing in Canada among the smartest pre-sale improvements homeowners can make.
Top Ways to Save Money Without Cutting Corners
Savvy homeowners can reduce their hardwood floor refinishing expenses without sacrificing quality by implementing these strategic approaches. With thoughtful planning and selective DIY efforts, you can maintain excellent results while keeping costs manageable.
Book during off-peak seasons
Summer offers excellent conditions for hardwood floor refinishing projects. With children out of school and more flexible schedules, July provides ideal timing for Canadian homeowners. Moreover, many homeowners schedule refinishing while on vacation, returning to beautifully restored floors without disruption to daily routines.
A common misconception involves humidity concerns during warmer months. In reality, as long as your home maintains consistent temperature and humidity through air conditioning or dehumidification, summer proves excellent for refinishing projects.
Do simple tasks like moving furniture yourself
One straightforward way to reduce hardwood flooring refinishing cost involves handling certain tasks personally:
Move furniture out and back into rooms yourself, saving $25-$65 per room
Clean the space after completion rather than paying for cleanup services
Remove carpet before professionals arrive if your floors were previously carpeted
Handle baseboard removal independently
These seemingly small contributions add up to substantial savings on your overall project cost.
Bundle services for better pricing
Explore package deals when planning your refinishing project. Essentially, you might secure better pricing when bundling services such as refinishing hardwood stairs and changing stain color alongside your main flooring project. Ask contractors about potential discounts for combining multiple aspects of your renovation.
Compare multiple contractor quotes
Obtaining at least three professional estimates before signing a contract represents one of the most effective cost-saving strategies. This approach not only provides a better understanding of fair market pricing but also offers a broader selection of services and features.
When comparing quotes, examine both price and quality considerations. Occasionally, contractors offering significantly lower prices might cut corners on preparation or materials.
Know when DIY is worth it
For budget-conscious homeowners, DIY refinishing presents considerable savings opportunities. However, proceed cautiously as hardwood floors require gentle handling—improper techniques risk damaging them severely, potentially leading to costly replacements.
Consider partial DIY approaches as alternatives to full professional service. For instance, buffing your floors costs only $1.00–$2.50 per square foot—significantly less than complete refinishing. Similarly, addressing small scratches and dents through targeted repairs before scheduling comprehensive refinishing can extend your floor’s lifespan while reducing expenses.
Summary
Hardwood floor refinishing is a significant investment for Canadian homeowners, with costs typically ranging from $3 to $8 per square foot depending on location, wood type, and finish. Understanding cost drivers and hidden expenses like furniture moving and subfloor repairs helps homeowners plan effectively and set aside a 10–15% contingency fund. With proper planning, refinishing can recover up to 147% of project costs at resale and increase a home’s value by 5–10%, making it a smart and valuable home improvement.
Hardwood floor refinishing in USA costs significantly less than complete replacement, with repairs ranging from $478 to $1,624 compared to replacement costs of $2,480 to $7,028 or more. However, many homeowners aren’t aware that most hardwood floors can be refinished up to 10 times throughout their lifetime, making restoration a practical alternative to costly replacement. Fortunately, understanding common hardwood floor problems like water damage, cupping, and buckling can help you make informed decisions about restoration.
Rather than immediately calling a hardwood floor refinishing company, you might consider whether your floors simply need cleaning and buffing or if they require professional refinishing products to address issues like dullness and fading. In fact, learning how to restore hardwood floors properly not only improves their appearance but also allows you to customize their look to suit your home’s esthetic
The Real Problems Behind Worn Hardwood Floors
Beneath the surface of your worn hardwood floors lies a range of issues that often go unnoticed until they become severe. Understanding these problems is essential before considering any hardwood floor refinishing in USA.
Surface scratches and dullness
The protective finish on hardwood floors inevitably wears down over time, making them increasingly vulnerable to damage. Surface scratches typically come from furniture legs, high heels, and dropped items. Moreover, everyday dirt and grit act as abrasives when walked upon, gradually dulling your once-gleaming floors. As the finish continues to deteriorate, previously minor scratches become more noticeable, creating that tired, worn appearance that diminishes your home’s esthetic appeal.
Water damage and discoloration
Water damage manifests through distinct signs including musty odors, staining, and discoloration. Unlike typical water stains that appear grayish, specialized hardwood floor restoration techniques are needed to address various discolorations. These include chemical stains from household products, iron stains from metal objects, and enzymatic discolorations that occur naturally within the wood. Furthermore, UV exposure causes wood to either darken or lighten over time—a natural process that varies by species.
Cupping, crowning, and buckling
Moisture imbalance leads to three primary structural issues in hardwood floors. Cupping occurs when excessive moisture beneath the floor causes board edges to rise higher than their centers, creating a concave shape. Conversely, crowning happens when more moisture exists on the floor’s surface, pushing the center of boards upward. In extreme cases, buckling can develop—where boards completely detach from the subfloor, rising several inches and creating serious trip hazards. These conditions typically result from flooding, leaks, or improper climate control.
Pet stains and odor issues
Pet urine presents unique challenges compared to regular water damage. The distinctive blackish-green color and persistent odor make these stains immediately identifiable. Since pets often urinate repeatedly in the same areas, these fluids penetrate deep into the wood, requiring specialized hardwood floor refinishing products. Unlike surface stains that can be cleaned away, pet stains often require either complete board replacement or staining the floor a darker color to mask the damage.
How to Restore Hardwood Floor the Right Way
Restoring your worn-out floors doesn’t always require a complete overhaul. Proper hardwood floor refinishing in USA involves understanding the right approach for your specific situation.
Cleaning and buffing before refinishing
Initially, determine if your floor needs full refinishing with a simple water droplet test. When water beads on the surface, your floor might only need cleaning and buffing rather than complete refinishing. A clean and buff involves no sanding of the actual wood. Instead, professionals deep clean your floors, buff them with an abrasive pad, and apply a fresh coat of finish. This approach works well for floors with surface-level wear and is substantially less invasive than full refinishing. Many historic homes maintain their hardwood’s appearance through annual screening and recoating.
Spot repairs vs full refinishing
Determining whether to perform spot repairs or full refinishing depends entirely on the extent and type of damage. Spot repairs address specific problems like scratches, dents, or isolated discoloration without refinishing the entire floor. This method is budget-friendly and minimizes disruption to your home.
Full refinishing, subsequently, becomes necessary when dealing with deep scratches, widespread damage, severely faded finish, or if you desire a completely new look for your hardwood floors. Full refinishing involves sanding down to bare wood, applying new stain, and sealing with protective finish.
Matching stain and finish for consistency
One of the most challenging aspects of hardwood floor restoration is achieving consistency in color and finish. Even boards of the same wood type often react differently to stains due to variations in cell structure, grain pattern, and moisture content. Prior to applying any stain, test it on an identical piece of wood or in an inconspicuous area.
For difficult matching situations, consider purchasing small cans of several color tones to find the perfect match or create a custom blend by mixing compatible stains (never mix oil-based with water-based products). Accordingly, always measure your ingredients precisely and record your formula for future reference. Remember that lighting conditions affect color perception—ensure you apply stain under the same lighting where the floor will be viewed.
Choosing the Right Finishing Products
Selecting the appropriate finishing products is pivotal in achieving a durable and aesthetically pleasing result. There are several factors to consider, including the type of wood, desired finish, and environmental conditions.
Wood Type: Different woods react differently to finishes. For instance, oak might require a different approach compared to cherry or maple. Researching the specific needs of your wood type can inform your choice of product.
Finish Type: Options range from oil-based to water-based finishes, each with its pros and cons. Oil-based finishes offer a richer color but take longer to dry, while water-based finishes dry quickly and have less odor. Consider your priorities when deciding which to use.
Durability and Maintenance: Think about the wear and tear your floors will endure. High-traffic areas might benefit from more robust finishes, such as polyurethane, which offers excellent protection against scratches and stains.
What Most People Don’t Know About Refinishing
There’s more to hardwood floor refinishing than meets the eye. Most homeowners are unaware of crucial limitations and considerations that affect long-term floor health and appearance.
How many times can a floor be refinished?
Solid hardwood floors can typically be refinished 8-10 times throughout their lifetime, although this depends entirely on their thickness. Standard 3/4-inch hardwood can withstand more refinishing cycles than thinner varieties. Generally, professionals remove about 1/32 inch of wood during each refinishing process. Therefore, floors with wear layers measuring at least 1/4 inch thick provide ample material for multiple refinishing cycles.
Risks of over-sanding and veneer damage
Over-sanding represents one of the most common yet preventable errors during hardwood floor refinishing in USA. Signs of excessive sanding include visible nail heads, thinning boards, and splintering edges. Furthermore, aggressive sanding can permanently damage the wood by creating dips, waves, or swirls visible after staining. Once you’ve removed too much material, replacement becomes your only option as the floor can no longer support additional refinishing.
Why engineered floors need special care
Engineered hardwood floors consist of a thin veneer of real wood atop multiple layers of plywood or fiberboard. Although these floors look identical to solid hardwood, they require specialized treatment during restoration. The veneer layer on engineered flooring typically measures between 0.6mm and 4.5mm thick, limiting refinishing opportunities to just 1-3 times throughout its lifespan. Consequently, many hardwood floor refinishing companies recommend screening and recoating for engineered floors rather than full sanding. This preserves the thin veneer while still refreshing the floor’s appearance.
Expert Tips to Extend Floor Life After Refinishing
After investing in hardwood floor refinishing in USA, proper maintenance becomes crucial for extending your floor’s lifespan. First and foremost, implementing these expert strategies will protect your investment for years to come.
Humidity and climate control
Maintaining indoor humidity between 35-55% and temperature at 60-80°F year-round prevents wood from expanding or contracting. Excessive humidity causes cupping or buckling, whereas low humidity leads to gaps between boards. Consider installing a dehumidifier in summer months and a humidifier during winter to maintain optimal conditions.
Using furniture pads and rugs
Felt pads work best for frequently moved items like dining chairs, while rubber pads provide stability for heavier furniture. Wait 14-18 days after refinishing before placing area rugs to allow complete curing. To prevent damage, place rugs in high-traffic areas with non-slip, breathable backing.
Routine cleaning and maintenance schedule
Regular cleaning with a microfiber dust mop prevents tiny grit particles from scratching your finish. Avoid wet mopping or cleaning products for 2-3 weeks after refinishing. In addition, immediately clean up spills to prevent moisture damage.
UV protection for sunlit areas
Hardwood floors fade over time from UV exposure—tropical woods typically darken while domestic species like oak and maple lighten. Install window treatments such as blinds or UV-blocking films to minimize sun damage. Equally important, rearrange furniture periodically to ensure even color development.
Summary
Hardwood floors remain a valuable investment that can last generations when properly maintained and restored. Through proper refinishing techniques, you can save thousands compared to complete replacement while preserving the character and charm of your existing floors. Before rushing into decisions, consider whether your floors need simple cleaning and buffing or comprehensive refinishing based on the extent of damage.
Hand scraped hardwood floors are a popular choice for homeowners who appreciate a rustic and antique aesthetic. These floors are crafted to have a unique, distressed appearance that exudes warmth and character. The hand scraping process involves artisans manually distressing each plank to create texture and variation. This technique not only enhances the wood’s natural beauty but also adds a timeless charm to any space.
The Refinishing Process for Hardwood Floors
Refinishing hardwood floors is a meticulous process that involves sanding down the surface to remove the existing finish and any imperfections. This is followed by applying new stain and a protective layer of polyurethane or another finish. The goal is to restore the floor’s original luster and extend its life by many years.
The refinishing process typically involves several steps:
Preparation: Clearing the room of furniture and other items, cleaning the floor thoroughly, and making any necessary repairs.
Sanding: Using a drum sander to remove the old finish and smooth out the surface.
Staining: Applying a new stain if desired, to alter or enhance the floor’s color.
Finishing: Applying a protective sealant to guard against future wear and tear.
Each step requires careful attention to detail to ensure the best results. Refinishing can breathe new life into old, worn-out floors, making them look brand new. However, the process can vary depending on the type of flooring, which brings us back to the question at hand: can hand scraped hardwood floors be refinished?
Can Hand Scraped Hardwood Floors Be Refinished?
The short answer is yes; hand scraped hardwood floors can indeed be refinished. However, the process is more complex than refinishing smooth hardwood floors. The unique texture of hand scraped floors demands a careful approach to preserve its character while restoring its finish.
Refinishing hand scraped hardwood floors requires expertise. The texture, which is a significant part of its appeal, can be compromised if not handled correctly. Traditional sanding methods can remove too much of the surface texture, diminishing the floor’s distinct look. Therefore, it’s essential to employ techniques that maintain the depth and variation of the scraping while ensuring a fresh, clean finish.
Because of this complexity, it’s advisable to seek professional help when refinishing hand scraped floors. Experienced artisans can carefully sand and refinish the floors, ensuring the original character is preserved. With professional care, your floors can maintain their charm for many more years, serving as a beautiful foundation for your home.
Factors to Consider Before Refinishing
Before deciding to refinish your hand scraped hardwood floors, there are several factors you should consider. These factors will help determine whether refinishing is the best option for your situation and how to proceed if it is.
Condition of the Floors: Assess the current state of your floors. If they have deep scratches, water damage, or significant wear, refinishing might be necessary. However, minor imperfections might not justify a full refinishing process.
Thickness of the Wood: The thickness of your hardwood affects how many times it can be sanded and refinished. If the floors have been refinished multiple times before, they may not withstand another round of sanding.
Budget and Timing: Refinishing floors is an investment of both time and money. Consider whether the cost fits within your budget and if you can accommodate the time needed for the process, which can take several days.
Taking these factors into account will help you make an informed decision about whether refinishing is the right choice for your hand scraped hardwood floors.
Advantages of Refinishing Hand Scraped Hardwood Floors
Refinishing your hand scraped hardwood floors offers several benefits that can enhance both the aesthetic appeal and functionality of your living space. Understanding these advantages can help you appreciate the value of undertaking this project.
Enhanced Appearance: Refinishing revitalizes tired floors, giving them a fresh, new look. The process can restore the original beauty of the wood, making it vibrant and lustrous once again.
Increased Longevity: By applying a new protective finish, refinishing can extend the life of your floors. This protective layer guards against future wear and tear, ensuring that your floors remain attractive and durable for years to come.
Cost-Effective Solution: Compared to replacing the entire floor, refinishing is a more economical option. It allows you to enjoy the benefits of a new-looking floor without the expense and hassle of a full replacement.
These advantages highlight the practical and aesthetic benefits of refinishing, offering a compelling case for considering this option for your hand scraped hardwood floors.
Common Challenges in Refinishing
While refinishing offers numerous benefits, it also presents certain challenges, particularly when dealing with hand scraped hardwood floors. Being aware of these challenges can help you prepare adequately and avoid potential pitfalls.
Preserving Texture: Maintaining the hand scraped texture is one of the biggest challenges. Standard sanding techniques can inadvertently smooth out the distinctive patterns, so a careful approach is necessary to preserve the floor’s unique character.
Matching Finishes: Achieving a consistent finish that matches the original can be tricky. This is particularly true if the floor has aged or if you want to alter the color slightly. Expert guidance may be required to ensure seamless results.
Time and Effort: Refinishing is a labor-intensive process that demands precision and patience. It involves multiple steps, including preparation, sanding, staining, and sealing, which can be time-consuming and require specialized skills.
By recognizing these challenges, you can better prepare for the refinishing process, ensuring that your project runs smoothly and delivers the desired results.
How to Prepare for Refinishing
If you decide to proceed with refinishing your hand scraped hardwood floors, proper preparation is crucial. Preparing your space and understanding what to expect can make the process smoother and more efficient.
Clear the Space: Remove all furniture, rugs, and decor items from the room. This will protect your belongings and provide the necessary space for the refinishing process.
Clean the Floors: Thoroughly clean the floors to remove dust, dirt, and debris. This ensures that the refinishing process starts on a clean surface, which is essential for achieving a smooth finish.
Coordinate with Professionals: If hiring professionals, communicate your expectations clearly. Discuss the desired finish, any specific concerns you have about preserving the floor’s texture, and the timeline for the project.
Finally, be prepared for some disruption during the refinishing process. The room will be unusable for several days, and the smell of the stain and finish may linger. Planning ahead can help minimize inconvenience and ensure a successful refinishing of your hand scraped hardwood floors.
Choosing the Right Finish for Hand Scraped Floors
Selecting the appropriate finish for your hand scraped hardwood floors is a critical step in the refinishing process. The finish not only enhances the floor’s appearance but also provides essential protection against wear and tear. There are several types of finishes to consider, each offering different benefits and aesthetic qualities.
Oil-Based Finishes: These finishes are known for their deep, rich hues and durability. They penetrate the wood, providing a long-lasting protective layer. However, they can take longer to dry and may emit strong odors during application.
Water-Based Finishes: Offering a clear, natural look, water-based finishes dry quickly and have a lower odor compared to oil-based options. They are ideal for those who prefer a less invasive refinishing process and a more environmentally friendly option.
Polyurethane Finishes: Available in both oil and water-based varieties, polyurethane finishes offer excellent durability and resistance to scratches and stains. They are a popular choice for high-traffic areas due to their robust protective qualities.
When choosing a finish, consider the level of gloss you desire—options range from matte to high-gloss—and how the finish aligns with your lifestyle and aesthetic preferences. Consulting with a professional can help you make an informed decision that enhances both the appearance and longevity of your hand scraped hardwood floors.
Professional vs. DIY Refinishing: What You Need to Know
Deciding between professional and DIY refinishing is a crucial consideration. Both options have their merits, but understanding the pros and cons of each can help you make an informed choice.
Professional Refinishing: Hiring professionals ensures expertise and precision, particularly important for preserving the hand scraped texture. Professionals have access to specialized tools and materials, and they can achieve consistent and high-quality results. However, professional services can be costly, so it’s important to weigh this against the potential benefits.
DIY Refinishing: Opting for a DIY approach can be more cost-effective and rewarding. It allows you to have hands-on involvement in the project, and you can work at your own pace. However, DIY refinishing requires a good understanding of the process and the right tools. Mistakes can be costly, possibly leading to unsatisfactory results.
Ultimately, the choice between professional and DIY refinishing depends on your budget, skills, and comfort level with the refinishing process. Consider these factors carefully to ensure the best outcome for your floors.
Is Refinishing Worth It?
Refinishing hand scraped hardwood floors can be a worthwhile endeavor, offering numerous benefits, from enhancing appearance to increasing durability. While the process is more complex than refinishing traditional hardwood floors, the results can be equally rewarding. If you’re ready to revitalize your hand scraped hardwood floors and restore their original beauty, consider taking the next step. Consult with flooring professionals or gather the necessary tools and materials for a DIY project.