What You Need to Know About Preventing Hardwood Floors from Squeaking

How to Prevent Hardwood Floors from Squeaking

Hardwood floors are supposed to feel solid. Quiet. The kind of floor you don’t think about when you walk across it. Then one day you hear it. That little squeak. Or worse, the one that follows you from the hallway into the bedroom every night.

From what we see in real homes at 1 DAY® Refinishing, squeaks rarely come from one big failure. They come from small movements adding up – a board shifts, a fastener flexes, the subfloor lifts just enough to make noise. You don’t see it, but you hear it. Especially when the house cools down at night.

Here’s the short answer. Many hardwood floor squeaks can be prevented if you catch them early. When noise is light, seasonal, or limited to a few spots, prevention usually means stopping movement – tightening the right fasteners, stabilizing the subfloor, or controlling indoor humidity. But when squeaks keep coming back or the floor feels bouncy, the noise is often a warning sign. This guide explains both – how to prevent squeaks before they get worse, and how to tell when the floor needs more than a temporary fix.

Quick Answer: How to Stop Hardwood Floor Squeaks

So… let’s get straight to it.

If the squeak is new, isolated, and light, you usually have options. If it’s loud, widespread, or keeps coming back, you’re probably looking at something structural.

When Squeaks Are Easy to Prevent

Squeaks tend to be manageable when they show up like this:

  • One spot that talks back when you step on it
  • Noise that comes and goes with the seasons
  • A floor that feels solid, even if it sounds annoying

This is the window where prevention actually works. Tightening the right fastener, stabilizing a small gap, or getting humidity under control can stop things from snowballing. On our repair projects, this is where we see the cleanest, longest-lasting results.

When Noise Signals a Bigger Problem

Now here’s the tricky part – people assume a squeak is just “old house noise.”

It’s not always.

When squeaks spread across rooms, come with bounce, or return right after you fix them, that’s usually a sign the movement is deeper. Subfloor attachment. Joist flex. Missed fasteners from the original installation. At that point, prevention alone won’t cut it.

Factors Affecting Hardwood Floors

Why Hardwood Floors Squeak in the First Place

Every squeak has the same root cause. Movement plus friction. That’s it.

Wood Movement, Friction, and Fasteners

Wood expands and contracts as moisture changes – and if you want a deeper breakdown of how moisture actually behaves inside wood, this guide on how to draw moisture out of wood floors explains it clearly. It’s normal. What’s not normal is when that movement has room to make noise.

A nail loosens just a hair. A staple flexes. The board lifts, then drops when weight hits it. That rubbing creates the squeak. You’d think tightening the fastener solves it every time. Sometimes it does. Sometimes it just shifts the noise a foot to the left.

Subfloor Gaps and Joist Movement

This is where things get louder.

If there’s space between the hardwood and the subfloor – or between the subfloor and the joists – you get vertical movement. You step, the floor dips, then snaps back. That snap is what you hear.

On real jobs, we see this a lot in older homes. Fasteners that barely caught the joist. Subfloor panels that weren’t glued. Everything looks fine until the house settles and starts talking back.

Seasonal Humidity Changes

Quiet all summer. Noisy all winter. That’s not random.

This is the same mechanism we see when floors weren’t given proper time to adjust early on – our article on hardwood floor acclimation goes deeper into how skipping that step creates long-term movement and noise. The U.S. Environmental Protection Agency recommends keeping indoor humidity in the 30%–50% range to reduce moisture-related material movement inside homes, which directly affects how wood floors expand, contract, and make noise.

That sharp squeak you only hear at night when the house cools down? Pretty classic humidity-driven movement.

How to Prevent Hardwood Floors from Squeaking

Preventing squeaks long-term means stopping movement, not just quieting sound.

Stabilizing the Subfloor and Fasteners

This is the heavy lifter. If you can eliminate vertical movement, you eliminate most squeaks.

A lot of this work happens from below. Reinforcing the subfloor to the joists with screws, adding construction adhesive where needed, shimming small gaps – none of it is glamorous, but it works.

Here’s how we usually break it down:

Cause of Squeak Preventive Fix
Loose fasteners Reinforce with screws
Subfloor gaps Shims or adhesive
Joist flex Blocking or reinforcement
Missed joists Correct fastener placement

Honestly, most squeak prevention lives in this table.

Reducing Friction Between Boards

Not every squeak comes from below. Sometimes boards rub against each other. Tight installs. Limited expansion space. Seasonal movement.

Reducing friction can mean targeted fastening or, in limited cases, dry lubricants. And yes, they can help – temporarily. If movement continues underneath, the sound usually finds a new way out.

Controlling Indoor Humidity

This part surprises homeowners every single time.

You can quiet a floor just by stabilizing humidity. Whole-home humidifiers, dehumidifiers, better HVAC balance – we’ve seen floors settle down without touching a single fastener.

Is it exciting? No. Is it effective? Very.

Preventive Fixes That Work Without Removing the Floor

Most people don’t want their floors ripped out, and that’s fair. The good news is, prevention rarely requires removal.

Effective options include:

  • Working from below whenever possible
  • Reinforcing only problem zones
  • Using screws instead of nails
  • Fixing the environment before chasing mechanical fixes

The goal isn’t silence today. It’s stability over time.

how to make hardwood floors less slippery

Preventive Fixes That Don’t Work (and Often Make It Worse)

Now, let’s talk about what usually backfires.

Temporary Lubricants and DIY Myths

Powders. Sprays. Internet hacks. They might quiet a squeak for a bit. They don’t stop movement.

Worse, they can contaminate joints or finishes, which makes real repairs harder later. We’ve walked into plenty of homes where the floor smells like graphite and still squeaks.

Over-Tightening Screws or Nails

Everyone thinks one screw will fix it.

Sometimes it does. Sometimes it wakes the whole floor up.

Over-tightening can split wood, strip joists, or force boards against uneven surfaces. Then you’re chasing new squeaks instead of solving the original one.

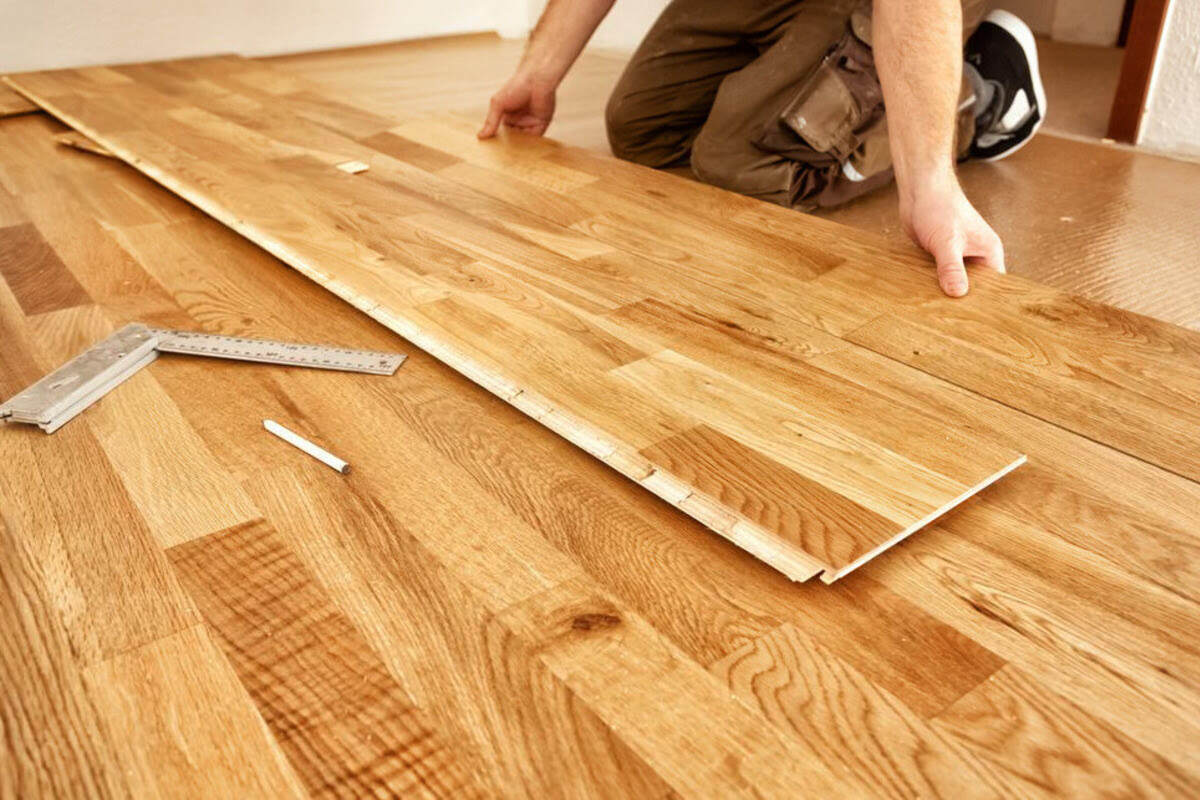
How to Prevent Squeaking During Refinishing or Repairs

Refinishing is actually one of the best times to deal with squeaks – if you do it right.

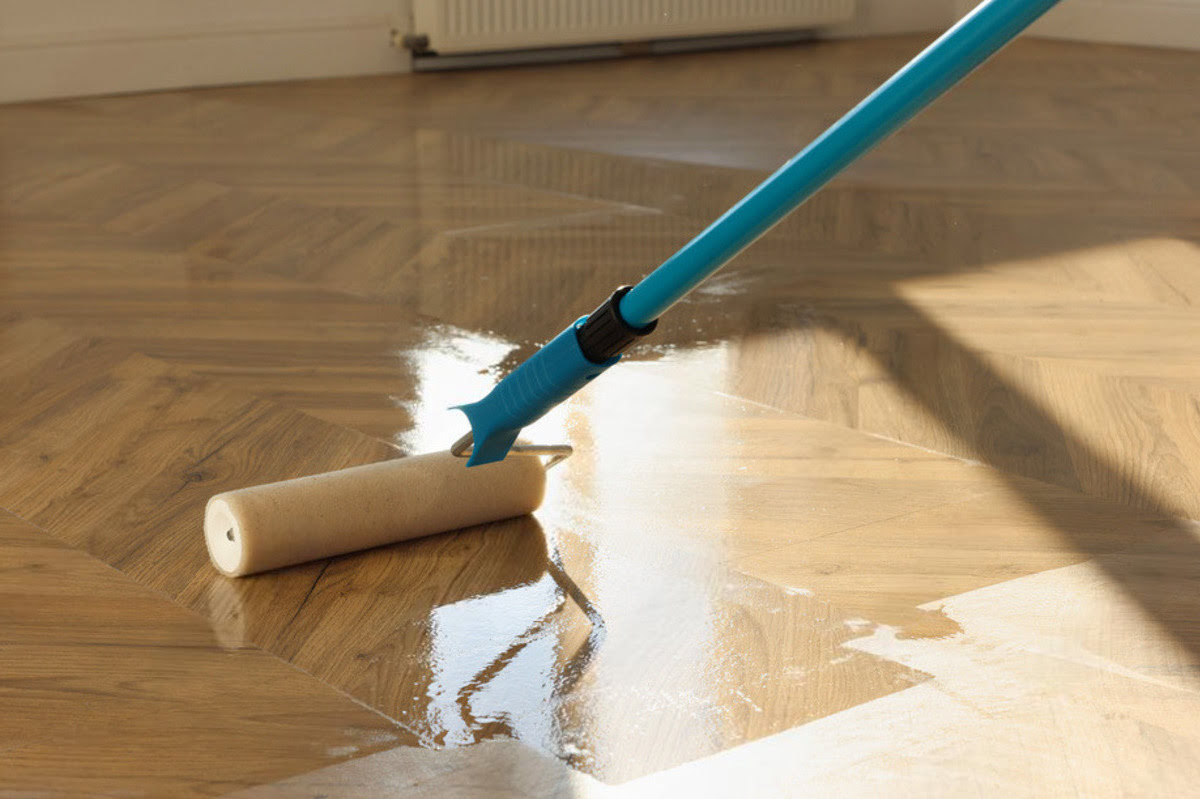
What Proper Refinishing Does (and Doesn’t) Fix

Refinishing is surface work. Sanding and finishing won’t fix structural movement by themselves. But the prep phase is where squeak prevention should happen.

On our hardwood floor refinishing projects, our crews always check for movement before sanding. Once the finish goes down, fixing squeaks gets riskier.

Prep Mistakes That Lead to Noise Later

Skipping subfloor checks. Ignoring small movement. Rushing the job.

Those shortcuts lock problems in place. This matters even more with engineered hardwood flooring, where aggressive fastening can damage the wear layer. Prevention during prep is cheaper, cleaner, and safer.

Preventive Measures to Avoid Hardwood Floor Creaking

When Squeaking Can’t Be Prevented Without Professional Help

Some floors just need more than a DIY fix. Knowing when to stop matters.

Signs of Structural or Subfloor Issues

You’re likely past prevention if you notice:

  • Bounce underfoot
  • Noise across multiple rooms
  • Growing gaps
  • Squeaks that return quickly

That usually means joists, subfloor attachment, or installation issues.

When a Long-Term Fix Requires a Pro

Here’s how we explain it to homeowners:

DIY Prevention Professional Repair
Localized squeaks Structural movement
Minor fastener issues Subfloor or joist problems
Stable floors Floors with bounce
Short-term improvement Long-term resolution

This same decision shows up when homeowners weigh polishing, recoating, or full refinishing – and honestly, the wrong call can lock in movement issues. If you’re on that fence, should you choose DIY or professional wood floor polishing lays out the tradeoffs clearly.

Keep Hardwood Floors Quiet

Keeping Hardwood Floors Quiet for the Long Term

Anyway, let’s bring this back to your floors.

Squeaks don’t automatically mean failure. They mean movement. The sooner you deal with that movement, the easier it is to keep things from getting worse.

From what we see on real jobs at 1 DAY® Refinishing, the quietest floors come from solid structure, controlled humidity, and smart prevention. Temporary fixes buy time. Stability solves the problem.

If you’re not sure what kind of noise you’re dealing with, or whether prevention is still on the table, that’s okay. Sometimes it’s a small adjustment. Sometimes it’s a bigger fix. Either way, understanding what’s happening under your feet is the first step toward a floor that stays solid – and quiet – for the long haul.

Hardwood Floor Acclimation Tips for a Flawless Installation

Hardwood Floor Acclimation

When it comes to installing hardwood flooring, acclimation is a critical step that cannot be overlooked. Hardwood floor acclimation is essential because wood is hygroscopic, meaning it absorbs moisture from the air. If the wood is installed without being acclimated, it may expand or contract excessively, resulting in gaps, warping, or buckling. This can lead to costly repairs and an unsightly appearance, undermining the aesthetic and functional benefits of your investment.

Why Acclimation is Essential for Hardwood Flooring

The importance of hardwood floor acclimation cannot be overstated. The primary reason for acclimation is to prevent moisture-related issues that can compromise the integrity of your flooring. Wood expands when it absorbs moisture and contracts when it loses moisture. Without proper acclimation, these natural changes can lead to significant problems. Proper moisture management in wood floors helps protect your flooring and prevents long-term damage.

Acclimation helps in achieving dimensional stability. When hardwood flooring is given sufficient time to adapt to the home’s environment, it minimizes the likelihood of expansion or contraction after installation. This stability is crucial for maintaining tight joints and preventing gaps or uneven surfaces.

Moreover, acclimation can aid in extending the lifespan of your hardwood floors. Properly acclimated flooring is less likely to suffer from stress and damage over time, preserving its beauty and functionality. Take the time to acclimate your hardwood flooring and invest in its longevity. This ensures it remains a stunning feature of your home for many years to come.

The Acclimation Process: Step-by-Step Guide

Acclimating hardwood flooring is a straightforward process, but it requires careful attention to detail. Follow these steps to ensure a successful acclimation period:

  1. Prepare the Installation Area:
    Ensure the installation area is clean, dry, and has a stable temperature and humidity level.
    Use a hygrometer to monitor the room’s relative humidity, aiming for a range between 30% and 50%.
  2. Unpack and Arrange the Flooring:
    Unpack the hardwood planks from their boxes and lay them flat in the room where they will be installed.
    Space the planks evenly, allowing airflow around each piece. This helps the wood adjust uniformly.
  3. Monitor the Conditions:
    Regularly check the temperature and humidity levels in the room.
    Adjust the HVAC system if necessary to maintain consistent conditions during the acclimation period.
  4. Timing the Acclimation:
    Allow the hardwood to acclimate for at least 5–7 days, though some species may require up to two weeks.
    Confirm that the moisture content of the wood matches the subfloor’s moisture content before proceeding with installation.

Follow these steps to ensure your hardwood flooring is well-prepared for installation and reduce the risk of future problems.
Hardwood Floor Acclimation

How To Work With The Moisture Meter?

Using a moisture meter is an essential part of the hardwood floor acclimation process. A moisture meter measures the moisture content of the wood and helps determine when the wood has reached EMC with the installation environment. There are two main types of moisture meters: pin-type and pinless. Pin-type meters use two metal pins that are inserted into the wood to measure moisture, while pinless meters use electromagnetic waves to provide a reading.

To use a moisture meter, start by ensuring the device is calibrated according to the manufacturer’s instructions. This step is crucial for accurate readings. Next, take multiple measurements across different boards and areas of the wood. This method ensures that you get an accurate overall picture of the wood’s moisture content, as variations can occur between boards.

After taking measurements, compare the moisture content of the wood with the desired EMC for your specific environment. This information can usually be found in the manufacturer’s guidelines or by consulting with a flooring professional. Once the wood reaches the appropriate EMC, it is ready for installation. Using a moisture meter not only ensures proper acclimation but also helps prevent future flooring issues.

Factors Affecting Hardwood Floor Acclimation

Several factors can influence the acclimation process, and being aware of these can help you make informed decisions. The type of hardwood species plays a significant role, as denser woods may require longer acclimation periods compared to lighter species. Understanding the characteristics of your chosen wood can aid in determining the appropriate acclimation time.

Environmental conditions are another crucial factor. The climate of your region, as well as the season during which you install the flooring, can impact the acclimation process. For instance, areas with high humidity may necessitate longer acclimation times to ensure the wood doesn’t absorb too much moisture.

Finally, the condition of your subfloor is essential. A subfloor that retains moisture can affect the acclimation process, potentially leading to issues with the installed flooring. It’s vital to assess and, if necessary, address the moisture levels of the subfloor before beginning the acclimation process. By considering these factors, you can tailor the acclimation process to suit the specific needs of your project.

Common Acclimation Mistakes to Avoid

Despite its importance, mistakes during the acclimation process are common. Being aware of these pitfalls can help you avoid them, ensuring a smooth installation process. One prevalent mistake is failing to unpack the hardwood flooring. Leaving the wood in its packaging prevents it from acclimating properly, as airflow is restricted.

Another error is not allowing enough time for acclimation. Rushing the process can lead to uneven moisture content across the planks, increasing the risk of expansion or contraction issues. Always adhere to the recommended acclimation period for your specific hardwood species and environmental conditions.

Finally, neglecting to monitor the environmental conditions during acclimation is a serious oversight. Fluctuations in temperature and humidity can affect the wood’s ability to acclimate properly. Utilize tools like hygrometers to keep track of these conditions, making adjustments as needed to maintain a stable environment. Avoid these common mistakes to set the stage for a successful hardwood floor installation.

How Long Should Hardwood Floors Acclimate?

The duration of the acclimation process depends on several factors, including the type of hardwood and the environment in which it will be installed. Generally, a minimum acclimation period of 5–7 days is recommended. However, some species, particularly exotic woods, may require up to two weeks to acclimate fully.

The goal is to ensure that the moisture content of the hardwood is in equilibrium with the subfloor and the room’s environment. This balance is crucial for preventing potential problems like warping or gaps. You should measure the moisture content of both the hardwood and the subfloor using a moisture meter to determine when equilibrium is achieved.

It’s important to remain patient and not rush the acclimation process. While it may be tempting to expedite the timeline to complete the project, allowing sufficient time for acclimation is a worthwhile investment. Properly acclimated hardwood flooring is more likely to provide years of beauty and functionality, making it well worth the initial wait.

How Long Should Hardwood Floors Acclimate

Signs Your Hardwood Floors Are Ready for Installation

Determining when your hardwood floors are ready for installation involves assessing several key indicators. First, measure the moisture content of the wood using a reliable moisture meter. The wood is ready for installation when its moisture content is within 2-4% of the subfloor’s moisture content.

Another sign is the stability of the room’s environmental conditions. You should ensure that the temperature and humidity levels have remained consistent throughout the acclimation period. Fluctuations in these conditions could mean that the wood has not acclimated properly, and additional time may be required.

Finally, inspect the wood for visual signs of acclimation. The planks should lie flat without any warping or bowing. Any noticeable changes in the wood’s shape or size might indicate that further acclimation is necessary. By confirming these signs, you can proceed with the installation process with confidence, knowing that your hardwood flooring is well-prepared.

Summary

Acclimating hardwood flooring is a crucial step in the installation process that ensures the longevity and beauty of your floors. While proper acclimation protects against warping and gaps, keeping your floors stunning for years also requires regular care. Professional services like hardwood floor refinishing, sanding, and polishing restore shine, repair surface wear, and extend the life of your investment. Whether you’re installing new floors or maintaining existing ones, our expert team ensures flawless results and lasting beauty, so you can enjoy your hardwood floors with complete peace of mind.

How to Get Scratches Out of Wood Floors and Restore Shine

How to Get Scratches Out of Wood Floors on a Budget

Scratched wood floors can transform a beautiful home feature into an eyesore overnight. Whether from moving furniture, pet claws, or dropping heavy objects, these imperfections catch both light and attention. Fortunately, learning how to get scratches out of wood floors doesn’t always require professional intervention or complete refinishing.

Many effective solutions for repairing scratched wood floors use simple household items you likely already have. From coconut oil and walnuts for minor scuffs to wood filler for deeper gouges, the right technique depends entirely on the severity of the damage. This guide explores proven methods that actually work, helping you restore your wood floors to their original beauty without unnecessary expense or effort.

Step 1: Assess the Type and Depth of Scratch

Before attempting to fix damaged wood floors, understanding what you’re dealing with is essential. Different scratches require different repair approaches, and correctly identifying the type of damage will save you time, money, and frustration.

Types of Scratches

Wood floor scratches typically fall into three main categories, each requiring a specific repair strategy:

  1. Light or superficial scratches only affect the finish layer of your floor. These minor marks don’t penetrate into the actual wood and often appear as faint lines visible only under certain lighting conditions.
  2. Medium scratches are more noticeable and have penetrated through some of the finish but haven’t reached deeply into the wood itself.
  3. Deep scratches and gouges have broken through the protective finish and damaged the wood underneath. These require more intensive repair methods.

The severity of scratches can vary widely – from microscopic surface abrasions to significant gouges. Understanding this spectrum is a crucial first step in learning how to get scratches out of wood floors effectively.

Fingernail Test: A Simple Way to Gauge Depth

To perform the test:

  1. Clean the scratched area thoroughly with a soft cloth.
  2. Gently run your fingernail across the scratch perpendicular to its direction.
  3. Pay attention to how your nail interacts with the damaged area.
  • If your fingernail glides smoothly, it’s a superficial scratch.
  • If your nail catches slightly, it’s a medium scratch.
  • If your nail catches deeply, it’s a gouge requiring more substantial repair.

This simple test is remarkably effective, especially since softer woods can exaggerate even slight damage.

Why Proper Assessment Matters

Correctly identifying scratch depth ensures you use the right repair method. Applying an inappropriate treatment wastes time, money, and materials—and might even worsen the problem. Light scratches can often be treated with oil or buffing, while deeper damage may require wood filler or refinishing.

Additionally, the type of floor finish (oil-based, water-based, waxed, varnished, etc.) plays a major role in how your floor responds to different treatments. Knowing when to repair and when to refinish prevents unnecessary work or costly errors.

Step 2: Fix Superficial Scratches Using Household Items

Once you’ve confirmed the scratches are superficial, you can restore your floors with simple remedies that avoid harsh chemicals or professional tools.

— Coconut Oil or Olive Oil

Natural oils are excellent for hiding superficial scratches and moisturizing the wood.

  • Coconut oil is ideal for untreated or freshly sanded floors. Clean the scratch, apply a thin layer of coconut oil, wait five minutes, and buff it with a soft cloth.
  • Olive oil works similarly. Dab a small amount on the scratch, let it soak, and wipe away excess.

Both oils nourish the wood and reduce the appearance of surface blemishes.

— Vinegar and Oil Solution

Mix equal parts olive oil and apple cider vinegar. Apply directly to the scratch, let it sit for 24 hours, and wipe it clean. This method combines vinegar’s gentle cleaning power with oil’s conditioning benefits.

Hardwood floor scratches

— Buffing the Treated Area

After applying oils or treatments:

  • Use a soft, lint-free cloth.
  • Start with gentle circular motions, then buff along the grain.
  • Apply light pressure to work the remedy into the wood.

Buffing restores natural shine and enhances the treatment, an important step in how to get scratches out of wood floors.

— The Walnut Trick

Walnuts contain natural oils and pigments that match many wood tones. Warm the walnut between your fingers, then rub it into the scratch using circular motions. Let it sit, then buff it off. This method is surprisingly effective for light surface damage.

For lighter woods, nuts like pecan or hickory may provide better tone matching.

Step 3: Repair Minor Surface Damage with Specialized Tools

When scratches go deeper than the finish but don’t reach raw wood, use specialized products to mask and fill the damage.

— Touch-Up Pens and Blending Pencils

Touch-up pens and blending pencils are infused with stain or resin and work well for minor to medium scratches.

  1. Use a lighter shade first.
  2. Apply in the direction of the grain.
  3. Wipe excess immediately.
  4. Layer darker shades if needed.

These tools dry quickly and match most common wood finishes.

— Wax Repair Sticks and Crayons

Wax sticks are excellent for deeper surface scratches and nail holes. Rub the stick across the damage to fill it, then buff or level with a plastic straightedge. Available in many colors, these can be blended to achieve a near-perfect match.

— Magic Erasers and Finish Restorers

Magic Erasers can remove scuff marks but must be used cautiously to avoid removing the finish. Alternatively, use finish restorers, which penetrate existing finish to rejuvenate color and shine without removing material—ideal for antique floors.

— Steel Wool for Blending

Super-fine steel wool (0000 grade) blends scratch edges with surrounding wood. Use gentle strokes along the grain, then follow up with a tack cloth and oil or polish. This technique helps those learning how to get scratches out of wood floors achieve smoother results.

Step 4: Address Deep Scratches and Gouges

Superficial damage may be easy to fix, but deep scratches and gouges require a more intensive approach to both repair and conceal. When scratches penetrate through the finish and damage the wood itself, it’s essential to rebuild the affected area using appropriate materials and techniques. This ensures that the fix is not only visually seamless but also structurally sound.

— Repairing Deep Damage with Wood Filler

The first step in repairing a deep scratch or gouge is to clean the area thoroughly. Dirt and debris can prevent adhesives and fillers from bonding properly. Once the surface is clean and dry, you’ll need to apply a wood filler. The best type to use is a stainable and flexible (elastomeric) filler that expands and contracts with the wood to avoid cracking over time.

Application should be done in thin, even layers using a putty knife, ensuring each layer dries fully before adding the next. This gradual build-up prevents air pockets and guarantees better adhesion. If the scratch is particularly deep, some experts recommend using epoxy-based wood filler for added strength and durability. This is a key technique when mastering how to get scratches out of wood floors with deep damage.

— Sanding and Staining for Seamless Blending

Once the filler has cured, you’ll need to sand the area smooth. It’s important to use a fine-grit sandpaper—220-grit or higher—to avoid damaging the surrounding finish. Always sand along the grain to maintain a uniform texture.

After sanding, apply a matching wood stain. The goal here is to blend the repaired section with the surrounding flooring, so color accuracy is essential. You may need to experiment with a few shades or even mix stains to achieve a perfect match. Always test the color on a hidden section before applying it to the main area.

— Finishing with a Protective Coating

After staining, protect the repair with a clear topcoat. Polyurethane is the most commonly used finish because it is durable and resists scratches. Oil-based versions offer a warmer tone but take longer to dry, while water-based options dry quickly and maintain the wood’s natural color without yellowing over time. For smaller repairs or antique floors, shellac may be more appropriate, offering a traditional look and fast drying time.

The final result, when done correctly, is a virtually invisible repair that restores both the appearance and integrity of your hardwood floor.

— When a Professional is the Best Option

If the damage is widespread or the repair area spans multiple boards, it may be more efficient and cost-effective to hire a professional. Likewise, if the repair attempts are clearly visible or the wood is splintering, warped, or compromised structurally, expert help can ensure the job is done safely and correctly. Flooring professionals have access to industrial-grade equipment and color-matching techniques that often surpass what’s achievable with DIY methods.

Oil-based polyurethane finishingStep 5: Know When to Refinish the Entire Floor

While minor and even moderate damage can often be resolved with targeted repairs, there comes a point when these fixes are no longer enough. When scratches become too numerous or deep, or when the floor’s finish is visibly worn away, refinishing the entire surface may be the only way to fully restore its beauty and protection.

— Recognizing the Signs of Refinishing Needs

Several signs indicate that refinishing is necessary. If water no longer beads on the surface but instead soaks into the wood, the finish has likely worn off entirely. Similarly, when bare wood is exposed, especially in high-traffic areas, or when the floor appears dull, discolored, or uneven in sheen, these are clear indications that the protective layer is no longer doing its job.

In more advanced cases, you may notice water stains or patches of gray, which suggest the wood is beginning to deteriorate due to moisture. These symptoms can’t be fixed with superficial treatments—they require a full sanding and refinishing process.

— Choosing Between DIY and Professional Refinishing

Homeowners who are comfortable with power tools and have the time to dedicate to a multi-day project may choose to refinish their floors themselves. This involves sanding off the existing finish, cleaning the surface, applying a new stain (if desired), and sealing it with several coats of polyurethane or another finish.

However, refinishing hardwood floors is labor-intensive and mistakes can be costly. Uneven sanding can lead to low spots or permanently damage the wood. For this reason, many choose to hire professionals. Though more expensive, professionals can complete the job more quickly and often provide warranties on their work, ensuring long-term peace of mind.

— Selecting the Right Finish for Your Floor

Choosing the appropriate finish is the final step in the refinishing process. Oil-based polyurethane offers durability and a rich, amber tone, while water-based polyurethane is less odorous, dries faster, and retains a clearer appearance over time. For those looking for a more traditional look, natural oils and waxes are also an option, though they require more frequent maintenance.

Experts generally agree that most solid hardwood floors can be sanded and refinished around ten times over their lifespan. This means even heavily damaged floors often have a second—or even third—chance to shine. Knowing when to stop spot-fixing and commit to refinishing can save time, preserve your flooring, and ultimately improve the look and value of your home.

Summary

Wood floors are a timeless investment, and knowing how to get scratches out of wood floors starts with accurate assessment. Light scratches respond well to household treatments; deeper damage requires fillers or refinishing. When spot repairs aren’t enough, full refinishing restores your floor’s original beauty. With proper care, your hardwood floors can remain stunning for decades.

Easy Ways to Get Rid of Carpet Tape on Wooden Floors

How to Remove Carpet Tape from a Wood Floor

Carpet tape is a useful tool for keeping your carpets and rugs securely in place. However, when it comes time to remove it from a wood floor, it can present some challenges. The adhesive in carpet tape is designed to be strong and long-lasting, which means it can sometimes leave behind sticky residue or even cause damage to your beautiful wooden flooring. Knowing how to remove carpet tape from a wood floor without causing harm is essential for maintaining the floor’s integrity and appearance.

Common Problems Caused by Carpet Tape on Wood Floors

Carpet tape, while effective in its primary function, can lead to several issues when applied to wood floors. The most prevalent problem is adhesive residue. Once the tape is removed, a sticky layer often remains on the surface, attracting dirt and dust, which can be difficult to clean. This residue not only mars the appearance of your floor but can also be a magnet for more significant issues if left untreated.

Another frequent issue is discoloration. Over time, the adhesive in carpet tape can react with the finish of your wood floor, leading to unsightly spots or patches. These discolorations can be particularly noticeable if the tape has been in place for an extended period. In some cases, the discoloration might require sanding and refinishing to fully restore the floor’s original look, which can be both costly and time-consuming.

Mechanical damage is another concern. In attempts to remove stubborn tape, you might inadvertently scratch or gouge the wood surface. Using improper tools or techniques can exacerbate this issue, leading to further damage. Understanding these potential problems underscores the importance of employing the right methods and tools for tape removal, which we will explore in the following sections.

A Step-by-Step Guide to Remove Carpet Tape from Hardwood floor

Tools and Materials Needed for Removal

To effectively remove carpet tape from a wood floor without damage, you will need a specific set of tools and materials. Having these on hand before you begin the process will make the task smoother and more efficient. Here is a list of essential tools and materials you should prepare:

  • Plastic Scraper or Putty Knife: This tool will help you gently lift the tape from the floor without scratching the wood surface.
  • Heat Gun or Hair Dryer: Using heat can soften the adhesive, making it easier to peel off the tape without leaving residue.
  • Adhesive Remover: Choose a product specifically designed for use on wood floors to dissolve any remaining sticky residue.
  • Soft Cloths: These are necessary for applying the adhesive remover and wiping the floor clean.
  • Warm Soapy Water: Useful for cleaning the area after the adhesive has been removed.

It’s crucial to select tools that are safe for use on wood floors to avoid causing any unintentional damage. For example, a plastic scraper is preferred over a metal one because it is less likely to scratch the floor. Similarly, a hair dryer can be used in place of a heat gun if you need a lower heat setting to prevent damage to the wood finish.

Step-by-Step Guide: How to Remove Carpet Tape from a Wood Floor

Removing carpet tape from a wood floor requires a methodical approach to minimize the risk of damage. Follow these steps to ensure a successful removal process:

Step 1: Preparing the Area

Begin by preparing the area for tape removal. Clear away any furniture or obstacles that might hinder your access to the tape. Vacuum or sweep the floor to remove any loose dirt or debris. This will help prevent scratches during the tape removal process.

Step 2: Applying Heat

Use a heat gun or hair dryer to apply heat to the tape. Hold the device a few inches above the tape and move it slowly back and forth to warm the adhesive. The heat softens the glue, making it easier to peel off without leaving residue or causing damage. Be cautious not to overheat, as excessive heat can damage the wood finish.

Step 3: Lifting the Tape

Once the adhesive is warmed, gently lift the edge of the tape using a plastic scraper or putty knife. Work slowly and carefully, applying steady pressure to avoid scratching the floor. Continue lifting the tape until it is completely removed. If the tape resists, apply additional heat to soften the adhesive further.

Step 4: Removing Residue

After the tape is removed, there might still be some adhesive residue left on the floor. Apply a small amount of adhesive remover to a soft cloth and gently rub the residue in a circular motion. Be sure to choose a remover that is safe for wood floors to prevent damage.

hardwood floor cleaning

Step 5: Cleaning the Floor

Finally, clean the area with warm soapy water to remove any remaining adhesive remover and dirt. Use a clean, dry cloth to wipe the area dry, ensuring no moisture is left behind, which could damage the wood. This step will restore the floor’s natural shine and prepare it for regular use.

Techniques to Prevent Damage to Your Wood Floor

Preventing damage during the removal process is crucial to maintaining your wood floor’s beauty. Here are some techniques to ensure your floor remains unscathed:

  • Use the Right Tools: Always opt for tools designed for delicate surfaces, such as plastic scrapers and soft cloths, to avoid scratches and gouges.
  • Test Adhesive Removers: Before applying any adhesive remover broadly, test it in a small, inconspicuous area to ensure it does not discolor or damage the wood finish.
  • Control Heat Application: When using heat to soften the adhesive, keep the heat source moving and maintain a safe distance from the floor to prevent overheating and damage.

By taking these precautions, you can effectively remove carpet tape while preserving the integrity of your wood floor. Preventing damage also means less need for costly repairs or refinishing in the future.

Alternative Methods for Removing Adhesive Residue

If traditional methods are not effective, there are alternative approaches you can try to remove adhesive residue from wood floors. These methods can be particularly useful for dealing with stubborn residues:

  1. Vinegar Solution: Mix equal parts of water and white vinegar in a spray bottle. Lightly spray the solution on the residue and let it sit for a few minutes before wiping it away with a soft cloth. Vinegar is a natural cleaner and safe for most wood finishes.
  2. Baking Soda Paste: Create a paste using baking soda and a small amount of water. Apply the paste to the residue and gently scrub with a soft cloth. Baking soda’s mild abrasiveness can help lift stubborn residue without damaging the wood.
  3. Oil-Based Cleaners: Some oil-based products, like mineral oil, can help dissolve adhesive residue. Apply a small amount to a cloth and gently rub the affected area until the residue is gone. Always wipe the area clean afterward to remove any excess oil.

These alternative methods can be effective, but it’s important to use them cautiously to avoid damaging the wood floor. Always test any new method in an inconspicuous area first.

Summary

Removing carpet tape from a wood floor without causing damage requires patience, the right tools, and proper techniques. Remember, the key to success lies in careful execution and the use of appropriate materials. Whether dealing with new or old tape, the strategies outlined in this article will help safeguard your wood floor’s beauty and durability. For more specialized care, consider seeking expert services in wood floor maintenance to ensure the best results and longevity of your floors.

Effective Strategies: How to Get Cat Urine Out of Wood Floors

How to Get Cat Urine Out of Wood Floors

Having a cat as a companion brings joy and warmth, but it also comes with certain challenges. One such challenge is dealing with cat urine on wood floors. If left unaddressed, cat urine can not only leave an unpleasant odor but also cause damage to your beautiful wooden surfaces. This article will guide you through effective strategies on how to get cat urine out of wood floors, ensuring your home remains clean and inviting.

Why Cat Urine is Difficult to Remove

Cat urine is notoriously difficult to remove because of its unique composition. Unlike other domestic animal waste, cat urine contains urea, uric acid, creatinine, and other metabolic byproducts. When the urine dries, these components crystallize, making it challenging to eliminate both the stain and the odor. Additionally, the longer the urine sits, the deeper it penetrates into the wood, increasing the difficulty of complete removal.

Another complicating factor is the enzymatic nature of cat urine. The uric acid present in the urine is not water-soluble, which means that regular cleaning methods may not suffice. Most standard cleaning solutions cannot break down uric acid effectively, leaving behind a lingering odor that cats can detect even if humans cannot. This detection might encourage repeat incidents in the same spot.

Understanding these challenges highlights the importance of using specific cleaning techniques and products designed to tackle the unique properties of cat urine. By doing so, you can effectively break down the urine components and prevent further damage to your wood floors.

The Importance of Addressing Cat Urine Quickly

Speed is of the essence when dealing with cat urine on wood floors. The sooner you act, the easier it will be to remove the stain and odor. Immediate action prevents the urine from seeping deeper into the wood, which can cause discoloration and long-term damage. Moreover, quick intervention helps prevent the development of mold or bacteria, which can pose health risks to you and your family.

Addressing cat urine promptly also deters your cat from revisiting the same spot. Cats have a keen sense of smell and are likely to return to areas where they have previously urinated if they detect any residual scent. By cleaning the area thoroughly and quickly, you can break this cycle and reduce the chance of future accidents.

In addition, addressing cat urine promptly demonstrates responsible pet ownership and protects your investment in quality flooring. Wood floors are valuable assets that enhance the aesthetic and monetary value of your home. Ensuring their longevity by dealing with stains and odors promptly is essential.

Essential Supplies for Cleaning Cat Urine from Wood Floors

Before tackling the cat urine removal process, gather all necessary supplies to ensure an effective cleaning routine. Having the right tools at your disposal will make the task more manageable and increase the chances of successfully eliminating both the stain and odor.

Supplies Checklist:

  1. Paper Towels or Cloths: For initial blotting to remove as much urine as possible.
  2. Enzymatic Cleaner: Specially formulated to break down uric acid crystals.
  3. White Vinegar: A natural deodorizer that neutralizes odors.
  4. Baking Soda: Absorbs moisture and odors.
  5. Hydrogen Peroxide: For stubborn stains and sanitizing.
  6. Soft-bristle Brush or Scrub Pad: To gently scrub the affected area without damaging the wood.
  7. Bucket and Warm Water: For rinsing and diluting cleaning solutions.
  8. Protective Gloves: To protect your hands during the cleaning process.

Once you have gathered these supplies, you will be well-prepared to tackle the cleaning process effectively. Remember, using the right tools is key to achieving the best results while preserving the quality of your wood floors.

Cleaning Cat Urine from Hardwood Floors

Step-by-Step Guide: How to Get Cat Urine Out of Wood Floors

Step 1: Blot the Area
Start by blotting up as much of the urine as possible using paper towels or a clean cloth. Avoid rubbing the area, as this can spread the urine further into the wood. Press down gently to absorb as much liquid as possible.

Step 2: Apply an Enzymatic Cleaner
An enzymatic cleaner is essential for breaking down the uric acid in cat urine. Apply the cleaner according to the product instructions, ensuring full coverage of the affected area. Allow it to sit for the recommended time to fully neutralize the urine.

Step 3: Use White Vinegar Solution
Mix equal parts of white vinegar and water in a bucket. Dampen a clean cloth with the solution and gently wipe the area. Vinegar helps neutralize odors and disinfects the surface. Avoid soaking the wood to prevent damage.

Step 4: Sprinkle Baking Soda
After cleaning with vinegar, sprinkle baking soda over the damp area. Baking soda absorbs moisture and neutralizes odors. Let it sit for a few hours, then vacuum or sweep it up.

Step 5: Rinse and Dry
Finally, rinse the area with warm water and dry thoroughly with a clean towel. Ensure no moisture remains to prevent wood warping or mold formation.
Following these steps will help you effectively remove cat urine from your wood floors, leaving them clean and odor-free. If any moisture remains trapped in the wood, consider using these methods to draw it out effectively.

Natural Remedies for Cat Urine Removal

Natural remedies offer a safe and eco-friendly alternative for removing cat urine from wood floors. These methods not only protect the environment but also minimize exposure to harsh chemicals for you and your pets.

1. Vinegar and Baking Soda
As mentioned earlier, vinegar and baking soda are a powerful combination. Vinegar acts as a natural disinfectant and deodorizer, while baking soda absorbs odors. This simple, yet effective solution can be used regularly to keep your floors fresh.

2. Hydrogen Peroxide
Hydrogen peroxide is another natural option that helps in removing stains and disinfecting the area. Apply a small amount to a cloth and gently dab the affected area. It helps to lift stains while killing bacteria. However, test it on a small, inconspicuous area first to ensure it doesn’t bleach the wood.

3. Essential Oils
Certain essential oils, like lavender or tea tree oil, have antimicrobial properties and can be added to cleaning solutions for added fragrance and effectiveness. Mix a few drops with water and use it to wipe down the affected area, leaving a pleasant scent.

Using these natural remedies ensures that you maintain a clean and healthy home without relying on harsh chemicals. They are particularly beneficial for households with pets or children.

What to Use for Cat Urine on Wood Floors

If natural remedies do not achieve the desired results, commercial products specifically designed for cleaning pet urine stains can be highly effective. These products often contain advanced formulations that tackle tough stains and persistent odors.

1. Enzymatic Cleaners
Enzymatic cleaners are a top choice for many pet owners. These cleaners contain enzymes that break down the proteins in urine, effectively eliminating both the stain and smell. Brands like Nature’s Miracle or Rocco & Roxie are popular options that are safe for use on wood floors.

2. Odor Neutralizers
Odor neutralizers are designed to eliminate odors at the molecular level, rather than just masking them. These products work well in conjunction with enzymatic cleaners to ensure complete odor removal. Look for products that are specifically labeled for use on wood surfaces.

3. Stain and Odor Removers
These all-in-one solutions are convenient for quickly addressing both stains and odors. They often include a combination of enzymes, deodorizers, and cleaning agents. Ensure the product is safe for wood floors to prevent damage.
When choosing a commercial product, always read the label to ensure it’s suitable for wood floors and follow the instructions carefully for the best results.

Preventing Future Accidents: Tips for Cat Owners

Preventing future accidents is as important as cleaning up existing ones. By addressing the underlying causes of inappropriate urination, you can reduce the likelihood of recurrence and maintain a harmonious living environment.

1. Litter Box Management
Ensure your cat’s litter box is clean and easily accessible. Cats are more likely to urinate outside the box if it’s dirty or located in a hard-to-reach area. Regularly scoop out waste and clean the box weekly to encourage proper use.

2. Addressing Behavioral Issues
Stress and anxiety can lead to inappropriate urination. Provide your cat with a safe and comfortable environment, and consider using pheromone diffusers to reduce stress. If behavioral issues persist, consult a veterinarian for advice and possible solutions.

3. Health Check-Ups
Regular veterinary check-ups can help identify and address any health issues that may be causing your cat to urinate outside the litter box. Conditions like urinary tract infections or kidney problems should be ruled out to ensure your cat’s well-being.

By taking these preventive measures, you can minimize accidents and enjoy a cleaner, more pleasant home.

Maintenance Tips for Wood Floors After Cleaning

After successfully removing cat urine, it’s important to maintain your wood floors to prevent future staining and damage. Regular maintenance helps preserve the beauty and longevity of your floors.

  1. Routine Cleaning. Regularly sweep or vacuum your floors to remove dirt and debris that can scratch the surface. Use a microfiber mop with a gentle wood floor cleaner for deeper cleaning, ensuring the product is suitable for your floor type.
  2. Protecting Against Moisture. Avoid excessive moisture on wood floors as it can lead to warping and damage. Clean up spills immediately and use area rugs or mats in high-traffic areas to minimize wear and tear.
  3. Periodic Sealing. Consider applying a protective sealant or wax to your wood floors every few years. This provides an additional layer of protection against stains and moisture. If your floors see a lot of foot traffic or pets, explore these high-traffic hardwood floor finish options.

With these maintenance tips, you can keep your wood floors in top condition, enhancing their appearance and durability.

Cleaning Cat Urine from Wood Floors

When to Seek Professional Help for Cat Urine Removal

In some cases, professional intervention may be necessary to address severe staining or persistent odors. Knowing when to call in the experts can save you time and prevent further damage.

  • Deep-set Stains
    If the urine has penetrated deeply into the wood, professional cleaning services may be required. Professionals have specialized equipment and products that can reach deeper layers and restore the floor’s appearance.
  • Persistent Odors
    When odors linger despite repeated cleaning attempts, a professional assessment can identify underlying issues and provide targeted solutions. They may use commercial-grade deodorizers or suggest refinishing options.
  • Floor Refinishing
    In extreme cases, refinishing the affected area or the entire floor may be necessary to fully eliminate stains and odors. This process, known as hardwood floor refinishing, involves sanding down the surface and applying a new finish to restore the floor’s original beauty.

Seeking professional help ensures that your wood floors are treated with the utmost care, preserving their value and appearance.

Summary

Maintaining clean and odor-free wood floors in a home with cats is entirely achievable with the right strategies. By understanding the nature of cat urine and acting swiftly, you can effectively tackle any accidents that occur. Whether you choose natural remedies or commercial products, the key is consistency and thoroughness in your cleaning routine. Remember, prevention is better than cure. Taking proactive steps to address behavioral and environmental factors will significantly reduce the likelihood of future incidents. Meanwhile, regular maintenance of your wood floors will ensure they remain a stunning feature of your home for years to come.

How to Make Wood Floors Less Slippery: A Home Safety Guide

How to Make Wood Floors Less Slippery

Wooden floors pose a dangerous slip hazard when regular cleaning products, wax, and high-gloss finishes build up on the surface. If you’re wondering how to make wood floors less slippery, it’s important to address these factors. Your home’s high-traffic areas face the biggest risk because constant foot traffic makes the wood surface smoother. Beautiful wood floors don’t have to come at the cost of safety. Anti-slip treatments, non-slip paint, smart rug placement and the right cleaning methods can reduce slip and fall risks effectively. The floor’s smoothness changes with seasons, so you need to adjust your maintenance routine throughout the year.

Understanding Wood Floor Safety

Wood floor safety goes beyond simple maintenance and includes many risk factors that vary by location and how you use the space. A good grasp of these risks will help you create targeted solutions throughout your home. Each room comes with its own set of challenges for wood floor safety. Your bathrooms and kitchens face higher moisture exposure that makes wood surfaces extra slick. On top of that, kitchen oil droplets can create unexpected slippery spots. Wooden stairs are particularly risky because they combine height with potential slipping hazards. Your pets might have trouble with smooth hardwood surfaces, especially when they run or turn quickly. You can boost pet safety by adding stair treads, which help both pets and people move safely between floors.

Risk Factors That Affect Wood Floors

The type of finish on wooden floors plays a big role in how slip-resistant they are. Standard solvent-based floor coatings give off over 60 different chemicals. Water-based coatings that contain n-methylpyrrolidone (NMP) can be dangerous, as NMP links to serious health issues. Heavy foot traffic wears down the protective finish in busy areas and exposes raw wood underneath. Dirt, grit, and shoe friction smooth out these spots over time, making them more slippery. Pet nails, high heels, and moving furniture speed up this wear. The seasons change how safe your wood floors are. Wood absorbs more moisture and becomes smoother during wet seasons. You’ll need to adjust how you maintain your floors as the weather changes throughout the year.

Regular checks will reveal common safety issues:

  • Warped and buckled areas that people might trip on
  • Gaps between boards
  • Too much polish that makes floors slippery
  • Dust buildup that reduces foot traction

If you’re trying to figure out how to make wood floors less slippery, following these tips for regular maintenance is essential. The National Wood Flooring Association recommends daily sweeping or dust mopping in busy areas. A monthly damp-mop with pH-neutral cleaners helps maintain good traction. Clean spills right away – leaving them can damage the finish as liquid seeps in. Entrance protection systems work well for commercial spaces and homes with lots of foot traffic. Quality door mats at each entrance cut down on dirt and moisture that gets tracked onto wood surfaces. Well-placed area rugs with non-slip backing help spread out wear patterns and make floors safer overall.

Budget-Friendly Safety Solutions

You don’t need expensive solutions to make wood floors less slippery. Simple, economical methods can make your home’s surfaces safer. DIY Anti-slip Treatments A water and baking soda paste helps remove slippery wax buildup. Mix one part vinegar with two parts water to tackle stubborn residue. A pH-neutral cleaner will keep your floor’s natural grip after cleaning. Economical Grip Enhancers Anti-slip coatings give lasting protection at a reasonable price. Water-based urethane sealers give great traction and dry in 6–12 hours. These clear coatings work well on all but one type of wood — natural hardwood, engineered hardwood, and bamboo.

Budget-friendly options to boost grip include:

  • Roll-on anti-slip coatings that create long-lasting, high-traction surfaces
  • Clear epoxy aerosol sprays with finely textured finishes
  • UV-resistant paint treatments that feel good on bare feet

how to make hardwood floors less slippery

Budget-Friendly Maintenance Tools

Basic tools you need to keep wood floors slip-resistant:

  1. Microfiber mops are great cleaning tools that pick up surface debris while keeping moisture minimal. Skip expensive cleaners and use pH-neutral hardwood floor products that remove dirt without leaving slick residue.
  2. Area rugs with non-slip backing are a smart fix for busy areas. All the same, make sure these rugs have breathable materials underneath so moisture doesn’t build up.
  3. Non-slip stair treads add safety to your stairs without much cost. Both people and pets benefit from these additions that prevent accidents on risky steps.
  4. Regular upkeep is vital to keep floors safe. Stay away from oil-based soaps on urethane-finished floors. The right humidity levels range from 25% to 60% for non-radiant heated sub-floors. A basic hygrometer helps track humidity accurately.
  5. Protective felt pads under furniture legs prevent scratches and help maintain the floor’s anti-slip qualities. This small investment protects your wood floor’s safety features and looks.

Seasonal Wood Floor Care

Wooden floors need different care strategies as seasons change to ensure safety and prevent slipping hazards. A good understanding of seasonal patterns helps maintain the right amount of traction.

Summer Humidity Management

Wood floor maintenance faces unique challenges in summer. Indoor humidity levels can reach up to 90% when temperatures rise, which makes wood planks expand. The expansion creates pressure between boards and can lead to cupping where the edges become higher than the centre.

These steps help protect floors and maintain proper grip:

  • Indoor humidity should stay between 35% and 55%
  • Regular use of dehumidifiers and air conditioners works best
  • Curtains or UV-blocking films should block direct sunlight
  • Quick removal of sand and debris prevents surface scratches

Winter Safety Measures

Heated homes in winter create very dry conditions – sometimes drier than the Sahara Desert’s 25% humidity. Wood contracts at these low moisture levels and gaps show up between planks.

Key winter maintenance steps include:

  • Room temperatures should stay between 60-80°F (16-27°C)
  • Humidifiers help keep relative humidity above 35%
  • Protective mats at entrances catch salt and snow
  • Quick cleanup of water and salt residue stops damage

Hydrometers placed at floor level help monitor humidity levels for optimal floor safety in both seasons. The right humidity control prevents structural issues that could make floors slippery. Stable indoor conditions year-round matter because big swings in temperature or humidity disrupt both wood stability and surface traction.

Note that seasonal maintenance goes beyond simple cleaning. Summer requires regular floor inspections for moisture-related problems. Winter demands extra attention near entrances where salt and snow can damage protective finishes. Your floors will stay safer and less slippery all year when you adapt maintenance routines to each season’s challenges.

Smart Prevention Strategies

Wood floors need reliable protection systems at every entrance to prevent slips and falls. A well-laid-out entrance system acts as your first defense against dirt, moisture, and debris that make floors dangerous.

Entrance Protection Systems

You need both outdoor and indoor components for a complete entrance protection strategy. Scraper mats outside each entrance remove large particles of dirt and debris from footwear. Inside, wiper mats catch remaining contaminants before they reach your wood floors.

To get the best results:

  1. Choose high-quality rubber-backed mats with ‘High Traction’ certification from the National Floor Safety Institute
  2. Keep mats flat and secure in their original position
  3. Replace any mat that shows signs of rippling or buckling right away

Research shows that people track in 80% of building dirt through foot traffic. Good entrance matting systems improve safety, cut cleaning costs, and help floors last longer.

Regular Inspection Routine

A planned inspection schedule helps spot potential hazards before accidents happen. Professional floor inspectors follow specific steps to assess:

  • Surface quality and installation integrity
  • Maintenance problems that need immediate fixes
  • Manufacturing defects that could affect safety

Floor inspections are vital safety measures, especially when you have property purchases planned. Regular checks should look for:

  • Loose floorboards or subfloor problems
  • Signs of warping or buckling
  • Surface scratches and cracks

Certified flooring specialists run industry-standard tests to check floor covering quality and find problem areas. Their reports give a full picture of specific issues and work to be done. Homeowners should check their floors regularly. Monthly inspections of high-traffic areas help spot wear and tear. Finding problems early lets you fix small issues before they become serious safety risks.

Summary

Wood floors need careful maintenance and preventive measures throughout the year. If you’re wondering how to make wood floors less slippery, the right safety measures can help. Your home’s appeal improves with beautiful hardwood surfaces, and with budget-friendly options like entrance mats, anti-slip treatments, and proper humidity control, you can substantially lower accident risks. Quick spill cleanup, regular cleaning schedules, and seasonal maintenance create lasting protection. These simple steps keep your wood floors beautiful and secure for years ahead.

Safe and Simple Wax Removal for Wood Floors

How to Get Candle Wax Off Wood Floor

Dealing with candle wax on wood floors can be a frustrating experience. Whether it’s from a romantic dinner gone awry or a festive decoration mishap, finding wax stuck to your beautiful hardwood can cause panic. However, there’s no need to worry! With the right techniques and a bit of patience, you can learn how to get candle wax off wood floor without damaging the surface. This comprehensive guide will walk you through various methods to tackle this common household problem, ensuring your floors remain pristine and wax-free.

Preparing for Wax Removal: Tools and Materials You’ll Need

Before diving into the wax removal process, it’s essential to gather the necessary tools and materials. Having everything at hand will make the task more efficient and less stressful. Here’s a list of items you’ll want to have ready:

  1. Ice cubes or a bag of frozen vegetables
  2. Plastic scraper or old credit card
  3. Iron
  4. Paper towels or brown paper bags
  5. Vinegar
  6. Baking soda
  7. Soft cloths
  8. Wood floor cleaner
  9. Wood polish (optional)

Additionally, you may want to have a vacuum cleaner nearby to clean up any debris during the process. It’s also wise to wear gloves to protect your hands, especially when dealing with heat or cleaning solutions. Remember, the key to how to get candle wax off wood floor successfully is to work carefully and patiently. Rushing the process could lead to scratches or damage to your wood floor’s finish, so take your time and proceed with caution.

The Ice Method: Freezing and Scraping Candle Wax

One of the simplest and safest methods to remove candle wax from a wood floor is the ice method. This technique works by freezing the wax, making it brittle and easy to scrape off without damaging the wood underneath.

To begin, place a bag of ice cubes or frozen vegetables directly on top of the wax. Leave it there for several minutes, allowing the cold to penetrate and harden the wax. You’ll know it’s ready when the wax becomes firm and opaque. Once the wax is frozen, use a plastic scraper or an old credit card to gently lift the wax from the wood surface. Work slowly and carefully, applying light pressure to avoid scratching the floor. The frozen wax should come off in chunks or flakes.

After removing the bulk of the wax, you may notice a thin residue remaining. Don’t worry – we’ll address this in later steps. For now, vacuum up any loose wax pieces to prevent them from melting back onto the floor.

Heat and Absorption Technique: Using an Iron and Paper Towels

If the ice method doesn’t remove all the wax, or if you’re dealing with a larger spill, the heat and absorption technique can be highly effective. This method uses heat to melt the wax and paper to absorb it.

Start by laying a paper towel or a brown paper bag over the remaining wax. Set your iron to a low heat setting – you want it warm enough to melt the wax but not so hot that it damages the wood floor. Gently press the warm iron onto the paper for a few seconds at a time. You should see the wax beginning to melt and be absorbed by the paper. Move the iron slowly over the area, replacing the paper as it becomes saturated with wax. Continue this process until no more wax is being absorbed by the paper. Be patient, as this method may take several attempts to remove all the wax.

Remember to keep the iron moving to prevent overheating any one spot on your floor. After you’ve removed as much wax as possible, allow the area to cool completely before proceeding to the next step.

Natural Solutions: Vinegar and Baking Soda for Stubborn Wax

For particularly stubborn wax residue, natural cleaning solutions can be your best friend. Vinegar and baking soda are not only effective but also safe for most wood floors when used correctly. Create a cleaning paste by mixing equal parts white vinegar and baking soda. The resulting mixture should have a consistency similar to toothpaste. Apply this paste to any remaining wax residue using a soft cloth.

Gently rub the paste into the wax in a circular motion. The mild abrasiveness of the baking soda combined with the cleaning power of vinegar will help break down the wax without harming your floor’s finish. After working the paste into the wax for a few minutes, wipe the area clean with a damp cloth. You may need to repeat this process a few times for complete removal. Once satisfied, dry the area thoroughly with a clean towel to prevent water damage to the wood. This is another great method for how to get candle wax off wood floor naturally.

Commercial Products: Specialized Wax Removers for Wood Floors

If natural methods aren’t yielding the results you desire, it may be time to consider commercial wax removers designed specifically for wood floors. These products are formulated to dissolve wax without damaging the wood or its finish.

When selecting a commercial wax remover, look for products that are:

  • Safe for use on finished wood
  • Non-abrasive
  • Environmentally friendly
  • Easy to apply and remove

Always read the manufacturer’s instructions carefully before use. Test the product on an inconspicuous area of your floor to ensure it doesn’t cause discoloration or damage. Apply the wax remover as directed, usually by spraying or dabbing it onto the affected area. Allow it to sit for the recommended time to break down the wax. Then, following the product instructions, wipe or scrape away the loosened wax. After using a commercial remover, it’s crucial to clean the area thoroughly with a wood-safe cleaner to remove any residual chemicals.

Gentle Scraping Techniques to Protect Your Wood Floor

Throughout the wax removal process, you may find yourself needing to scrape away stubborn bits. It’s crucial to use gentle scraping techniques to avoid damaging your wood floor’s delicate finish.

Here are some tips for safe scraping:

  • Always use plastic or rubber scrapers, never metal.
  • Hold the scraper at a 45-degree angle to the floor.
  • Apply gentle, even pressure as you scrape.
  • Work in the direction of the wood grain when possible.
  • Take frequent breaks to assess your progress and prevent over-scraping.

If you encounter particularly resistant wax, resist the urge to apply more force. Instead, return to one of the softening methods (heat or commercial remover) before attempting to scrape again. Remember, patience is key. It’s better to take your time and preserve your floor’s finish than to rush and cause permanent damage.

Cleaning and Polishing After Wax Removal

Once you’ve successfully removed all traces of candle wax, it’s important to clean and polish your wood floor to restore its natural beauty and protect it from future damage.
Start by thoroughly cleaning the affected area with a wood-safe cleaner. This will remove any residue from the wax removal process and prepare the surface for polishing. Use a soft, damp cloth to apply the cleaner, being careful not to oversaturate the wood.

After cleaning, allow the floor to dry completely. This may take several hours, so be patient. Once dry, assess the condition of your floor. If the wax removal process has left the area looking dull compared to the surrounding wood, you may want to apply a wood polish or refresher.

Choose a polish that’s compatible with your floor’s finish. Apply a small amount to a soft cloth and work it into the wood using circular motions. Be sure to blend the polished area with the surrounding floor to maintain a uniform appearance.

Preventing Future Candle Wax Spills on Wood Floors

While knowing how to remove candle wax is valuable, preventing spills in the first place is even better. Here are some proactive measures you can take to protect your wood floors from future wax accidents:

  • Use candleholders with wide, stable bases to prevent tipping.
  • Place candles on heat-resistant trays or plates to catch any drips.
  • Trim candle wicks to ¼ inch before lighting to minimize dripping.
  • Consider using flameless LED candles for a safer alternative.
  • Keep candles away from drafts, which can cause uneven burning and dripping.
  • Never leave burning candles unattended.

When to Call a Professional: Dealing with Extensive Wax Damage

While most candle wax spills can be handled with DIY methods, there are situations where professional help may be necessary. If you’re dealing with extensive wax damage, or if your attempts at removal have left your floor looking worse for wear, it’s time to consider calling in an expert.
Professional floor refinishers have specialized tools and products that can tackle even the most stubborn wax without damaging your floor. They can also address any scratches or discoloration that may have occurred during your removal attempts.
Signs that you might need professional help include:

  • Wax that has deeply penetrated the wood grain
  • Visible scratches or gouges from attempted removal
  • Discoloration or changes in the floor’s finish
  • Large areas affected by wax spills

Remember, wood floors are a significant investment in your home. If you’re unsure about your ability to remove the wax safely, it’s better to consult a professional than to risk permanent damage to your floors.

Summary

Dealing with candle wax on wood floors can be challenging, but with the right approach, it’s a problem you can solve. From the simple ice method to more advanced techniques using heat and commercial products, you now have a toolkit of strategies to tackle wax spills of any size. If you’re wondering how to get candle wax off wood floor, these methods will help you restore your floor’s beauty. Remember to always start with the gentlest method and work your way up to more intensive techniques only if necessary. Patience and care are your best allies in preserving the beauty of your wood floors throughout the wax removal process.

Managing Moisture in Wood Floors: A Comprehensive Solution

How to Draw Moisture Out of Wood Floors​

Wood floors are a beautiful and timeless addition to any home, but they can be susceptible to moisture damage. Whether you’re dealing with a minor spill or extensive water damage, knowing how to draw moisture out of wood floors is crucial for maintaining their integrity and appearance. In this comprehensive guide, we’ll explore various methods and techniques to help you address moisture issues in your wood flooring, ensuring its longevity and preserving its natural beauty.

Understanding Wood Floor Moisture Issues

Moisture problems in wood floors can arise from various sources, including high humidity, water leaks, or flooding. When wood absorbs excess moisture, it can lead to a range of issues that compromise both the appearance and structural integrity of your flooring. Understanding the nature of these issues is the first step in effectively addressing them.

Wood is a hygroscopic material, meaning it naturally absorbs and releases moisture from its surroundings. This property allows wood to maintain equilibrium with its environment, but it also makes it vulnerable to excessive moisture exposure. When wood floors absorb too much moisture, they can swell, cup, or buckle, leading to unsightly and potentially dangerous conditions.

The extent of moisture damage depends on factors such as the type of wood, the finish applied, and the duration of exposure. Some wood species are more resistant to moisture than others, but all types can suffer damage if exposed to water for extended periods. Recognizing the signs of moisture issues early on can help you take prompt action and minimize potential damage.

Signs of Excess Moisture in Wood Floors

Identifying moisture problems in your wood floors early is crucial for preventing extensive damage. Here are some common signs to look out for when determining how to draw moisture out of wood floors:

  • Cupping: When the edges of wood planks curl upward, creating a concave shape.
  • Crowning: The opposite of cupping, where the centre of the plank rises higher than the edges.
  • Buckling: Severe swelling that causes the wood planks to lift from the subfloor.
  • Discolouration: Dark spots or stains that indicate water damage.
  • Mould or mildew growth: Often visible in the seams between planks or along the edges of the room.
  • Musty odours: A telltale sign of moisture issues, even if visible damage isn’t apparent.
  • Squeaking or creaking: Excessive moisture can cause wood to expand, leading to noisy floors.

If you notice any of these signs, it’s essential to act quickly to prevent further damage and address the underlying moisture issue.

The Importance of Addressing Moisture Problems Quickly

Tackling moisture issues in wood floors promptly is crucial for several reasons. First and foremost, quick action can prevent the spread of damage and potentially save your flooring from irreparable harm. Moisture left unchecked can lead to warping, splitting, and even structural damage to the subfloor and supporting joists.

Moreover, addressing moisture problems quickly can help prevent the growth of mould and mildew, which can pose serious health risks to you and your family. Mould thrives in damp environments and can spread rapidly, potentially causing respiratory issues and other health concerns.

From a financial perspective, dealing with moisture issues early can save you significant costs in the long run. Minor problems can often be resolved with simple DIY methods, whereas extensive damage may require professional intervention or even complete floor replacement – a much more expensive proposition.

Natural Methods to Draw Out Moisture from Wood Floors

When dealing with minor moisture issues, several natural methods can help draw out excess water from your wood floors:

  • Rice method: Spread a layer of uncooked rice over the affected area and cover it with a towel. The rice will absorb moisture from the wood over time.
  • Salt technique: Similar to the rice method, sprinkle a generous amount of salt over the damp area and let it sit for 24 hours before sweeping it away.
  • Baking soda application: Apply a thin layer of baking soda to the affected area. It will absorb moisture and help neutralize odours.
  • Sunlight exposure: If possible, open curtains and blinds to allow direct sunlight to hit the damp areas. The heat from the sun can help evaporate moisture.
  • Fans and air circulation: Set up fans to blow air across the floor’s surface, promoting evaporation and air movement.

Using Dehumidifiers to Remove Moisture

Dehumidifiers are powerful tools in the fight against excess moisture in wood floors. These devices work by removing water vapour from the air, effectively lowering the overall humidity in a room. By reducing ambient moisture, dehumidifiers can help prevent wood floors from absorbing excess water from the air.

When using a dehumidifier:

  • Choose the right size for your space. A unit that’s too small won’t be effective, while an oversized one may waste energy.
  • Place the dehumidifier in the centre of the room for optimal air circulation.
  • Keep doors and windows closed to maintain the dehumidified environment.
  • Empty the water collection tank regularly or set up a continuous drain if possible.
  • Monitor humidity levels with a hygrometer, aiming for a relative humidity between 35% and 55%.

For best results, run the dehumidifier continuously until the moisture issue is resolved. In areas prone to high humidity, you may need to use a dehumidifier regularly to maintain optimal conditions for your wood floors.

The Role of Proper Ventilation in Moisture Control

Proper ventilation plays a crucial role in controlling moisture levels and maintaining the health of your wood floors. Good air circulation helps prevent the buildup of stagnant, humid air that can contribute to moisture problems. Here are some strategies to improve ventilation in your home:

  1. Open windows and doors: When weather permits, create cross-ventilation by opening windows on opposite sides of the room.
  2. Use exhaust fans: Install and regularly use exhaust fans in bathrooms, kitchens, and laundry rooms to remove moisture-laden air.
  3. Ceiling fans: These can help circulate air throughout the room, preventing moisture from settling on the floor.
  4. HVAC maintenance: Ensure your heating and cooling systems are functioning properly and have clean filters to promote good air circulation.
  5. Crawl space ventilation: If you have a crawl space, make sure it’s properly ventilated to prevent moisture from seeping up into your flooring.

Drying Techniques for Severely Water-Damaged Wood Floors

When wood floors suffer severe water damage from flooding or major leaks, aggressive drying techniques become necessary. The first critical step involves removing all standing water through wet vacuums or pumps. Once the surface water is cleared, carefully lifting and propping up affected floorboards allows essential air circulation underneath the damaged areas.

While solid hardwood can often withstand professional drying treatments, laminate flooring typically requires immediate replacement after significant water exposure, as its compressed layers will permanently delaminate and warp. High-powered industrial fans should be strategically placed to create strong airflow across the floor surface and beneath any lifted boards.

Multiple dehumidifiers must be deployed throughout the space to extract moisture from both the air and flooring materials. Gentle heat application can accelerate the drying process, though space heaters should be used with extreme caution to avoid fire hazards. For extensive damage, professional water extraction services often become necessary to ensure proper remediation.

Throughout the drying process, moisture meters should be used regularly to track progress and confirm when the wood has returned to appropriate moisture content levels. Given the complexity and risks involved with severe water damage, professional intervention typically provides the safest path to proper drying and prevention of long-term issues.

Refinishing and Sanding After Moisture Damage Recovery

Once wood floors have thoroughly dried and stabilized after moisture damage, professional refinishing may become necessary to restore their appearance and integrity. The refinishing process begins with thorough sanding to remove water stains, raised grain, and surface imperfections caused by moisture exposure. Multiple sanding passes with progressively finer grits ensure optimal surface preparation. This process not only improves aesthetics but also allows for inspection of deeper moisture damage that might have been initially overlooked.

After sanding, applying a moisture-resistant sealer followed by multiple coats of appropriate finish creates a robust barrier against future water intrusion. Professional refinishers can also address specific areas where boards may have cupped or crowned, ensuring a level surface throughout. The timing of refinishing proves crucial – attempting this process before the wood has fully dried and reached proper moisture content levels can lead to uneven results and potential future problems. Moisture meter readings should confirm appropriate levels before any refinishing work begins.

Final Thoughts

Maintaining dry, healthy wood floors is essential for preserving their beauty and longevity. By understanding the signs of moisture issues, implementing preventive measures, and knowing how to draw moisture out of wood floors when problems arise, you can protect your investment and enjoy your wood floors for years to come. Remember that prompt action is key when dealing with moisture issues.

How to Remove a Scratch from a Wood Floor: Easy Repair Tips

how to remove a scratch from a wood floor

Wooden flooring adds timeless elegance and warmth to any home’s interior. However, over time, various factors such as furniture movement, pet activity, and everyday foot traffic may result in surface imperfections, leading homeowners to wonder how to remove a scratch from a wood floor. While minor scratches are an inevitable part of floor aging, more significant damage can detract from the floor’s aesthetic appeal. Fortunately, there are effective methods available for restoring your wooden floors to their original beauty.

Types of Scratches on Wood Floors

Before we dive into how to remove a scratch from a wood floor, it’s helpful to understand the types of scratches. Getting this will point you to the best way to get those scratches out for good.

  • Surface Scratches: Dragging stuff or dropping things that aren’t heavy can make minor scratches. These only mess with the top coat of your wood floor.
  • Deep Scratches: These bad boys cut through the finish and dig into the wood. They come from dropping heavy stuff or sliding sharp things around on the floor.
  • Gouges: Gouges are worse; they’re big scratches that happen when you drag or drop heavy furniture. Fixing these can be tough, and you might have to do more to get them sorted.

By knowing what kind of scratch you’re up against, you can figure out the best gear, stuff to use, and the way to fix it right.

Essential Materials for Scratch Repair

Before proceeding with scratch repair, please ensure you have all the necessary materials and tools:

  1. Sandpaper of various grits (120, 180, 220)
  2. Wood filler or putty matching your floor color
  3. Wood stain or marker in corresponding shade
  4. Mineral spirits or paint thinner
  5. Clean cloths or rags
  6. Putty knife or plastic scraper
  7. Wood floor cleaning solution
  8. Vacuum cleaner
  9. Personal protective equipment (gloves, safety goggles, face mask)

Having all these materials on hand will ensure a professional-quality repair.

Preparing the Wood Floor for Scratch Repair

Preparing the Wood Floor for Scratch Repair

Proper surface preparation is essential for successful repair. Please follow these recommended steps:

  • Surface Cleaning: Begin by thoroughly cleaning the affected area. Please use an appropriate wood floor cleaner with a soft brush or mop to remove all dirt, debris, and residue that might interfere with the repair process.
  • Thorough Vacuuming: Once the area is clean, please use a vacuum cleaner to remove any remaining dust particles or debris. This step is crucial for ensuring proper adhesion during the repair.
  • Protecting Surrounding Areas: If you’re dealing with a significant scratch or gouge, consider protecting adjacent areas with painter’s tape or a drop cloth to prevent any accidental staining or spillage.
  • Adequate Lighting: Proper lighting is essential for accurately assessing and addressing the scratches. Please ensure sufficient lighting, whether natural or artificial, to properly illuminate the repair area.

Methods for Addressing Surface-Level Scratches

Minor scratches in wooden flooring can often be remedied with relatively simple techniques. Here are several effective methods for addressing superficial scratches:

  1. Natural Oils and Furniture Polish: For shallow scratches, consider using a walnut or quality furniture polish with a clean cloth. The natural oils in these products can help conceal minor imperfections by filling and blending them with the surrounding wood grain.
  2. Wood Stain Markers and Touch-up Tools: Wood markers and touch-up pens are excellent tools for concealing surface marks. Please select a shade that closely matches your flooring and apply following the wood grain pattern.
  3. Surface Refinishing: For more noticeable scratches, consider using fine-grit sandpaper (220 grit or higher) to gently smooth the affected area. Follow this with an appropriate wood stain or touch-up product matching your floor color. Complete the repair by applying a clear polyurethane coating for protection.

Please note: Exercise caution when treating surface scratches, as excessive pressure or aggressive treatment may cause additional damage to the wood surface.

Addressing Deep Scratches

Deep scratch repair requires more comprehensive treatment. Here are recommended methods for addressing significant damage:

  • Wood Filler Application: For deeper scratches or indentations, apply a color-matched wood filler or putty. Use a putty knife or appropriate applicator to ensure smooth, even application. Allow proper drying time according to manufacturer specifications.
  • Refinishing Process: Once the filler has cured, carefully sand the area with fine-grit sandpaper (220 grit or higher) to achieve a uniform surface. Apply matching wood stain or touch-up product, followed by a protective clear polyurethane coating.
  • Professional Restoration Options: For severe gouges or extensive scratches, consider wood inlay or board replacement. This involves removing the damaged section and installing a matching replacement piece. Due to the precision required, this method is best performed by experienced flooring professionals.

Please approach deep scratch repair with patience and attention to detail to achieve a seamless blend with the surrounding flooring.

Preventive Measures for Wood Floor Protection

While scratches on wooden floors are common, there are several effective preventive measures to minimize damage and extend floor longevity:
Protective Furniture Accessories: Please install felt pads or furniture glides beneath chairs, tables, and heavy furniture. These protective elements help prevent scratch formation during furniture movement.

  1. Pet Nail Maintenance: Regular pet nail trimming is essential for floor protection. Maintaining shorter nail length significantly reduces the likelihood of scratch marks.
  2. Strategic Rug and Mat Placement: Consider placing appropriate rugs or mats in high-traffic areas to protect wooden flooring from excessive wear and potential scratching.
  3. Footwear Guidelines: Please remove high-heeled shoes and athletic cleats before walking on wooden surfaces to prevent indentation and scratch damage.
  4. Appropriate Cleaning Practices: Use gentle cleaning methods and avoid harsh chemicals or abrasive cleaning tools that may compromise the floor’s protective finish.

Professional Services Consideration

For significant damage, professional assistance may be warranted. Professional wood floor refinishing services offer several advantages:

  • Expertise: Professional technicians possess comprehensive knowledge, skills, and experience to address complex floor repair challenges effectively.
  • Professional Equipment: Industry professionals use specialized equipment specifically for wood floor restoration, which can be instrumental when learning how to remove a scratch from a wood floor.
  • Service Guarantees: Reputable professionals often provide service warranties or guarantees, ensuring long-term satisfaction with the repair work.
  • Time and Convenience: Professional services offer time-efficient solutions while minimizing personal effort and potential complications.

While professional services may represent a higher initial investment, they often prove cost-effective for addressing significant damage and maintaining floor value.

Summary

Wood floor scratch repair requires careful attention to detail and appropriate techniques. The methods outlined above provide guidance for addressing various levels of damage while maintaining floor integrity. Preventive measures play a crucial role in minimizing future damage and preserving floor condition. Please consider implementing the suggested protective measures and consulting professional services when necessary.

How to Repair Water Damage on Laminate Flooring

How to Repair Water Damage on Laminate Flooring

Many homeowners are drawn to laminate flooring for its affordability, attractive appearance, and long-lasting nature. Unfortunately, even these durable floors can be damaged by water, whether from a malfunctioning appliance, an accidental spill, or unexpected flooding. When water makes its way into laminate boards, it can cause them to warp, buckle, or even fall apart, ruining both their look and function. If you’re wondering how to repair water damage on laminate flooring, there are some situations where you can restore water-damaged laminate to its former glory without having to replace the entire floor.

First Things First: How Bad is the Damage?

Before you roll up your sleeves and start fixing, it’s important to figure out just how extensive the water damage is. A small spill might not be too hard to handle, but when you’re thinking about how to repair water damage on laminate flooring, consider if the water has soaked deep into the planks. In more severe cases, it might be better to replace the full floor rather than attempting patchwork.

Professional floor refinishing services are essential when addressing water damage on hardwood or laminate floors. First, evaluate the extent of the damage. A little spill or some surface moisture isn’t too tricky to deal with. But if water has seeped deep into the cracks and soaked the insides of the planks, you might be facing a more significant challenge. In cases like this, you may need to consider replacing the full floor instead of trying to patch it up.

To get a good idea of the damage, take a close look at the affected area. Keep an eye out for any boards that look warped, twisted, or like they’re coming apart. If only a few planks or a small area are damaged, repairs might be possible. However, if the problem covers a large area or multiple rooms, it might be more cost-effective and practical to replace the entire floor.

Once you’ve assessed the damage, it’s crucial to find and address the source of the water problem. This could be anything from a faulty appliance to a leaky pipe or even a roof that’s letting water in. If you don’t tackle the root cause, you’ll likely keep experiencing water damage, which would make any repairs futile. It might be worth calling in a reputable plumber or builder to help identify and fix the source of the leak.

Getting Ready to Fix Things

Before starting, you need to get all the right tools. Having the correct equipment will make the process of how to repair water damage on laminate flooring easier and more effective.

Key Tools and Materials

  • Safety glasses and gloves
  • Putty knife or pry bar
  • Utility knife or oscillating multi-tool
  • Flooring adhesive or construction adhesive
  • Replacement laminate planks (matching the existing flooring)
  • Replacement underlayment material (if you need it)
  • Cleaning solvent or degreaser
  • Hammer or rubber mallet
  • Measuring tape
  • Pliers
  • Fans or dehumidifiers

When fixing laminate flooring damaged by water, you need replacement planks that look just like the existing ones. Use leftover planks from when you first installed the floor if you have them. If not, go to your local hardware store or get in touch with the manufacturer to get matching planks. Make sure the new planks come from the same batch or production run to keep color and texture differences small.

Taking Out the Damaged Planks

After you’ve got all the tools and materials you need, you should remove the laminate planks that got damaged.

  1. Finding the Planks That Got Affected
    Start by spotting the boards you need to take out. Sometimes just a couple of boards are in bad shape, but other times, you might have to replace a bigger area.
  2. Taking Out the Boards
    Grab a putty knife or pry bar to lift the damaged boards off the subfloor. Take your time and be careful not to hurt the boards around it or the subfloor. If some boards are stuck, you might need to use a utility knife or an oscillating multi-tool to cut through where they lock together.
  3. Checking the Subfloor
    After you take out the damaged planks, check the subfloor to see if water has damaged it or mold has grown on it. If the subfloor looks bad, you might need to fix or replace it before you move on to repairing the laminate flooring.

Getting the Subfloor Ready

To install the new planks, you need to make sure the subfloor is clean, dry, and flat.
Clean the subfloor with a solvent or degreaser to get rid of any leftover gunk or dirt. If the subfloor is damp or wet, use fans or dehumidifiers to dry it out. Moisture can make the new planks bend or bubble up, which would undo all your hard work to fix the floor.
If the subfloor isn’t level or has bumps, use a sander or floor leveler to make it smooth and even. This helps the new planks lie flat and blend in with the existing floor.

Installing the Replacement Planks

Now that you’ve prepared the subfloor, you can start to install the replacement laminate planks. Before you begin, let the new planks adjust to the room’s temperature and humidity. This takes one to two days and helps stop the planks from swelling or shrinking after you install them.
If your current flooring was put in using a floating method, you might need to put flooring adhesive or construction glue on the subfloor. Make sure to follow what the maker says about how to apply it and how long to let it dry.
Cut the new planks to the right size and shape with a utility knife or laminate cutter. Make sure the new planks fit tight against the old flooring, without any spaces or parts that stick out.
Most laminate floors have a way to lock the planks together. Do what the maker says to lock the new planks in place. You might need to use a rubber mallet or tapping block to do this.

Finishing Touches

Once you’ve put in the new planks, there are a few last things to do to make sure the fix looks good and lasts a long time.
Put clear silicone sealant or laminate seam sealer where the new planks meet the old floor. This helps stop water from getting in and causing problems later.
Put heavy stuff, like weights or books, on top of the fixed area for a day or two. This helps the new planks stick well to the floor underneath and stay flat.
After you’re done fixing, clean the area well and follow what the maker says about taking care of it. Cleaning often and cleaning up spills or leaks right away will help your fixed laminate floor last longer.

When to Think About Getting New Floors

You can sometimes fix water-damaged laminate floors, but in some cases, replacing them might be a better option. If water has ruined a significant portion of your floor, it may be cheaper and easier to install a new one rather than trying to figure out how to repair water damage on laminate flooring for large areas.

  • Big Problems: If water has ruined a lot of your floor or a big part of it, it might cost less and be easier to put in a whole new floor instead of trying to fix it.
  • Damage That Keeps Happening: If your floor constantly gets wet due to an ongoing issue, such as a persistent leak or excessive moisture, it’s wise to replace the flooring. Additionally, address the source of the problem to prevent further damage.
  • How It Looks: Sometimes even if the damage is local finding planks that match can be tough. When the fixed spot sticks out or ruins the room’s look, replacing the whole floor might work better.

Summary

Once you’ve put in the new planks, there are a few last things to do to make sure the fix looks good and lasts a long time. Put clear silicone sealant or laminate seam sealer where the new planks meet the old floor. This helps stop water from getting in and causing problems later. After the repairs, it’s a good idea to schedule professional refinishing and sanding services. This will ensure a uniform appearance and long-lasting durability, making your floors look as good as new.

Put heavy stuff, like weights or books, on top of the fixed area for a day or two. This helps the new planks stick well to the floor underneath and stay flat. After you’re done fixing, clean the area well and follow what the maker says about taking care of it. Cleaning often and cleaning up spills or leaks right away will help your fixed laminate floor last longer.