Can Hand Scraped Hardwood Floors Be Refinished?

Can Hand Scraped Hardwood Floors Be Refinished

Hand scraped hardwood floors are a popular choice for homeowners who appreciate a rustic and antique aesthetic. These floors are crafted to have a unique, distressed appearance that exudes warmth and character. The hand scraping process involves artisans manually distressing each plank to create texture and variation. This technique not only enhances the wood’s natural beauty but also adds a timeless charm to any space.

The Refinishing Process for Hardwood Floors

Refinishing hardwood floors is a meticulous process that involves sanding down the surface to remove the existing finish and any imperfections. This is followed by applying new stain and a protective layer of polyurethane or another finish. The goal is to restore the floor’s original luster and extend its life by many years.

The refinishing process typically involves several steps:

  • Preparation: Clearing the room of furniture and other items, cleaning the floor thoroughly, and making any necessary repairs.
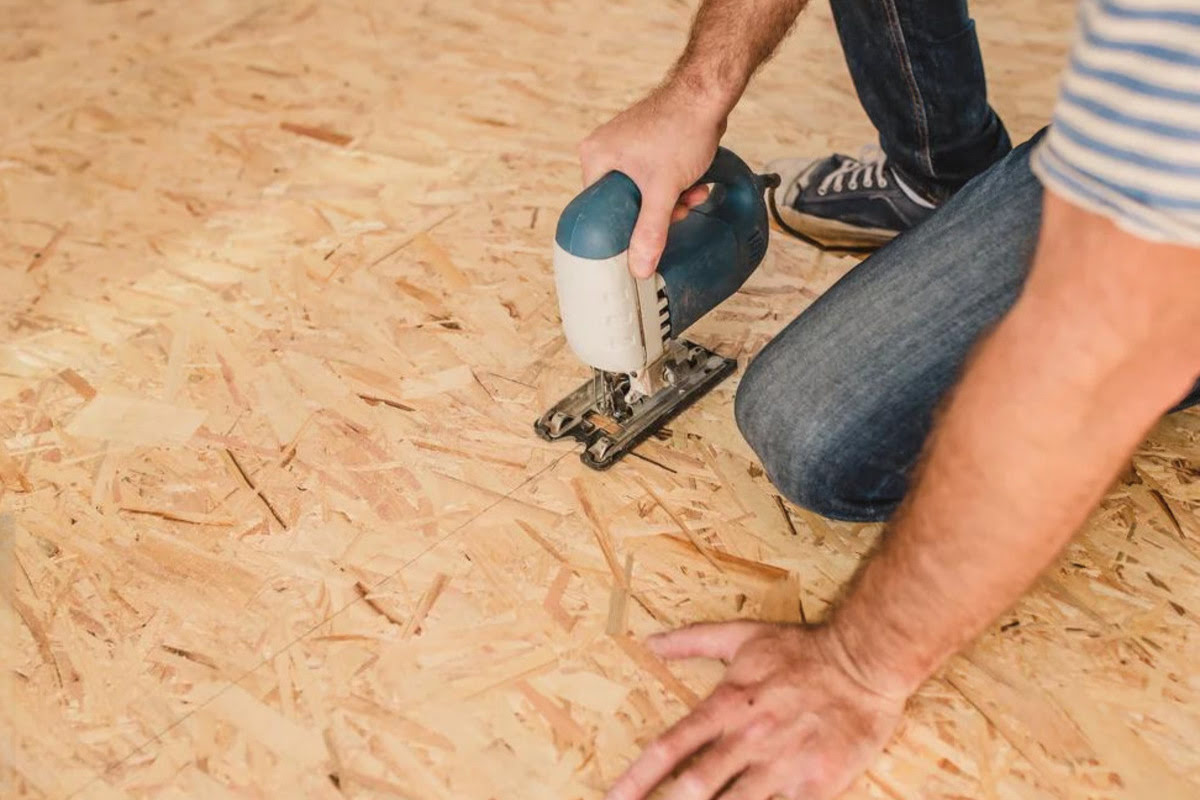
  • Sanding: Using a drum sander to remove the old finish and smooth out the surface.
  • Staining: Applying a new stain if desired, to alter or enhance the floor’s color.
  • Finishing: Applying a protective sealant to guard against future wear and tear.

Each step requires careful attention to detail to ensure the best results. Refinishing can breathe new life into old, worn-out floors, making them look brand new. However, the process can vary depending on the type of flooring, which brings us back to the question at hand: can hand scraped hardwood floors be refinished?

Can Hand Scraped Hardwood Floors Be Refinished?

The short answer is yes; hand scraped hardwood floors can indeed be refinished. However, the process is more complex than refinishing smooth hardwood floors. The unique texture of hand scraped floors demands a careful approach to preserve its character while restoring its finish.

Refinishing hand scraped hardwood floors requires expertise. The texture, which is a significant part of its appeal, can be compromised if not handled correctly. Traditional sanding methods can remove too much of the surface texture, diminishing the floor’s distinct look. Therefore, it’s essential to employ techniques that maintain the depth and variation of the scraping while ensuring a fresh, clean finish.

Because of this complexity, it’s advisable to seek professional help when refinishing hand scraped floors. Experienced artisans can carefully sand and refinish the floors, ensuring the original character is preserved. With professional care, your floors can maintain their charm for many more years, serving as a beautiful foundation for your home.

Factors to Consider Before Refinishing

Before deciding to refinish your hand scraped hardwood floors, there are several factors you should consider. These factors will help determine whether refinishing is the best option for your situation and how to proceed if it is.

  1. Condition of the Floors: Assess the current state of your floors. If they have deep scratches, water damage, or significant wear, refinishing might be necessary. However, minor imperfections might not justify a full refinishing process.
  2. Thickness of the Wood: The thickness of your hardwood affects how many times it can be sanded and refinished. If the floors have been refinished multiple times before, they may not withstand another round of sanding.
  3. Budget and Timing: Refinishing floors is an investment of both time and money. Consider whether the cost fits within your budget and if you can accommodate the time needed for the process, which can take several days.

Taking these factors into account will help you make an informed decision about whether refinishing is the right choice for your hand scraped hardwood floors.

Refinishing Process for Hand Scraped Hardwood Floors

Advantages of Refinishing Hand Scraped Hardwood Floors

Refinishing your hand scraped hardwood floors offers several benefits that can enhance both the aesthetic appeal and functionality of your living space. Understanding these advantages can help you appreciate the value of undertaking this project.

  1. Enhanced Appearance: Refinishing revitalizes tired floors, giving them a fresh, new look. The process can restore the original beauty of the wood, making it vibrant and lustrous once again.
  2. Increased Longevity: By applying a new protective finish, refinishing can extend the life of your floors. This protective layer guards against future wear and tear, ensuring that your floors remain attractive and durable for years to come.
  3. Cost-Effective Solution: Compared to replacing the entire floor, refinishing is a more economical option. It allows you to enjoy the benefits of a new-looking floor without the expense and hassle of a full replacement.

These advantages highlight the practical and aesthetic benefits of refinishing, offering a compelling case for considering this option for your hand scraped hardwood floors.

Common Challenges in Refinishing

While refinishing offers numerous benefits, it also presents certain challenges, particularly when dealing with hand scraped hardwood floors. Being aware of these challenges can help you prepare adequately and avoid potential pitfalls.

  1. Preserving Texture: Maintaining the hand scraped texture is one of the biggest challenges. Standard sanding techniques can inadvertently smooth out the distinctive patterns, so a careful approach is necessary to preserve the floor’s unique character.
  2. Matching Finishes: Achieving a consistent finish that matches the original can be tricky. This is particularly true if the floor has aged or if you want to alter the color slightly. Expert guidance may be required to ensure seamless results.
  3. Time and Effort: Refinishing is a labor-intensive process that demands precision and patience. It involves multiple steps, including preparation, sanding, staining, and sealing, which can be time-consuming and require specialized skills.

By recognizing these challenges, you can better prepare for the refinishing process, ensuring that your project runs smoothly and delivers the desired results.

How to Prepare for Refinishing

If you decide to proceed with refinishing your hand scraped hardwood floors, proper preparation is crucial. Preparing your space and understanding what to expect can make the process smoother and more efficient.

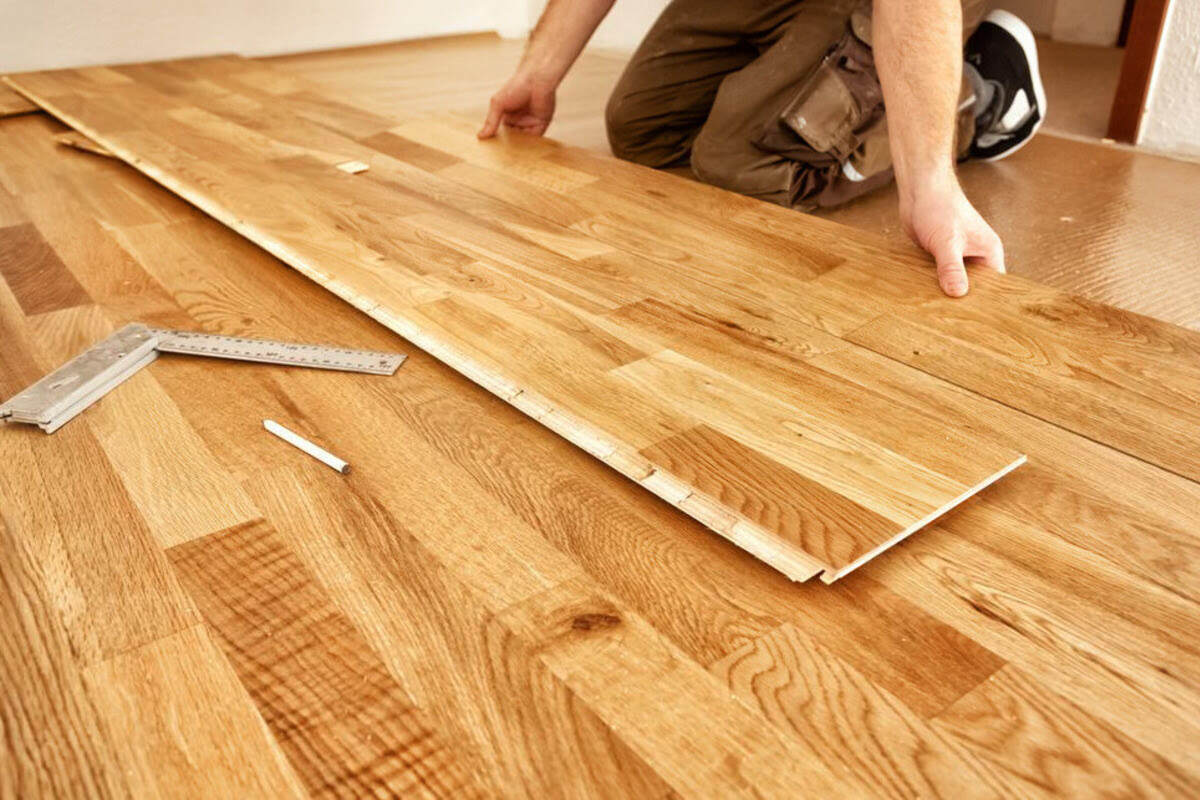
  • Clear the Space: Remove all furniture, rugs, and decor items from the room. This will protect your belongings and provide the necessary space for the refinishing process.
  • Clean the Floors: Thoroughly clean the floors to remove dust, dirt, and debris. This ensures that the refinishing process starts on a clean surface, which is essential for achieving a smooth finish.
  • Coordinate with Professionals: If hiring professionals, communicate your expectations clearly. Discuss the desired finish, any specific concerns you have about preserving the floor’s texture, and the timeline for the project.

Finally, be prepared for some disruption during the refinishing process. The room will be unusable for several days, and the smell of the stain and finish may linger. Planning ahead can help minimize inconvenience and ensure a successful refinishing of your hand scraped hardwood floors.

Choosing the Right Finish for Hand Scraped Floors

Selecting the appropriate finish for your hand scraped hardwood floors is a critical step in the refinishing process. The finish not only enhances the floor’s appearance but also provides essential protection against wear and tear. There are several types of finishes to consider, each offering different benefits and aesthetic qualities.

  1. Oil-Based Finishes: These finishes are known for their deep, rich hues and durability. They penetrate the wood, providing a long-lasting protective layer. However, they can take longer to dry and may emit strong odors during application.
  2. Water-Based Finishes: Offering a clear, natural look, water-based finishes dry quickly and have a lower odor compared to oil-based options. They are ideal for those who prefer a less invasive refinishing process and a more environmentally friendly option.
  3. Polyurethane Finishes: Available in both oil and water-based varieties, polyurethane finishes offer excellent durability and resistance to scratches and stains. They are a popular choice for high-traffic areas due to their robust protective qualities.

When choosing a finish, consider the level of gloss you desire—options range from matte to high-gloss—and how the finish aligns with your lifestyle and aesthetic preferences. Consulting with a professional can help you make an informed decision that enhances both the appearance and longevity of your hand scraped hardwood floors.

How To Sand Hardwood Floors

Professional vs. DIY Refinishing: What You Need to Know

Deciding between professional and DIY refinishing is a crucial consideration. Both options have their merits, but understanding the pros and cons of each can help you make an informed choice.

  • Professional Refinishing: Hiring professionals ensures expertise and precision, particularly important for preserving the hand scraped texture. Professionals have access to specialized tools and materials, and they can achieve consistent and high-quality results. However, professional services can be costly, so it’s important to weigh this against the potential benefits.
  • DIY Refinishing: Opting for a DIY approach can be more cost-effective and rewarding. It allows you to have hands-on involvement in the project, and you can work at your own pace. However, DIY refinishing requires a good understanding of the process and the right tools. Mistakes can be costly, possibly leading to unsatisfactory results.

Ultimately, the choice between professional and DIY refinishing depends on your budget, skills, and comfort level with the refinishing process. Consider these factors carefully to ensure the best outcome for your floors.

Is Refinishing Worth It?

Refinishing hand scraped hardwood floors can be a worthwhile endeavor, offering numerous benefits, from enhancing appearance to increasing durability. While the process is more complex than refinishing traditional hardwood floors, the results can be equally rewarding. If you’re ready to revitalize your hand scraped hardwood floors and restore their original beauty, consider taking the next step. Consult with flooring professionals or gather the necessary tools and materials for a DIY project.

Easy Tips on How to Level Subfloor for Wood Flooring

How to Level Subfloor for Wood Flooring

A level subfloor is the foundation of any successful wood flooring project. When your subfloor is uneven, it can lead to a host of problems such as creaking sounds, gaps, and even damage to your beautiful wood floors over time. Ensuring that the subfloor is level is crucial in maintaining the durability and aesthetic appeal of your flooring. A well-leveled subfloor not only supports the flooring but also enhances the comfort and safety of your living space.

Common Issues with Uneven Subfloors

Several issues arise from not having a level subfloor, each impacting the performance and appearance of your wood flooring. The most noticeable problem is the presence of gaps between floorboards. These gaps not only detract from the visual appeal but can also pose a tripping hazard, especially in high-traffic areas. Addressing these gaps after installation can be costly and time-consuming.

Another common issue is the development of squeaky floors. As the wood planks rub against an uneven subfloor, they can create noise, which can be both annoying and indicative of potential structural issues. This squeakiness often results from movement due to inadequate support, which can be exacerbated by foot traffic over time.

Furthermore, an uneven subfloor can lead to the warping or cupping of wood planks. Moisture can accumulate in the low spots, causing the wood to expand and warp. Over time, this will damage the flooring, requiring repairs or even replacement. Ensuring your subfloor is level can prevent these moisture-related issues, maintaining the quality and appearance of your wood flooring.

Tools and Materials Needed for Leveling a Subfloor

Successfully leveling a subfloor requires the right tools and materials. Here is a list of essentials you will need to get started:

  • Leveling compound: This self-leveling material is essential for filling in low spots on the subfloor.
  • Trowel: A trowel is used to spread and smooth the leveling compound.
  • Sander or grinder: Essential for smoothing out high spots on the subfloor.
  • Screws and screw gun: Used to secure loose subfloor panels.
  • Measuring tape: For ensuring accuracy in measurements.
  • Level: A long level helps to check the evenness of the subfloor.
  • Chalk line: Useful for marking areas that need leveling.
  • Safety gear: Gloves, goggles, and a dust mask to protect yourself during the process.

Having these tools and materials on hand before you begin will make the leveling process more efficient and effective. Each tool plays a vital role in ensuring that the subfloor is uniformly level, providing a reliable foundation for your wood flooring.

Preparing your workspace is equally important. Ensure that the area is clean and free of debris before starting. This will not only make the job easier but also prevent any potential contamination of the leveling compound. With proper preparation and the right tools, you are well on your way to achieving a perfectly level subfloor.
Tools and Materials Needed for Leveling a Subfloor

Step-by-Step Guide on How to Level a Subfloor for Wood Flooring

Leveling a subfloor may seem daunting, but with the right approach, it can be a manageable DIY project. Here’s a step-by-step guide to help you through the process:

  1. Assess the Condition of Your Subfloor
    Start by inspecting your subfloor for any signs of damage, such as rot, mold, or warping. Use a long level or a straightedge to check for uneven spots. Mark these areas for further attention.
  2. Prepare the Subfloor
    Remove any debris, nails, or staples that may be present. Clean the surface thoroughly to ensure a solid bond between the subfloor and the leveling compound. This preparation is crucial for achieving a smooth, even surface.
  3. Choose the Right Leveling Compound
    Depending on the material of your subfloor (plywood, concrete, etc.), select the appropriate leveling compound. Cement-based compounds are commonly used for concrete subfloors, while self-leveling compounds are ideal for plywood.
  4. Apply the Leveling Compound
    Mix the leveling compound according to the manufacturer’s instructions. Pour it onto the subfloor, starting at the lowest point. Use a trowel to spread it evenly, ensuring all low spots are filled.
  5. Let the Compound Cure
    Allow the leveling compound to dry completely, which typically takes 24 to 48 hours. Follow the manufacturer’s guidelines for curing time to ensure the compound sets properly.
  6. Final Inspection
    Once the compound has cured, inspect the subfloor again. Use a level to check for any remaining uneven areas and sand down any high spots.

Taking the time to follow these steps will ensure a stable and smooth foundation for your wood flooring, enhancing its performance and appearance.

Techniques for Leveling Different Types of Subfloors

Different subfloor materials may require distinct approaches for leveling. Here’s how to handle various types:

  • Wooden Subfloors
    Wooden subfloors are common and can be leveled using the steps outlined above. However, in cases where there is significant damage, such as rot or extensive warping, it may be necessary to replace sections of the wood. Always ensure that the wood is dry and free from pests before applying any leveling compound.
  • Concrete Subfloors
    Concrete subfloors might have cracks or pits that need filling before leveling. Use a concrete patching compound to address these issues. Once these areas are repaired, you can proceed with applying a self-leveling compound specifically designed for concrete surfaces. Be sure to follow the manufacturer’s instructions for best results.
  • Plywood Subfloors
    Plywood subfloors can be treated similarly to wooden subfloors. However, pay special attention to the joints between plywood sheets. Ensure they are securely fastened and smooth to prevent any movement that could affect the level. Consider using a thin layer of underlayment before applying the leveling compound for added stability.

When you understand the unique requirements of each subfloor type, you ensure effective leveling and provide your wood flooring with a stable and secure base.

Cost Considerations for Leveling a Subfloor

To understand the costs associated with leveling a subfloor is essential for effective budgeting. Several factors influence the overall expense of this process.

Materials and Tools

The cost of materials and tools can vary significantly. Expect to invest in:

  • Leveling Compounds: Prices range from $15 to $40 per bag, depending on the type and brand.
  • Tools: You may need a concrete grinder, belt sander, or trowel, which can cost anywhere from $20 to $200.

Labor Costs

  • If you choose to hire a professional, labor costs will be a significant part of your budget. On average, professionals charge between $1.50 and $3.00 per square foot to level a subfloor. This cost can fluctuate based on your location and the complexity of the project.

Additional Expenses

Consider potential additional expenses, such as:

  • Repair Costs: Fixing damage like rot or mold can add to the overall expense.
  • Underlayment: If additional underlayment is required, this will increase costs.

When you understand these cost factors, you can plan effectively and keep your subfloor leveling project within budget.

When to Seek Professional Help for Subfloor Leveling

While DIY projects can be rewarding, there are times when professional help is advisable. If you encounter extensive damage, such as widespread rot or structural issues, it’s best to consult a professional. They have the expertise to assess and address problems that may be beyond the scope of a DIY project.

Additionally, if you’re dealing with a large area or complex leveling tasks, professional assistance can save time and ensure accuracy. They have access to specialized tools and materials that can make the job quicker and more precise. Investing in professional help can be cost-effective in the long run, as it reduces the risk of errors that could lead to costly repairs.

Finally, if you’re unsure about any step in the leveling process, don’t hesitate to seek professional guidance. Their experience can provide peace of mind, ensuring that your project is completed to the highest standards.

When to Seek Professional Help for Subfloor Leveling

Preventative Measures to Avoid Future Subfloor Issues

Preventing future subfloor issues is just as crucial as addressing existing ones. By being proactive, you can maintain the integrity of your flooring and reduce the likelihood of costly repairs.

  • Regular Inspections:
    Conduct routine inspections of your flooring to catch any early signs of subfloor issues. Look for signs of moisture, gaps, or movement. Addressing these problems early can prevent them from becoming more serious.
  • Moisture Control:
    Moisture is a common culprit behind subfloor problems. Use moisture barriers under your flooring to prevent water infiltration. Ensure your home is well-ventilated, and consider using a dehumidifier in particularly damp areas.
  • Quality Installation:
    Invest in quality installation services to ensure the subfloor and flooring are installed correctly. A professional installer can identify potential issues and address them before they become significant problems.

Take these preventative measures to extend the life of your wood flooring and keep its beauty and functionality.

Summary

Achieving a level subfloor is a critical step in ensuring a successful wood flooring installation. By understanding the importance of a level subfloor, addressing common issues, and following a step-by-step leveling process, you set the stage for a beautiful and durable floor. Whether tackling the project yourself or seeking professional help, the key is preparation and attention to detail. Remember, a level subfloor not only enhances the appearance and longevity of your wood flooring but also contributes to the comfort and efficiency of your home. By investing time and resources into creating a perfect foundation, you can enjoy the beauty and functionality of your wood floors for many years.

Top Design Ideas for Engineered Hardwood Flooring for Basement

engineered hardwood flooring for basement​

Engineered hardwood flooring for basement is a popular choice for homeowners seeking elegance and durability. Unlike traditional hardwood, engineered hardwood consists of multiple layers. The top layer is a veneer of real wood, while the underlying layers are typically made of plywood or high-density fiberboard. This construction provides enhanced stability and resistance to moisture, making it ideal for environments prone to humidity and temperature fluctuations, such as basements.

Why Choose Engineered Hardwood Flooring for Your Basement?

Engineered hardwood flooring is an excellent choice for basements thanks to its construction, which makes it more resistant to moisture and temperature fluctuations than solid hardwood. It is composed of multiple layers of wood, with the top layer being a hardwood veneer. This layered structure provides enhanced stability, making it suitable for environments like basements where humidity and temperature can vary.

One of the primary advantages of engineered hardwood flooring is its aesthetic versatility. It offers the rich and classic look of hardwood, which can elevate the style of any basement. Whether you prefer a rustic, traditional, or modern design, there is an engineered hardwood option to match your taste. Moreover, this type of flooring comes in a variety of finishes, colors, and plank sizes, providing endless possibilities for customization.

In addition to aesthetic and structural benefits, engineered hardwood flooring is relatively easy to install. It can be installed over concrete and other types of subfloors, often without the need for additional underlayment. This ease of installation can help reduce labor costs and make the process more manageable for DIY enthusiasts. Overall, engineered hardwood flooring combines beauty, durability, and practicality, making it an ideal choice for basement renovations.

Current Trends in Engineered Hardwood Flooring for Basements

The world of engineered hardwood flooring is constantly evolving, with several exciting trends emerging in recent years. These trends not only enhance the aesthetic appeal of your basement but also improve functionality and sustainability.

  • Wide Planks and Long Boards: Wider and longer planks are gaining popularity as they create a more open and seamless look. This trend is particularly appealing in basements where space might be limited, as it can make the area appear larger.
  • Matte and Low-Gloss Finishes: Glossy floors are becoming less common, with matte and low-gloss finishes taking center stage. These finishes offer a more natural and understated look, which is perfect for a cozy basement atmosphere.
  • Eco-Friendly Options: With growing awareness of environmental issues, many homeowners are opting for eco-friendly engineered hardwood. Floors made from sustainably harvested wood and low-VOC finishes are not only better for the planet but also healthier for your indoor air quality.

Cost considerations are essential when choosing your flooring. Here’s a quick overview of expected costs per square foot:

Type of Finish Estimated Cost (USD)
Wide Planks $5 – $10
Matte Finishes $4 – $9
Eco-Friendly Options $6 – $12

Design Ideas for Engineered Hardwood Flooring in Basements

When considering design ideas for engineered hardwood flooring in basements, it’s essential to think about the overall theme and functionality of the space.

Design Ideas for Engineered Hardwood Flooring in Basements

Here are some inspiring ideas to consider:

  1. Rustic Charm: Opt for wide planks with a distressed finish to create a cozy, rustic atmosphere. Pair these floors with warm, earthy colors and vintage decor to enhance the inviting feel.
  2. Modern Elegance: Choose sleek, dark-toned engineered hardwood with a glossy finish for a contemporary and sophisticated look. Complement this style with minimalist furniture and metallic accents.
  3. Coastal Retreat: Light-colored engineered hardwood can evoke a beachy vibe, especially when paired with soft blues and whites. This design is perfect for creating a relaxing basement getaway.

Incorporating creative patterns and layouts can also enhance the visual interest of your basement flooring. Consider herringbone or chevron patterns for an eye-catching design. Additionally, mixing and matching different plank widths or colors can add a unique touch to your flooring project.

Remember to consider the functionality of the space when selecting your flooring design. For example, if your basement serves as a playroom or entertainment area, you may want to choose a more durable finish that can withstand heavy foot traffic and activity. Ultimately, the right design will balance aesthetics with practicality, creating a basement space that is both beautiful and functional.

Installation Considerations for Engineered Hardwood Flooring

Before installing engineered hardwood flooring in your basement, there are several key considerations to ensure a successful installation. First and foremost, assess the moisture levels in your basement. Although engineered hardwood is more moisture-resistant than solid hardwood, excessive humidity can still pose a risk. It’s crucial to have a moisture barrier in place, such as a vapor barrier underlayment, to protect your investment.

Next, consider the subfloor preparation. A smooth, level surface is essential for a proper installation. Any unevenness or imperfections in the subfloor can lead to issues with the flooring later on. Depending on the condition of your existing subfloor, you may need to make repairs or adjustments to ensure it meets the necessary standards for hardwood installation.

Finally, when it comes to the installation method, you have several options: floating, glue-down, or nail-down. Each method has its pros and cons, and the best choice depends on your specific circumstances, including the type of subfloor and personal preferences. Consulting with a flooring professional can provide valuable insights and help you make an informed decision that aligns with your needs and budget.

Costs of Engineered Hardwood Flooring for Basements

Understanding the cost implications is crucial when planning to install engineered hardwood flooring in your basement. The costs can vary based on several factors, including the quality of the materials, the size of the area, and the complexity of the installation process.

Cost Breakdown:

  • Materials: Engineered hardwood flooring typically ranges from $3 to $14 per square foot, depending on the wood species, thickness, and finish.
  • Installation: Professional installation costs can range from $3 to $10 per square foot. This cost covers the labor involved in preparing the subfloor, laying the flooring, and any additional treatments such as sealing.
  • Additional Expenses: Consider the cost of underlayment, moisture barriers, and any necessary subfloor repairs, which can add $1 to $3 per square foot.

Common Myths About Engineered Hardwood Flooring

Despite its many advantages, some myths about engineered hardwood flooring persist, causing hesitation among homeowners. Let’s debunk these common misconceptions.

  1. “Engineered Wood is Not Real Wood”: This myth stems from the belief that engineered wood lacks authenticity. In reality, the top layer is genuine wood, providing the same natural beauty as solid hardwood.
  2. “It Can’t Be Refinished”: While it’s true that engineered wood can’t be sanded and refinished as many times as solid wood, it can still be refinished once or twice, depending on the thickness of the veneer. This feature prolongs its lifespan and keeps it looking fresh.
  3. “It’s Not Durable”: Engineered wood is crafted to withstand various conditions, making it a robust choice for basements. Its layered construction enhances stability, preventing the warping that can plague solid wood in humid environments.

Summary

Engineered hardwood flooring for basements is a practical and stylish choice that offers durability, versatility, and a wide range of design options. When you understand current trends, explore creative design ideas, and debunk common myths, you can make an informed decision that enhances your home’s value and aesthetic appeal. If you’re ready to transform your basement into a beautiful and functional space, consider installing engineered hardwood flooring. For expert advice and installation services, contact us today to get started on your renovation journey. Let’s bring your vision to life with the perfect flooring solution!

Hardwood Floor Acclimation Tips for a Flawless Installation

Hardwood Floor Acclimation

When it comes to installing hardwood flooring, acclimation is a critical step that cannot be overlooked. Hardwood floor acclimation is essential because wood is hygroscopic, meaning it absorbs moisture from the air. If the wood is installed without being acclimated, it may expand or contract excessively, resulting in gaps, warping, or buckling. This can lead to costly repairs and an unsightly appearance, undermining the aesthetic and functional benefits of your investment.

Why Acclimation is Essential for Hardwood Flooring

The importance of hardwood floor acclimation cannot be overstated. The primary reason for acclimation is to prevent moisture-related issues that can compromise the integrity of your flooring. Wood expands when it absorbs moisture and contracts when it loses moisture. Without proper acclimation, these natural changes can lead to significant problems. Proper moisture management in wood floors helps protect your flooring and prevents long-term damage.

Acclimation helps in achieving dimensional stability. When hardwood flooring is given sufficient time to adapt to the home’s environment, it minimizes the likelihood of expansion or contraction after installation. This stability is crucial for maintaining tight joints and preventing gaps or uneven surfaces.

Moreover, acclimation can aid in extending the lifespan of your hardwood floors. Properly acclimated flooring is less likely to suffer from stress and damage over time, preserving its beauty and functionality. Take the time to acclimate your hardwood flooring and invest in its longevity. This ensures it remains a stunning feature of your home for many years to come.

The Acclimation Process: Step-by-Step Guide

Acclimating hardwood flooring is a straightforward process, but it requires careful attention to detail. Follow these steps to ensure a successful acclimation period:

  1. Prepare the Installation Area:
    Ensure the installation area is clean, dry, and has a stable temperature and humidity level.
    Use a hygrometer to monitor the room’s relative humidity, aiming for a range between 30% and 50%.
  2. Unpack and Arrange the Flooring:
    Unpack the hardwood planks from their boxes and lay them flat in the room where they will be installed.
    Space the planks evenly, allowing airflow around each piece. This helps the wood adjust uniformly.
  3. Monitor the Conditions:
    Regularly check the temperature and humidity levels in the room.
    Adjust the HVAC system if necessary to maintain consistent conditions during the acclimation period.
  4. Timing the Acclimation:
    Allow the hardwood to acclimate for at least 5–7 days, though some species may require up to two weeks.
    Confirm that the moisture content of the wood matches the subfloor’s moisture content before proceeding with installation.

Follow these steps to ensure your hardwood flooring is well-prepared for installation and reduce the risk of future problems.
Hardwood Floor Acclimation

How To Work With The Moisture Meter?

Using a moisture meter is an essential part of the hardwood floor acclimation process. A moisture meter measures the moisture content of the wood and helps determine when the wood has reached EMC with the installation environment. There are two main types of moisture meters: pin-type and pinless. Pin-type meters use two metal pins that are inserted into the wood to measure moisture, while pinless meters use electromagnetic waves to provide a reading.

To use a moisture meter, start by ensuring the device is calibrated according to the manufacturer’s instructions. This step is crucial for accurate readings. Next, take multiple measurements across different boards and areas of the wood. This method ensures that you get an accurate overall picture of the wood’s moisture content, as variations can occur between boards.

After taking measurements, compare the moisture content of the wood with the desired EMC for your specific environment. This information can usually be found in the manufacturer’s guidelines or by consulting with a flooring professional. Once the wood reaches the appropriate EMC, it is ready for installation. Using a moisture meter not only ensures proper acclimation but also helps prevent future flooring issues.

Factors Affecting Hardwood Floor Acclimation

Several factors can influence the acclimation process, and being aware of these can help you make informed decisions. The type of hardwood species plays a significant role, as denser woods may require longer acclimation periods compared to lighter species. Understanding the characteristics of your chosen wood can aid in determining the appropriate acclimation time.

Environmental conditions are another crucial factor. The climate of your region, as well as the season during which you install the flooring, can impact the acclimation process. For instance, areas with high humidity may necessitate longer acclimation times to ensure the wood doesn’t absorb too much moisture.

Finally, the condition of your subfloor is essential. A subfloor that retains moisture can affect the acclimation process, potentially leading to issues with the installed flooring. It’s vital to assess and, if necessary, address the moisture levels of the subfloor before beginning the acclimation process. By considering these factors, you can tailor the acclimation process to suit the specific needs of your project.

Common Acclimation Mistakes to Avoid

Despite its importance, mistakes during the acclimation process are common. Being aware of these pitfalls can help you avoid them, ensuring a smooth installation process. One prevalent mistake is failing to unpack the hardwood flooring. Leaving the wood in its packaging prevents it from acclimating properly, as airflow is restricted.

Another error is not allowing enough time for acclimation. Rushing the process can lead to uneven moisture content across the planks, increasing the risk of expansion or contraction issues. Always adhere to the recommended acclimation period for your specific hardwood species and environmental conditions.

Finally, neglecting to monitor the environmental conditions during acclimation is a serious oversight. Fluctuations in temperature and humidity can affect the wood’s ability to acclimate properly. Utilize tools like hygrometers to keep track of these conditions, making adjustments as needed to maintain a stable environment. Avoid these common mistakes to set the stage for a successful hardwood floor installation.

How Long Should Hardwood Floors Acclimate?

The duration of the acclimation process depends on several factors, including the type of hardwood and the environment in which it will be installed. Generally, a minimum acclimation period of 5–7 days is recommended. However, some species, particularly exotic woods, may require up to two weeks to acclimate fully.

The goal is to ensure that the moisture content of the hardwood is in equilibrium with the subfloor and the room’s environment. This balance is crucial for preventing potential problems like warping or gaps. You should measure the moisture content of both the hardwood and the subfloor using a moisture meter to determine when equilibrium is achieved.

It’s important to remain patient and not rush the acclimation process. While it may be tempting to expedite the timeline to complete the project, allowing sufficient time for acclimation is a worthwhile investment. Properly acclimated hardwood flooring is more likely to provide years of beauty and functionality, making it well worth the initial wait.

How Long Should Hardwood Floors Acclimate

Signs Your Hardwood Floors Are Ready for Installation

Determining when your hardwood floors are ready for installation involves assessing several key indicators. First, measure the moisture content of the wood using a reliable moisture meter. The wood is ready for installation when its moisture content is within 2-4% of the subfloor’s moisture content.

Another sign is the stability of the room’s environmental conditions. You should ensure that the temperature and humidity levels have remained consistent throughout the acclimation period. Fluctuations in these conditions could mean that the wood has not acclimated properly, and additional time may be required.

Finally, inspect the wood for visual signs of acclimation. The planks should lie flat without any warping or bowing. Any noticeable changes in the wood’s shape or size might indicate that further acclimation is necessary. By confirming these signs, you can proceed with the installation process with confidence, knowing that your hardwood flooring is well-prepared.

Summary

Acclimating hardwood flooring is a crucial step in the installation process that ensures the longevity and beauty of your floors. While proper acclimation protects against warping and gaps, keeping your floors stunning for years also requires regular care. Professional services like hardwood floor refinishing, sanding, and polishing restore shine, repair surface wear, and extend the life of your investment. Whether you’re installing new floors or maintaining existing ones, our expert team ensures flawless results and lasting beauty, so you can enjoy your hardwood floors with complete peace of mind.